By: Ann Harman
This article originally appeared in the Autumn 2019 issue of BEEKeeping Your First Three Years
The bee calendar on the wall will be turning to the months of late Autumn, then early Winter. Queens, whether living in hives in the northern states or the much warmer South, are going to take their Winter “vacation” for a well-deserved rest. However, you are not finished with your bee year yet. Your next projects are important one so do not plan on putting them off.
Now is the time to review your beekeeping records! So, scramble around for those scraps of papers you scribbled something on. Dump your bee bucket out on the floor – find any scraps? We’ll come back to the bucket later. Check all the pockets of your bee clothing. Now that you have done that, why not go ahead and toss it in the washing machine.
As bees get caught in clothing they can sting it and leave behind drops of venom. This will dry between wearings and will be invisible. However, it can become a source of venom allergy as the dried venom gets dispersed in the air and inhaled, not only by you but also others in the household. Beekeeper gloves can also carry dried venom. So, they need a good wash also. Disposable gloves can be discarded now. There’s the start of a shopping list for the upcoming bee year! Start it now! You’ll be adding to it soon.
While you are washing your bee clothing give your veil a wash, according to instructions for your type of veil. This is especially important if you are in African bee areas where the bees will bounce off your veil while ejecting venom. That will dry on the veil and become a source of venom dust. For African bee work it might be good to wash off your veil from time to time during bee season.
Scraps of paper, notebooks, information put on cell phone, put into computer all need to be reviewed. You are looking to complete a story of each hive during the year. It is going to cover what the bees did, what you did, when you did something and what happened. Did you need help from your mentor? Was there any problem? Was it resolved? As you are doing this review you will find ways to improve your record keeping.
You may have taken some photos with your cell phone of frames – doing something. Or perhaps it was supposed to be a photo of a nice queen. It actually turned out to be a photo of blurry bees doing something. Review your snapshots to see if there are ones that convey some information and help to complete your records. Go ahead and keep the useful ones provided you know why you are keeping them.
Did you set up your own record keeping program on your computer? Many beginning beekeepers decide this system will make more sense to them than using a paper notebook whose pages stick together with honey and propolis. However information does have to be transferred immediately or some vital bit may be forgotten.
A little over ten years ago two beekeepers realized both that hive records are important to good beekeeping but “home grown” formats on computers may not be the best approach to keeping records. That was when HiveTracks was designed. Over the years the formats were refined so that today the small-scale beekeepers now have available the HiveTracks Hobbyist Platform, designed for those beginning beekeepers and others with a small number of hives.
To find an excellent description of this new software platform please visit the April 2019 issue of Bee Culture, pages 35-41. There you will discover diagrams and explanations of the information you can obtain from each of your colonies as they go through their bee year. Just think – you won’t have to depend on scraps of paper, sticky notebooks, and your memory. Your bees will be better the coming bee year.
Now that the important record keeping has been reviewed and chosen, go back to that bee bucket that you dumped on the floor. A quick look at the hive tools shows that they will have to be cleaned up. Wax, propolis and gunk needs to be scraped off. If the weather is cold you can put them outside to get cold, making it easier to snap off lumps. Do whatever you can to make the hive tools really clean so there is no chance of transferring disease. As you are inspecting hives next season you can always give them a quick trip in a lit smoker to melt off debris. With the bucket contents all over the floor now you can see that hive tool that you won as a door prize. You tried it once but it doesn’t fit your hand. Take it to the next bee club meeting. Someone there might really like it. As you replace all your things back into the bucket it gives you a chance to add to your shopping list. Also you may be reminded about some gadget you thought might be useful, such as a frame holder. It’s a simple gadget but can be most valuable in keeping frames full of bees – and possibly the queen – from falling over on the ground leaving bees wandering around in grass or sand. If you don’t have one, put it on a bee equipment shopping list. Check the roll of duct tape, smoker lighter and other bits and pieces you find useful.
Now that the bee bucket is done pick up your smoker. Cleaning this up is best done outside. Empty out any accumulated ashes under the inner grid. Creosote can gum up the closing rims. Cleaning those up will really help. Check the bellows for any damage or holes. Once you are sure all is well, your smoker can be considered ready for use. (That task didn’t take that long.) How is your supply of smoker fuel? Put it on your shopping list if your supply won’t get you through the first very busy months.
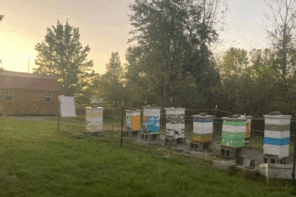
The next item for your inspection is your beeyard. Here conditions depend on where you live – warm or cold climate, sand or grass, hilly or flat, wet or dry. While you walk around it go back to any thoughts you may have had throughout the bee year. Do you see any abandoned equipment lying around? It is not doing you or your bees any good there. Now walk around again to inspect the hives themselves. Although you are just looking at the outside you want to be certain all the parts are lined up, covers are secure. If you made any notes in your records about the condition of woodenware actively in use, go back and review those records. The equipment suppliers frequently have equipment sales in January so take advantage of these for needed replacement parts as well as for starting new hives or nucs.
Those beekeepers in “critter country” with such pests as skunks and bears know that the electric fence, of whatever type, is their most valuable piece of equipment. So your next walkaround will be concentrated on the fence and its charger. Although you might not expect critter problems during your Winter, you still want your fence working, “just in case…”
You’re not finished yet! It’s time to move inside where you have stored your bee equipment – woodenware. If you had a honey crop during this bee year, you may have some stored honey supers. If they are in plastic bags, check the bags over carefully. It is so easy for a mouse to chew a hole in a bag and proceed to make a mess sight unseen. Make a note to check these throughout the Winter.
Did you happen to record the condition of your honey supers before storing them? Honey flows can seem to just pop up suddenly in some years. Unfortunately, we really cannot predict exactly what the next honey flow time will bring, it’s much better to be ready for it than contacting equipment suppliers when everybody else is in a state of panic.
Carefully review all queen excluders if you use them. Any small area damaged will be found by a queen. She spends all her days in the hive; you are only inside the hive for a very short time. This is one piece of equipment that needs to have a carefully chosen storage place. Another item that needs safe storage is frames of good, useful drawn comb. If you have some useful comb left from a dead colony it can be used for the coming bee season if you are certain that the colony did not die from disease. Check frames and clean up any built comb that is unsuitable. It will not be used so there is no point in keeping it. Check any hive bodies, screen bottom boards, inner covers and tops. Pay particular attention to any sugar syrup feeders you used this year. Feeders can get mold forming while in use, especially with 1:1 syrup. While the weather is still suitable, get busy with scrub brushes, hot soapy water, sponges, garden hoses, and some rubber boots. Using some bleach give the feeders a thorough rinse, then flush with water. Dry completely before storage and protect from dust. If you don’t like the style of feeder you chose, add a different one to your shopping list. Decide what items need repair and repainting or replacing. If you were able to extract some honey this year, review your supply of containers. They also need a clean storage area. All the stored equipment has now been reviewed. Add to your shopping list.
Now it is time to sit down with a cup of tea sweetened with honey and review. Consolidate your shopping list. Personal gear – you might decide to use a different style veil. Bee hives – you’ve been curious to try a plastic hive. Making nucs might have been on your list to try this year. Now is a good time to look through the advertisements in beekeeping magazines. You can go online to several bee equipment suppliers to help you decide your coming bee year.
Yes, I asked many pesky questions; however, being ready for the upcoming bee year will really get it off to a good start. Well, at least with the bees and your equipment and your beeyard. Now we hope Mother Nature can control her tantrums of extreme weather so that the plants and the bees can form their partnership, then all will be well.