Ed Simon
The three parts of this collection are subsets of the 263 hints, definitions and informational tidbits gathered in over twenty years of beekeeping. I hope they are helpful.1
Air Conditioning – Hot Hives
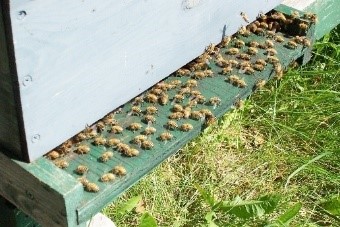
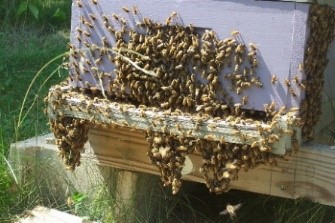
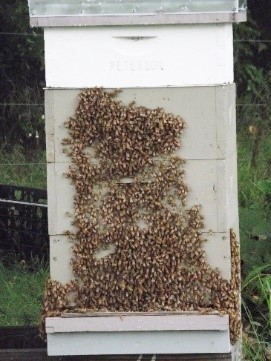
On a hot day or when the nectar needs to be dehydrated, bees will form at the entrance to the hive and force air through the hive to cool the insides.
Note: All the bees are facing one direction.
Ants – They will find an easy meal.
Cinnamon powder sprinkled around the feeder rim and on the inner cover takes care of the ant problem.
Attaching Wild Comb – Attaching comb to a frame.
After you have collected a wild colony and need to attach the wild comb to a frame, be sure to keep the top at the top. Comb cells have a definite slope to them. When you attach comb to your frame use rubber bands. They work great and will eventually be removed by the bees.
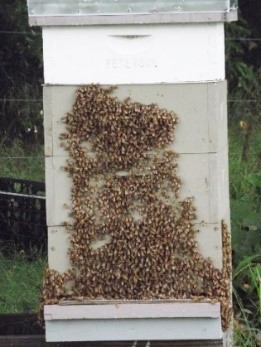
Bearding – This is not, and I repeat not swarm preparation.
On a hot day the bees will congregate on the front of the hive. It is hot inside, so they decided to cool themselves off and reduce the heat being produced inside the hive.
Bee Development – The standard schedule for an egg to bee development (Apis mellifera)
See Table 1
Note: A drone bees life span is limited. If the drone mates he will die after the mating ritual. If a drone does not mate, he is evicted from the hive in cold weather.
Note: Africanized bee development time is shorter.
Bee Space – The space needed for a bee to move within.
| Table 1 | ||||||
|---|---|---|---|---|---|---|
| Type | Egg | Larva | Capped | Pupa | Avg. Dev, Time | Life Span |
| Queen | 3 | 5.5 | 7.5 | 8 | 16 | 1-3 yrs |
| Worker | 3 | 6 | 9 | 12 | 21 | 50-70 days |
| Drone | 3 | 6.5 | 10 | 14.4 | 24 | 5 mos. Max |
| Table 2 | ||
|---|---|---|
| Frame Size | One Side | Both Sides |
| Medium | 2240 | 4480 Maximum (approximate) |
| Deep | 3440 | 6880 Maximum (appropriate) |
If a small space is less than ¼ inch or 6.4 mm, the bees filled it with propolis. If a space is more than ⅜ inch or 9.5 mm, the bees will fill it with comb. This concept was recognized and defined by L. L. Langstroth.
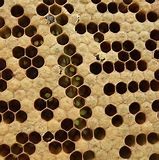
Brood Pattern – Every cell filled with eggs, larvae or capped brood is the perfect brood pattern. Depending on the percentage of missed cells the pattern ranges from perfect to rotten.
Cells – Cell count
The possible number of cells on a frame
See Table 2
Cells – Cell identification
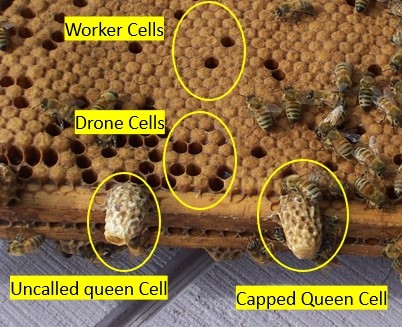
The caste of the bee larvae residing in a cell is easily identified by the capping on the cell.
Worker – Flat cap – the most prevalent of all castes
Drone – Domed cap that has the shape of a 22-caliber bullet
Queen – Extended cap that has the texture of a peanut shell. The location of the cell often identifies the cells’ purpose. This is not an absolute indicator of the purpose for building this queen cell.
Crystallized Honey – Shake the bear up.
Crystalized honey in a plastic bear can be liquefied in the microwave. The outside of the honey will heat faster than the inside of the honey. To stop the plastic from melting and causing the bear to nod its head, only heat the bear 20-30 seconds at a time. Between each heating shake the bear/honey up to distribute the hot honey. It may take four of five repetitions to completely liquefy the honey. But it is still quicker than sitting the bear in a pan of hot water.
Dry Honey Supers – When you put your honey supers away for the winter with all the honey removed. This can be easily accomplished by allowing your supers to stacked where the bees can rob the remaining honey left over from extraction.
Entrance Reducer – They never fit correctly.
When building an entrance reducer, make sure the entrance reducer is smaller than the smallest opening you have on your bottom boards. Then when installing the reducer, use a wad of newspaper on one end to work as a spring and force a tight fit of the reducer.
Extraction – Multiple beekeepers.
If you are extracting with a group of beekeepers and you need to account for the honey for each individual beekeepers, Mark the side of each super with its original weight. Then after extracting the honey, reweigh the super. The difference is the weight of the honey from that super. Even if the frames do not get returned to the same super, the total extracted honey weight will be correct.
Note: The capping wax weight is accounted for as honey.
Extraction – Easy frame Popper.
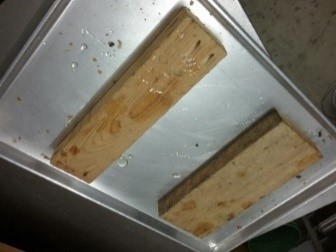
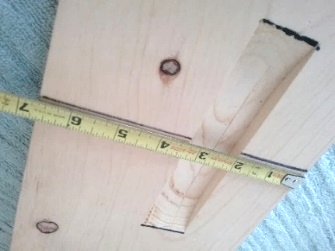
Put two – 2” x ??” x 14” pieces of lumber on a large cookie sheet (commercial cookie or cake sheet). Then force the honey super down on the lumber. This will raise the frames 1½” above the top of the box, making it easier to separate them for a move to the uncapper.
Extraction Clean Up 1 – Let the bees do the work.
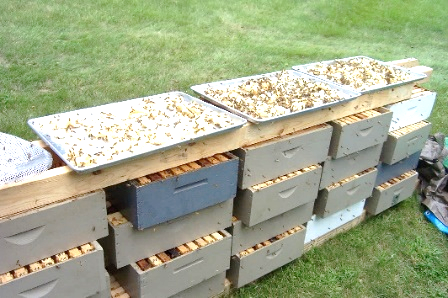
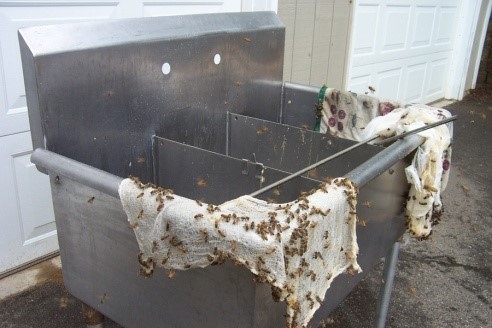
Move your equipment outside of the extraction area and let it set for a couple of days. All the junk honey that you would normally wash away will be reused by your bees. Wipe up the thicker/deeper puddles of honey with a wet rag so the bees won’t drown and then hang the rags up for the bees to clean the honey.
Festoon – When the bees develop a chain where one bee hangs from another bee is called a festoon. This often occurs when the heat inside the hive is too hot and the workers go outside to cool off. This activity is often accompanied by bearding.
Gargoyle – Easy hive body removal.
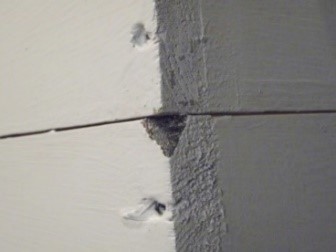
The gargoyle is a hive body modification which allows a hive tool easy access to the top corners for box separation. Use a sander to remove the top corners of hive bodies. This removal gives you an easy way to place your hive tool between boxes.
Hand Holds – Hive body handholds need to be wide.
Double cut hand holds for your hive body when cutting with a dado blade on your table saw. Reposition the saw fence further from the saw blade and recut the handhold. This will widen the hole so your fingers can curl into the hold without gouging into your fingers.
Hive Air Flow – A stick will do it.
Placing a stick or a piece of wood between the inner cover and the top cover will allow a better flow of hot air from the hive during the summer months.
Hive Dimensions – Langstroth.
The dimensions of a Langstroth hive may very a little from one manufacturer to another. The generally accepted dimensions are:
See Table 3
Hive Placement – Do not place your hives in straight rows.
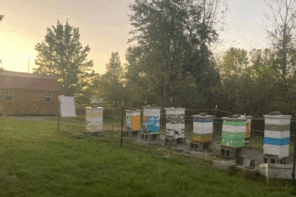
If hives are placed in a row, the end hives will eventually have more bees. Bees tend to drift to the hives at the ends. Place your hives at irregular distances and at angles to one another.
Hive Stand – Keep your stands low.
Be careful when placing your hive stands. The higher your hives, the higher your supers are when you want to remove them. When full they weigh about fifty pounds each. You do not want to climb a ladder to retrieve a super.
Hive Stand – Make sure your hive stands have a solid base.
Spend the extra time to ensure your hive stands are on a solid/level base. You don’t want them to tip over as you add hive bodies and supers.
Honey Storage – Five-gallon pails
Five-gallon pails are an extremely easy to use and a great way to store honey. If you fill them full, they weigh about sixty pounds. Before placing the lid on make sure the rubber gasket is in place.
As was noted at a bee club meeting, when selecting pails for honey storage do not and I repeat do NOT, NOT, NOT use pails that were used to store dill pickles.
Honey Supers – Pulling honey.
When pulling honey, after you eliminate the bees cover the bee-free super with a wet sheet. The wet sheet will cling to the super and is heavier so the wind will be less likely to blow the cover away.
| Table 3 | ||||||
|---|---|---|---|---|---|---|
| Length | Width | Height | ||||
| Shallow | 19 7/8 | 16 1/4 | 75 11/16 | |||
| Medium (money super) | 19 7/8 | 16 1/4 | 6 5/8 | |||
| Deep (brood) | 19 7/8 | 16 1/4 | 9 5/8 | |||
Honey Supers – Pulling honey – Excess bees
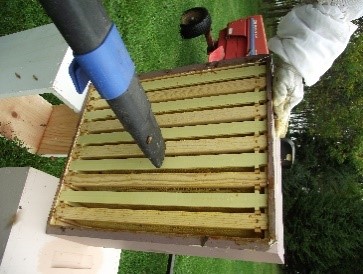
Sometimes things just don’t work out. If the number of bees remaining in the supers is too great, then a blower can help solve the problem. A gas leaf blower works great. A hand held Battery-powered blower is even better.
Hot Hive – This is not, and I repeat not swarm preparation.
On a hot day the bees will congregate on the front of the hive. They are not getting ready to swarm. It is hot inside, so they decided to cool themselves off and reduce the heat being produced inside the hive. It’s like you sitting on the front porch in a cool breeze. This is called bearding.
In-frame Feeder – Bees will drown or get stuck in syrup.
When using the one or two-gallon frame feeders or division feeders that sit inside a hive body, add straw, wood chips or a screen before filling the feeder. These provides a foot hold for the bees. It will allow them to escape if they get stuck in the syrup.
Inner Cover – This unit is used to isolate the telescoping cover from the bee’s propolis or gluing. Without it the bees would glue the telescoping cover to the top hive body. Since there is no way to insert a hive tool under the telescoping cover it would be difficult or impossible to remove once it is glued to the hive body. (If you forget one you will find out what I mean!)
Inspection – Positioning hive bodies?
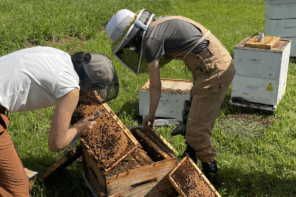
When removing hive bodies practice the same ritual every time for the placement of the removed boxes. When you restore the boxes, you can keep the order and the orientation of the box identical to when it was removed.
Inspection – Setting hive bodies?
When removing hive bodies and you set the hive bodies individually on the ground, be sure to set them so the frames are vertical. If they are horizontal, they can and probably will collapse on themselves.
Inspection – Setting hive bodies?
When removing hive bodies and you set the hive bodies on an upturned telescoping cover. Set them crosswise so the minimum amount of box surface is in contact with the cover rim. This minimizes the number of bees that could be crushed.
Installing Bee Packages – They will miss the hive.
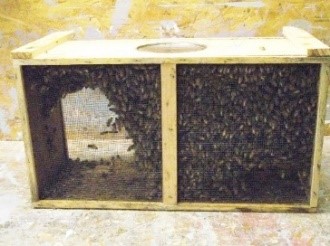
Even though you spray down the bees before shaking your new package into the hive, they seem to miss where you want them to go. To eliminate some of this, use an empty hive body and place it on top of the target hive. Then keep the shipping box inside the top hive body while shaking the bees into the bottom box. This will help channel the bees into the lower hive box.

