By: Roy Hendrickson
This article originally appeared in the Summer 2017 issue of BEEKeeping Your First Three Years
Everything you need from March to Winter
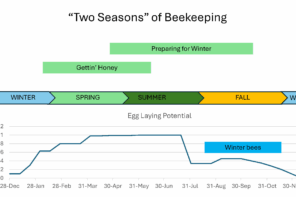
This article describes my bee work starting March 1st and running through the remainder of the season. With the exception of mite control, (The mite control practices I describe are current, although they’re subject to instant revision as need dictates) the management practices I describe duplicate those I used while operating a 300 colony honey production operation from the late 1970’s through the year 2000. For simplicity I’ll average the timing of various manipulations thereby eliminating the normal variations that occur from season to season.
The reader will have to make the necessary adjustments to compensate for discrepancies that occur between different operating territories.
My operating territory lies roughly fifteen miles south of Lake Erie approximately thirty miles east of Cleveland, Ohio. As a result of the northerly winds that continually sweep across the cold lake; my Spring build-up period is dominated by cold, wet, nasty weather. As a general rule the first pollen makes its appearance around mid-March, it will be at least another month before any serious bee work can begin. In the meantime I’ll work on the many chores that don’t require decent weather. The first order of business is to assemble needed equipment, most notably frames and foundation, along with the myriad odds and ends that are required throughout the season. Weather permitting, winter deadouts will be moved into the shop for repair or painting. Brood combs are carefully sorted. Older damaged combs, or combs with too much drone brood are scrapped. (I don’t attempt to salvage frames or plastic foundation.) Honey filled combs (more than half full) are set aside for emergency Spring feeding, or as feed combs for the early splits. The remaining combs are stored until needed for colony equalization or split make up. Due to the cold temperatures, no moth control measures are required at this time. Combs not reused by late June will be treated to prevent any possibility of moth damage.
Once the snow recedes, I’ll heft the colonies from he side to check the food reserves. Spring syrup feeding is not practical in this area due to frequent bouts of cold weather. Plus, I’ve largely eliminated that need by feeding copiously the preceding Fall. If emergency feeding is required I simply exchange frames of honey for empty comb in the immediate brood-nest area. If frames of honey are in short supply I’ll feed wet sugar. (Mix cold water and granulated sugar to a consistency of wet gravel. Place the mixture on wax paper, directly above the cluster. Flip the inner cover over, or add a spacer to provide the necessary accommodation space.) Sugar fed in this manner is the equivalent of fondant or a Winter feed patty, and at a much more reasonable price.
Sometime around the middle of April the weather will have warmed enough to open colonies. The first order of business is to check colony condition and start the mite sampling process. (Whether due to drifting or nearby colony collapse, late season mite transfer can wreck havoc the following Spring. Failure to take this threat seriously can spell colony doom by mid-to-late July.) My preferred sampling technique is a 150 bee alcohol wash as opposed to the standard 300 bee sample size. I believe the smaller sample provides a more accurate mite count, plus it only requires half as many bees. At any rate, if the mite count exceeds my early Spring treatment threshold, (2 mites per 100 bees) I’ll treat with one formic strip (MAQS) per colony, placed between the brood boxes, (MAQS can be used with supers in place) or with 25 grams of Apiguard placed on the top bars of the uppermost brood box. With Apiguard it’s necessary to add a spacer (1½ – 2½ inches deep) to allow the thymol to vaporize evenly throughout the colony. If necessary, apply a second treatment of either product 14 days Later. This will provide a 21 day treatment window with an expected 90% or better efficacy rate. Spring treatment with Apiguard or any of the other mite control products should be completed prior to supering.
Spring Management
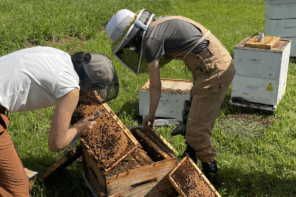
By late April or early May the strongest colonies will be ready to equalize. (Equalizing refers to the practice of removing excess brood and adult bees from strong colonies, and then using those resources to boost weaker colonies, or to make up splits) Successful colony equalization requires three basic beekeeping essentials, a degree of analytical skill, an ability to identify the queen, and some form of resource transport . The analytical skill refers to the act of estimating a specified amount of brood. For example, my definition of a full frame of brood is a deep frame, with both sides two thirds filled, with anything from eggs to emerging brood. For example, six weeks prior to the start of the main honey flow you want to leave the equalized colony with the equivalent of four frames of brood. But the colony in question has brood unevenly distributed over nine frames between two deep brood boxes. Your job is to estimate, then remove the excess brood and adult bees so the remaining colony is approximately the desired size. The first time you try this, deliberately underestimate. You can always return and make further adjustments. In practice, the idea is to remove frames that contain the oldest brood and adhering bees. And for every frame of brood you remove, shake bees off an adjacent frame of brood. That way you’re equalizing both the brood and the adult population. This will in turn reduce the swarming potential of the overwintered colony, and the receiving colony or split will get an immediate boost from the extra bees. Five weeks prior to the flow you want to leave the equalized colony with five frames of brood and accompanying bees. Four weeks out leave six frames of brood. Six frames of brood equates to a full hive body, although it will never appear that tidy. This simple equalization formula worked exceedingly well during my commercial years. Give it a try.
Colonies can be equalized any time prior to the start of the main honey flow. However, the closer the flow, the less brood you remove. If you remove too much brood too close to the flow, the colony will fail to reach or maintain honey production strength. Instead, focus your efforts on the adult bees. For every frame of brood you remove shake bees off two or three additional frames of brood. In other words, you want to remove a good portion of the bees that would otherwise leave with a swarm! In summary, colony equalization sounds complicated, but with a little practice it will quickly become just another colony manipulation.
There are times when locating the queen is an absolute must. When equalizing, it isn’t necessary to locate the queen, just make sure you don’t transfer her along with the brood and adult bees you remove. (If you inadvertently remove the queen an emergency supercedure will be initiated, and that will severely reduce or eliminate that colony’s production potential) Brood rearing is paramount during the spring buildup period, so early in he season the queen is a]most certain to be found in that portion of the brood nest that contains eggs and very young larvae. When examining frames, ignore the young brood; instead focus on the portion of the brood nest that contains the older brood. That should minimize the chances of coming into contact with the queen. As the brood nest expands, the queen increases her range accordingly. This is where it can get a bit tricky. Carefully scan each frame you intend to remove or shake. If a frame lacks eggs or young larvae, chances are pretty good the queen isn’t there. The danger lies with frames that contain a mixture of older brood along with eggs or very young larvae. The queen could very well be on that frame, or in the immediate vicinity. Quickly scan each side of the frame, as well as the face of the next comb to be removed . If no queen, tilt the frame horizontally so that you’re looking across the comb surface. Queens and drones stand taller than workers. With a little practice they’re quite easy to spot. Of course your chances of spotting the queen will improve drastically if she is marked with a bright color, white or bright yellow are very easy to spot. If possible replace the combs you remove with drawn comb, not foundation. If foundation is your only option, place it to the outside of the active brood nest. If placed in the center, it tends to divide and inhibit brood nest expansion.
For maximum efficiency the brood and bees that are removed through the equalization process should be relocated to another location. Otherwise the older bees will return to the parent colony thereby negating a lot of time and hard work. A couple suggestions: for one or two colony operations a five frame nuc box fitted with a screened bottom board should suffice. For larger operations, because you’re going to be transporting lots of extra bees, and they generate heat, you might consider altering the nuc box. Omit the screened bottom. In its place extend the ends of the nuc box downward a couple of inches, and install 8 mesh screen along the sides. This will provide both additional clustering space and abundant ventilation.
Split make up
As with any beekeeping function, there isn’t a single “best way” to make a split. However, weather limits the choices for those operating in more northern locations. The following describes my split make up procedure. Adjust as you’ll deem appropriate. All my splits are housed in five frame nuc boxes. The initial input consists of two frames of brood and plenty of extra bees. A frame of honey and two empty combs round out the unit. A caged queen or mature queen cell is installed once the unit has been moved to a new location. The smaller nuc box confines a portion of the heat given off by the cluster. This allows the young queen to expand the brood nest at a much faster rate than would be possible in larger equipment. Once the new queen’s brood starts to emerge, the colony will immediately require additional comb space. This is a prime example of a relatively weak colony that will readily draw foundation. If you’re in need of drawn comb, simply add a second five frame box of foundation. If there’s a honey flow in progress, you’re all set. If not, feed 1:1 syrup until the flow begins. By the time the foundation has been drawn out, the season will have progressed to the point where you can safely transfer the nuc into standard equipment. If foundation is not an issue, fill the second box with drawn comb. You’ll be amazed at how quickly the small colony will grow.
Timely supering is every bit as important as equalization when it comes to swarm prevention. Supers provide the colony with two immediate benefits. They supply storage space for incoming nectar that would otherwise end up in the brood nest. Plus, they provide a parking or resting space for the legions of emerging bees. Without supers, these bees, like incoming nectar, will plug up the brood nest. And guess what, swarm preparations are initiated! The first super should be added, above an excluder, the day the colony is equalized. When the bees cover five or more frames in the first super, add a second. Once the honey flow begins, add another super when the top super has bees actively working on six or seven frames.
What about foundation? Most new beekeepers lack drawn super comb so foundation is the only alternative. If that’s your situation, forget the excluder and place the foundation directly above the brood nest. In time the wax producers will begin drawing comb. Once the bees are working on seven or eight frames, add another super. With any luck you should have a couple supers of drawn comb by season’s end. The following season you can use the baiting technique to expedite new comb production. Baiting is the practice of using drawn comb to entice the bees up into the foundation super. Generally two or three empty drawn combs are transferred from the outside of the uppermost super into the center of the foundation super. The displaced frames of foundation replace the drawn comb in the lower box. Once the storage bees begin filling the bait combs, it won’t be long before the wax producers start working on the foundation. Once you gain an adequate amount of drawn super comb, life in the bee yard becomes a whole lot easier.
Crop Removal
The main honey flow in this area runs from the first of June through the fourth of July, give or take a few days. Due to the potential for significant mite buildup I make every effort to remove the crop at the earliest opportunity. Clearing bees from honey supers can be one of the more challenging beekeeping tasks. There are a variety of bee removal options. Generally, experience coupled with the number of colonies involved will determine the most practical method. Most new beekeepers start with the brushing method. The problem here is the commonly available bee brush (The yellow bristle model) is too stiff. When you brush heavy concentrations of bees off a comb you tend to roll the bees, irritating them to no end. By the time you’ve reached the third super you’re dealing with the equivalent of Africanized bees. Instead, give the frame a quick shake, above the entrance, prior to brushing. This should dislodge most of the bees and noticeably speed up the removal process. Another option is to remove about half of the brush bristles with a pair of scissors or a utility knife. This will soften the brush and lessen the bee irritation during the brushing phase.
Once you reach the five or ten hive plateau and you’re extracting twenty or more supers, the shake and brush method starts to get a bit laborious. At this point the use of a blower becomes a viable option. In general, blowers are more efficient when the supers contain mostly capped frames with a minimum of burr comb. Burr comb, the connecting comb between supers, is the real detriment to efficient super removal. Once burred-up supers are separated free honey is everywhere. From this point on, bee removal with a blower becomes a very slow, sticky affair.
Enter the fume board. When coupled with a blower, fume boards give the beekeeper the latitude to clear supers in short order. Used properly, a fume board will drive the bees out of two or three supers at a time, eliminating the need to deal with masses of sticky bees. The following fume board basics have served me well. Use boards with a metal cover, and paint the cover flat black to improve heat absorption. Heat vaporizes the repellant causing the bees to move downward to get away from the fumes. If your colonies are partially shaded, place the board in direct sunlight prior to, and between applications. If the top super is only partially filled or mostly uncapped, remove and set it off to the side on the upturned outer cover and leave the inner cover in place. This will eliminate any robbing potential. With the blower running at maximum rpm, direct the airflow downward through the frames in the top super. This will force the exposed bees to move downward. Now apply the fume board . Wait a couple minutes, remove the board and then lift the back of the super. Use the blower to remove any strays, including those lodged between the end bars and the super wall. Occasionally the upper super(s) even though fully capped will be packed with bees. Use the blower as described above to start the bees moving downward, and then apply the fume board. However, in this event turn the board so the corners of the super are exposed. This added ventilation will prevent the fumes from overwhelming the large number of bees.
There are two basic types of repellants, Butyric Anhydride commonly known as Bee Go, and oil of almond, the primary ingredient in Bee Dun and Fischer’s Bee Quick. Both are effective when used correctly. Effectiveness aside, there are major differences between these products. To many, the odor of Bee Go is quite noxious. In the event of a spill or accidental contact, the odor tends to linger. Thus it can’t be shipped via UPS or the U.S. mail, so acquisition is through direct pickup only. (Contrary to popular belief it’s not the repellant odor that drives the bees out of the supers. The fumes burn the bee’s eyes and that’s the motivating force.) Bee Dun and Fischer’s Bee Quick are less objectionable and can be shipped without limitation. Odor aside, l much prefer Bee Go. I believe it works better under marginal weather conditions.
Varroa Control
Once the crop has been removed it’s back to mite control, and now we’re playing for keeps! Depending on your number of colonies, the number of nearby colonies, and the treatment attitude of your neighbors, your mite control approach can range from no big deal to deadly serious. By mid-to-late July mite loads can easily reach the 4-6 mites per hundred bees threshold. At that level, failure to treat immediately will usually result in dead colonies by the end of the year, and on occasion a month or two earlier.
With a couple of exceptions my treatment regimen remains the same as in the Spring. For heavy mite loads I’ll apply the full strength MAQS treatment instead of a single strip at 14 day intervals. With Apiguard I’ll apply a 25 or 50 gram treatment depending on the projected temperature, (50g above 77 degrees, 25g below) and I’ll definitely apply a second treatment in 12-14 days. However, one mid-summer treatment isn’t nearly enough to counter the late season mite transfer from nearby collapsing colonies. I have a friend who had that experience last year. He treated a light mite load (1-2 mites per hundred bees) in late July, with full strength MAQS, and figured he was done treating for the year. Four of his twelve colonies were dead by Thanksgiving; the remaining eight were dead by the New Year. Why? Mites had transferred via drifting and robbing from (numerous) nearby untreated colonies! (Recent research indicates that mites can travel up to two miles from a collapsing colony.) As a result I’ll sample, and in all probability treat again in late August or early September. And this time I’ll alternate products. In other words, if I used MAQS in July, I’ll switch to Apiguard in August and/or September. Last year I treated three times, alternating between those two products, with great success. Failure to do anything less would have resulted in wholesale disaster.
Back when I was running bees on scale, July through September were consumed with crop removal and extraction. Nowadays my schedule is much more relaxed. I actually have time to monitor the comings and goings of my bees. Barring a mid-Summer drought this area has an abundance of pollen producing plants. As such, I pay attention to both the levels of incoming pollen, and the average amount of stored pollen. (I check the pollen band whenever I open a colony.) Good nutrition is an integral part of any successful mite control program . Consequently I’m prepared to feed pollen substitute should the need suddenly arise. Mid-to-late Summer is also an ideal time to replace questionable or failing queens. A young queen will provide the colony with an abundance of young bees going into Winter, one of the prerequisites for successful overwintering. Mid-Summer is also the perfect time to make up splits for next season’s use.
Feeding
By the first of September the Summer dearth is coming to an end. Although Goldenrod has been in bloom for over a month, its golden yellow pollen is but a recent addition. If the weather cooperates, incoming nectar should arrive by the tenth. Regardless , September is Winter stores month. If the colonies lack the necessary Winter food reserves by month’s end, it will be a grim Winter indeed. As a result, Summer splits are supplied frames of honey at make up, and fed sugar syrup when necessary. Likewise, lightweight colonies are fed as need dictates. Come September 1st I start feeding heavy syrup to the neediest colonies. If the Goldenrod fizzles, the feeding intensifies. I keep at it until I’m satisfied, or until the onset of cold weather halts the proceedings. I don’t attempt to weigh colonies. The correct weight is determined by lifting each colony from the side(s). This is an experience thing, and it’s relative to the operating territory. One suggestion, if you have trouble lifting a colony, it’s probably heavy enough. You might also check with a couple of longtime local beekeepers as to their Winter weight recommendations.
All feeding is accomplished through the center hole in the inner cover. Feeding in this manner is simple, economical, and extremely efficient . My primary feeder is a 10 lb friction top honey container. (No longer available.) A quart Mason jar or plastic gallon jug with a metal lid, will work equally well. The rate of syrup consumption is controlled by the number of holes punched in the lid. The more holes the greater the rate of syrup consumption. Ideally the holes should be about 1/16 of an inch diameter, or about the size of a standard frame nail. Use either 4 or 6d nail and a tack hammer, and tap the nail just hard enough to drive the point partially through the metal lid. The bees tend to propolize the holes in plastic lids, but if they’re your only option, use a 1/16 or 3/32 inch diameter drill. In use, elevate the feeder a quarter of inch to allow the bee’s full access to the feed holes. Use a hive body or a couple of supers to protect the feeder from the elements. With this system, once feeding has commenced, it’s often possible to replace or refill the feeder without the use of a smoker or veil.
Winter Protection
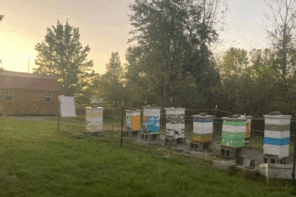
When it comes to overwintering success, the importance of good windbreaks is second only to adequate food reserves. Colonies that are under constant wind stress simply do not overwinter very well. The further north you’re located the greater the potential for damage. Thick woods, heavy underbrush, or a solid fence row all create ideal windbreaks. Colonies placed downwind at the base of a hill are usually well protected. In heavy snow territory these locations are often buried by drifting snow, thereby creating the best natural windbreak of all. I classify manmade structures as natural windbreaks. Apiaries located on the leeward side of a barn or out building generally fare very well. Absent a natural windbreak, you’ll have to conjure up something. A few well placed bales of straw make an excellent windbreak. Old aluminum storm doors placed lengthwise behind exposed colonies are quite effective. My favorite manmade windbreaks are old shipping pallets. I cut the pallets in half and use deck screws to attach pieces of scrap plywood. They’re held in place by short lengths of pipe or metal fence posts.
By late October the weather has cooled to the point where it’s possible to install the top insulation. (It’s much quicker to make the transition if the bees are clustered.) In cold climates top insulation has at least five identifiable benefits. First, the insulation traps a portion of the heat given off by the overwintering cluster, thereby preventing any frost or ice buildup. Similarly, the combination upper entrance/ventilation port allows the warm moist air to vent, virtually eliminating any condensation buildup on the top bars or the underside of the inner cover. Third, the retained heat increases the cluster’s ability to move and access the stored food reserves. As a result, colonies supplied with top insulation are much less likely to cold starve during the depths of a long cold Winter. Fourth, the upper entrance allows for easy outside access whenever the weather warms enough for a cleansing flight. And last of all, top insulation allows a colony to rear more brood in the cold of early Spring than would be possible were insulation not present. If possible allow the colony to benefit from the top insulation until average daytime temperatures reach the fifty-five to sixty degree range.
For small beekeepers the most practical application of top insulation is between the inner and outer covers. I recommend two inches of high-density Styrofoam of the type commonly sold in big-box lumber stores. Buy the one inch thickness, and cut two pieces that fit in side the raised border. Use woodworker’s glue (Titebond II) to glue the two pieces of Styrofoam together. To prevent the bees from chewing up into the insulation, cover the inner cover center hole with a piece of window screen. Once the insulation is in place, the outer cover is returned to its normal position on top of the insulation.
The final step is to create the combination upper entrance/ventilation port. Nowadays virtually all commercially manufactured inner covers have a raised border on both sides. Select the side with the thickest border. If necessary, add a thin strip of wood to increase the border height to 3/8th of an inch. Locate the center line on the front of the cover and remove a 2 ¾ inch section of the border. In use, this side is turned down so that the bees have direct access to the outside. If you were to shine a flashlight into the opening, you would be looking directly at the top bars of the uppermost brood box. Caution: Do not allow the outer cover rim to obstruct the upper entrance. If it does, either cut a notch in the outer cover rim, or add another layer of Styrofoam.
- Left to right: Ideal manmade windbreak; Inner cover in the Winter position, with insulation in place; Wrapping in place, snow will cover the bottom entrance throughout the Winter.
For those operating in the more northern latitudes, it may be prudent to consider some form of colony wrap. Wrapping the colonies is he last job of the season, and this usually occurs in mid-to-late November before everything freezes up. Over the years I’ve gravitated from 15 lb roofer’s felt to Colony Quilt, a wrapping material supplied by B&B Honey Farm in Houston, Minnesota. This is a plastic based wrap combined with a thin layer of insulation. It’s durable, easy to cut, and easy to apply. Although the cost is somewhat higher than roofer’s felt, I believe it is money well spent. In use, the pre-cut wraps are temporarily secured with a couple of half inch staples or clear packaging tape. Overwinter security is achieved by wrapping the colony with plastic bailing twine. (For a complete overwintering article, Google: Winter Preparation, followed by my name.) Happy Beekeeping!
Roy Hendrickson has been keeping bees for over 30 years and lives in Chardon, Ohio.