By: David E. MacFawn
This article originally appeared in the Winter 2020 issue of BEEKeeping Your First Three Years
How you get started in beekeeping sets the tone for your future beekeeping career. Among many choices, hive size needs to be selected: ten-frame, eight-frame, and five-frame Nucleus Hive (NUCs), deeps, mediums, and shallow brood chambers and supers. Many beekeepers have chosen ten-frame equipment and wished they had started with eight-frame equipment due to the weight and size (it is difficult and costly to switch from ten-frame to eight-frame equipment).
Where and how you locate your first bee yard is also important. Locate your first bee yard close to your house and reserve out-yards for later after you have more experience beekeeping. Learn about the bee year in your area from your local bee club or an old-timer.
A hive consists of the following:
-
- Bottom board with an entrance reducer
- Brood chamber, which can be deep (9 5/8″ tall), several mediums (6 5/8″ tall), or several shallows (5 11 /16″ tall)
- One or more supers– a super is defined as a deep (9 5/8″ inches tall), several mediums (6 5/8″ tall), or several shallows (5 11 /16″ tall), that is located above the brood chamber
- Inner cover
- Top cover which may be telescoping or migratory
In the southeast, I recommend a deep eight-frame or ten-frame brood chamber, one medium- or shallow-feed chamber, and at least two honey supers per hive. What size super/frames to use for the brood chamber and the honey supers needs to be determined. The beekeeper must match honey-super size to the location’s typical nectar flow and amount of honey needed to get through Winter. Also, consider what the beekeeper can lift and handle. Consult experienced beekeepers to determine the location’s typical nectar flow and amount of honey needed to get through Winter. It is best to standardize your equipment as much as possible. A lot of beekeepers have placed a shallow frame in a medium super with a resulting mess. For a three-pound package of bees, you will initially need either a ten-frame or eight-frame deep hive body with frames containing foundation, bottom board, inner cover, telescoping cover, entrance reducer, and a pail feeder to install the bees and feed them.
- If the colonies will be in your backyard:
- Put a hedge or fence in front of your hives to make the bees fly up at overhead level
- Place colonies away from heavily traveled paths and walkways
- Locate a water source very close to your colonies such that the bees do not travel to a neighbors’ pool or birdbath and become a nuisance
- Check local ordinances for honey bees
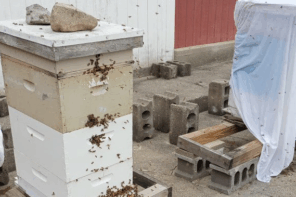
There should be no more than two hives on a stand – best practice is one hive on two cement blocks. Bees are sensitive to vibrations and vibrations transmitted through a hive stand upsets the colony. I use three cement blocks with two landscape timbers on top of the three blocks. A hive is located on either end of the 8-foot landscape timber with extra equipment stored between the two end hives. The three cement blocks and two landscape timbers are easily moved with a large wheel hand-truck that can get under the back of the hives to move them. This configuration is also efficient for working with the colonies. A person’s efficient “power zone” is between your knees and shoulders. This hive equipment height helps minimize injuries but take your own height into account.
In the southeast, I recommend a deep eight-frame or ten-frame brood chamber, one medium- or shallow-feed chamber, and at least two honey supers per hive. What size super/frames to use for the brood chamber and the honey supers needs to be determined. The beekeeper must match honey-super size to the location’s typical nectar flow and amount of honey needed to get through Winter. Also, consider what the beekeeper can lift and handle. Consult experienced beekeepers to determine the location’s typical nectar flow and amount of honey needed to get through Winter. It is best to standardize your equipment as much as possible. A lot of beekeepers have placed a shallow frame in a medium super with a resulting mess. For a three-pound package of bees, you will initially need either a ten-frame or eight-frame deep hive body with frames containing foundation, bottom board, inner cover, telescoping cover, entrance reducer, and a pail feeder to install the bees and feed them.
The latest from Dr. Tom Seeley (professor at Cornell University); Environment of Evolutionary Adaptedness (EEA)
• Average in the wild is 2.5 colonies per square mile; space colonies as widely as possible. Spacing colonies will be easier for hobbyists than for commercial beekeepers. Spacing should reduce disease and pest transmission, robbing, and over-pasturing.
• Use small nests; one deep and one shallow; make less honey but the colony is healthier. Smaller nests will increase swarming. The use of bait hives (aka “swarm traps”) will help alleviate some of the bee loss due to swarming. However, letting bees swarm in an urban environment will cause mayhem and restrictive ordinances. Also, bait hives may not be practical in an urban setting.
• 4150.17- 3657.78 = 492.39 inches3 (8.07 L) less with 8-frame deep / medium configuration than Seeley’s configuration (Table 2).
• Bees naturally build 4 to 8 combs in the wild. Bees also seem to do better in 8- frame equipment than 10-frame equipment but they swarm more in 8-frame equipment. Swarming contains more elements than a brood break. We could go with two 8-frame deeps but that would mean lifting 64 pounds.
• 2166.53 x 2 = 4,333.06 inches3 4333.06- 4150.17 = 182.89 inches3 (2.99 L) more with two 8-frame deeps may be the way to go if you do not mind lifting 64 pounds. However, it should be noted that an 8-frame deep holding 64 pounds of honey may not match the nectar flow in your area. An 8- frame medium holding 40 pounds may be a better match. Also, the brood nest may expand into an 8-frame deep or medium super in the Spring.
• Use rough-cut lumber on the inside to increase the propolis coating. This makes sense since the inside of a tree cavity is rough and the propolis is an anti-microbial/ antiseptic resin from trees. Rough-cut dried lumber is difficult to obtain. Also, using dimension lumber (full l” not the ¾” planed) will achieve higher thermal insulation for the hive but it will be heavier to lift.
• Target diverse pollen sources for the location as much as possible. Diverse pollen sources were much more plentiful years ago. Also, bees need a varied diet to achieve the nutrition they require. With large fields of mono-crop plantings, it may be difficult for bees to collect the best pollen diet. A diverse pollen supply is required for raising brood and feeding young honey bees. This is very location-dependent.
• Maintain a 10% to 20% drone comb. Drone brood is raised by healthy colonies. In recent years reducing the amount of drone brood has been found not to impact honey yield as much as previously thought. Solid sheets of the foundation were thought beneficial to increase workers, however current foundation does not allow for drone brood unless it is drone brood foundation with larger cell sizing (typically the plastic green foundation).
• Obtain and keep bees adapted to your location. This was practiced more in the early 20th century than today. We are just now starting to raise geographically dependent honey bees which research shows increases bee health and survivor ability.
• Keep nest structure intact; keep original frame location in the hive and original frame orientation;. do not reverse boxes. It makes sense to keep the nest intact, the way the bees laid it out. The bees laid the bee nest in a certain fashion for a reason. The nest layout supports brood rearing and honey production.
•No top entrances; use two inches bottom opening (¾” height). This also makes sense since bees prefer a two-inch bottom opening for nest defense and it allows the bees to support brood rearing with a shorter distance when entering the hive. The brood area is the first area when entering a hive for Langstroth, Top Bar, and all hives. Surplus honey is naturally stored above the brood nest.
•Condensation in hives is the bees’ Winter water source. This may be counter to the current belief, but tree cavities are limited in the ability to disperse condensation, especially in the Winter. Bees remove a lot of the rotten punk wood for structural integrity before coating the inside with propolis.
•Do not disturb colonies in Winter for feeding syrup or pollen. However, colony stores going into Winter are going to be dependent on your location. It makes no sense to allow a valuable colony, otherwise healthy and strong, to starve because your area is toxic or short on bee feed. This gets back to the art of beekeeping. In much of the south, we have a weak Autumn nectar flow. This means the beekeeper needs to leave enough honey on the colony to get through any Summer dearth, Fall, and Winter.
Choosing what size equipment is of utmost importance. The beekeeper can choose 10-frame or 8-frame, in deep, medium, or shallow depths. Top Bar Hives (TBH) may also be considered. Be very careful when assembling equipment. Correct-size nails need to be used and the super assembled with the correct handhold orientation. The woodenware should be primed with a high-quality primer and two coats of high-quality paint used after priming. Currently, only smooth-planed inside equipment is available and not the newer recommended rough hive surfaces. Rough inside surfaces are desirable to increase the bees’ propolis coating.
Ten-frame Langstroth equipment is the traditional standard. It allows the most space which minimizes swarming and is the most economical. However, it is heavy to lift and the most difficult to get your arms around. Eight-frame equipment is easier to lift and handle, is lighter, the bees seem to do better since bees tend to move up, but the bees tend to swarm more.
What size of equipment depends on your preference. Some beekeepers use all deeps– weight is of concern but all frames are interchangeable. An alternative is to use all mediums, with about half the weight of a deep to lift, and again all the frames are interchangeable. Also, a lot of beekeepers use a deep brood chamber and a medium feed chamber and supers. The super size should match your area’s nectar flow and overwintering store requirements.
Standard Langstroth equipment has outside dimensions of 19 7/8″ (19 ¾”) x 16 ¼” (16 1/8″ inches). This means the outside dimensions of different manufacturer’s equipment will generally fit due to the board nominal thickness (¾”). Different manufacturer’s equipment depth may be different by 1/8″ or less. This depth difference may result in the interior bee space being violated from the top of the frame top bars to the bottom bar of the above super frame in two stacked supers, brood chamber and super, or super and the inner cover/ migratory cover. If you are purchasing equipment (deep, medium, shallow) from different manufacturers, assess the equipment’s depth differences. If the space between super frames of different manufacturer’s equipment is greater than 3/8″ a burr comb may be built. If space is less than ¼ inches, space may be propolized shut (Figure 1).
Burr comb means the bee space (¼” to 3/8″) has been violated between the top of the top bars in the below super and the bottom bars in the above super. Burr comb sometimes makes it difficult to separate the two supers. Spacing violations may allow a place for small hive beetles to hide. The burr comb is also typically drone comb which allows Varroa mite reservoirs.
A lot of beekeepers use nine-frame spacers in their ten-frame honey supers. Nine- frame spacers result in the bees drawing out the comb past the edge of the frame’s top bars. This allows easy uncapping of the honeycomb.
All hive body and super joints should be glued with high-quality waterproof glue and nailed. Gluing the joints helps ensure a waterproof joint. The joints where the nails go in should be drilled with the hole slightly smaller than the nail shank diameter. Drilling a hole will keep the wood from splitting. Most manufactures drill the holes. All wooden ware should be primed with a high-quality primer and painted with at least two coats of high-quality paint. Only the outer surfaces should be painted; the inside surfaces should not be painted since the bees will coat the inside surfaces with propolis. In the high humidity southeast, properly painted wooden ware should last eight to ten years before repainting is necessary.
When assembling, the assembler needs to ensure the handholds are oriented correctly and the side is not upside down with respect to the other sides. If an end side is upside down, the frame rest ledge will be on the box’s bottom rather than the top.
The glue should be applied to joints on both pieces before assembly. If too much glue is applied it will run out onto the super surface. You can certainly wipe off the excess glue with a cloth or just leave it on the surface to dry. Also, note the handhold orientation. When assembling, the correct handhold orientation and frame rest orientation needs to be verified before gluing, assembly, and nailing. Some beekeepers use screws. Screws are better than nails but usually a combination of nails and glue is sufficient.
Attaching a ¾” x about 6″ board just above the handhold will increase the surface lifting area. This additional lifting surface helps immensely with finger-tip comfort and being able to lift a heavy super. The downside is the hives take more room in a truck when moving. The trade-off is between comfort/lifting weight and being able to fit hives in a truck.
For top bar hives, refer to Dr. Wyatt Mangum’s book, Top-Bar Hive Beekeeping: Wisdom & Pleasure Combined, ISBN 978-0-9851284-0-1, Singing Drone Publications. Bowling Green, Virginia.
When adding empty supers, I typically top super, or just place the empty super with frames on top of the hive stack. It is quicker and easier than removing all the full supers and placing the empty super on top of the feed chamber/ super or bottom supering. You get almost as much honey yield with top supering compared to bottom supering and it is a lot easier and quicker.
You can use a refractometer to determine honey moisture content before removing the supers (it should be 18.6% or lower) or, use the old rule of thumb that the frame of honey should be about 7/8″ of the frame capped or higher to extract.
The nectar flow usually stops in Lexington, South Carolina, around the second week of June. The queen tapers off her egg lying at this time. This is a good time, in South Carolina, to check for Varroa and treat if necessary. You should also check for Varroa in August/beginning of September and treat if necessary. This is a good time to check for other diseases such as American Foulbrood (AFB).
I typically pull my ripe honey supers and extract mid-June. If you wait longer your Spring honey may get mixed with the Autumn honey. If you only have a few hives, it is typically less expensive to pay a friend to extract the honey rather than invest in a lot of extracting equipment. This is especially true if you are a new beekeeper and are “just trying out the waters.” An extractor and extracting equipment will cost from $500 to $800.
Safety in the Beeyard
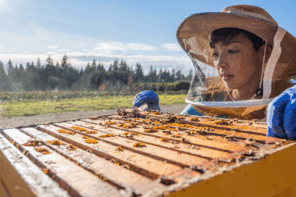
1. When approaching your bee yard, put your veil on to protect your eyes and hair.
a. Eyes: Stings to the eye may cause blindness. Protect your eyes.
b. Hair: Keep bees out of your hair. If you have long hair, pull it back in an elastic. The looser your hair, the easier for a bee to get entangled in it if you take off your veil or it gets inside. If a bee does get in your veil, walk away from the bee yard before removing your veil.
2. Light your smoker. Smoke is what helps to control and calm your bees. There is a theoy as to why smoke works. It interferes with the bees’ sense of smell, and shifts their behavior from colony defense to “gorge and retreat.” Don’t over smoke, but apply smoke ‘any time that you see bees looking at you. If they are looking at you, they are aware of you! You want plentiful cool white smoke-gray smoke does not have the same effect on the bees. Hot smoke will burn the bees’ wings. Always check the temperature of smoke–NEVER let the flame rise higher than the top of the smoker. Do not use oils in your smoker that could potentially remain in the hive comb. Be aware of fire safety when lighting your smoker and during use, especially during dry periods or when dry vegetation might be close to your working area.
3. Clothing: Wear clothing that is light-colored and loose-fitting.
a. Avoid wearing fuzzy clothing, especially dark fuzzy socks. Bees tend to sting at the elastic interface where clothing meets your skin.
4. Medical
a. Hydration: In the Summer, make sure you hydrate before work and have extra water for frequent breaks.
b. First Aid Kit in the vehicle with an antihistamine and Epi-pen for possible allergic reactions. Always know where the closest medical facility is located.
5. Travel
a. Out yards: Let someone know where you are located.
b. Have a cell phone available.
c. Properly secure equipment in trucks.
1. Enclose smoker and “cork” the flue or extinguish correctly before travel.
d. If in an area where Africanized bees are present park car or truck close enough to provide emergency shelter.
6. Avoid eating bananas before working your bees. The smell of bananas is similar to the bees’ alarm scent. Be careful about wearing products with perfumes or colognes. Bees communicate using pheromones or scents. Introducing a strange scent could cause problems: attraction, aggression, confusion.
7. Clean your hive tool to kill diseases like American Foulbrood (AFB) spores. This can be done by placing your hive tool in a lit smoker. This is a good practice to establish between hives, especially between bee yards.
8. Wash your bee suit regularly to avoid contamination of diseases like AFB and to remove alarm pheromone. Think biosecurity when moving from one bee yard to another by cleaning your tools, changing or washing your suit and your boots.
9. Before work, scan the apiary and remove trip hazards such as sticks, fallen branches, vines, and brambles.
10. Avoid standing in front of the hive. Stand to the side or back of the hive out of the bees’ flight path.
11. Be gentle. Move slowly without any quick jerking movements. The more bees you squash, the more alarm pheromone is released and the more excited your bees will become. During a nectar flow, you can work faster but during a dearth, the bees are more defensive and you should work slower.
12. Work the colony earlier in the day when the field bees are foraging. The field bees are more apt to sting. If you have to work later, move slower.
13. If you have a drone layer colony, you will have mostly older bees that are more apt to sting.
14. Small colonies are less apt to sting than large colonies.
15. Do not wear sunglasses or leather watch bands.
16. Do not jar the hive or bump your smoker on the woodenware at the hive entrance when puffing a couple of smoke puffs into the entrance before opening the hive.
17. Place hives on individual stands, two cement blocks work well, to keep noise and vibrations from exciting adjacent colonies.
18. Get in and out of hives quickly. In a ten-frame hive remove frames 2 or 9 first–not 1 or 10. Frames 1 and 10 are typically stuck to the outside wall with propolis. When replacing frames, align the Hoffman spacers on the frame you are inserting with the Hoffman spacers on the frames in the hive. This will help from squashing bees or rolling a queen that you did not see.
19. When lifting, “bend with your knees, not your back,” and put your hives lower so you can kneel while working. Bending over for long periods or lifting wrong may hurt your back.
20. Don’t place your hives where they can be seen or regarded as a nuisance. Be aware of poo1s, footpaths, schoolyards, playgrounds, and livestock.
21. Be aware of potential pesticide applications nearby. Also, remember bears like honey too.
22. Weather is a consideration. Work bees on sunny days whenever possible. Rainy days will have many bees in the hive and more older bees which tend to be more defensive. Even after a rain shower, many bees will stay in the hive so if possible, delay your inspection. Bees don’t like foraging when it is windy outside. Again, try to postpone inspections until the wind is low.
23. Avoid working with other animals such as horses, cows, goats, chickens, etc., before working with your bees. The odors from these animals may linger on your body or clothing and cause your bees to sense these odors and become more defensive.
Getting started right with bees is critical. Speaking with beekeeping old-timers, going to bee meetings, and taking a course or attending conferences are all very important. To be successful with bees you need to be educated. It typically takes two to three years to start to understand how to manage your bees. There is a lot to learn.