Hive Inspections
Richard Wahl
As a new beekeeper that first time hive inspection can seem like an intimidating task. After all, looking in on and moving frames and supers with thousands of potentially stinging insects is not for those who may be faint of heart. There are some steps that can make the task less intimidating than it may seem. Staying calm and using slow deliberate movements will go a long way toward keeping the bees in a calmer state. Even with a full bee suit, veil and gloves I was very nervous the first time I went into a hive. My first inspection would happen with no prior experience with bees and no assistance from any other beekeeper or individual. The fact that it was a swarm catch with unknown origins and unknown demeanor did not help to ease my nervousness. I was probably breathing a little harder than normal as well. With all their sensory acuity I am sure the bees could hone in on the bit of extra carbon dioxide that I was exhaling. It is said that bees go for the face of an animal or human first because their sensory perceptions are tuned to picking up that slight change in the air quality that occurs with the exhaling of air. I certainly had a dozen or so bees testing my veil to see if they could get to my face that first time. But since that first inspection I have learned several useful techniques and I now find it to be the exception to have more than one bee in an aggressive mood testing my veil.
Preparation for Inspection
For any inspection there should be a reason to inspect. The first deep Spring inspection will normally be checking to see if the queen is laying and to assess if there are enough food stores available. It may also include looking for any indications of possible disease in the hive. It can also include that first seasonal check for mites.
Later inspections may be looking for indications the hive might be getting ready to swarm. In any case having potentially needed equipment at the ready will decrease the time the hive needs to be open. If it is thought a super may need to be added or a split might be in order, having those extra supers or nucs with frames ready and set out by the hives in advance will save time. It is far easier to have extra equipment at the ready rather than to need to retrieve it after the hive has been opened.
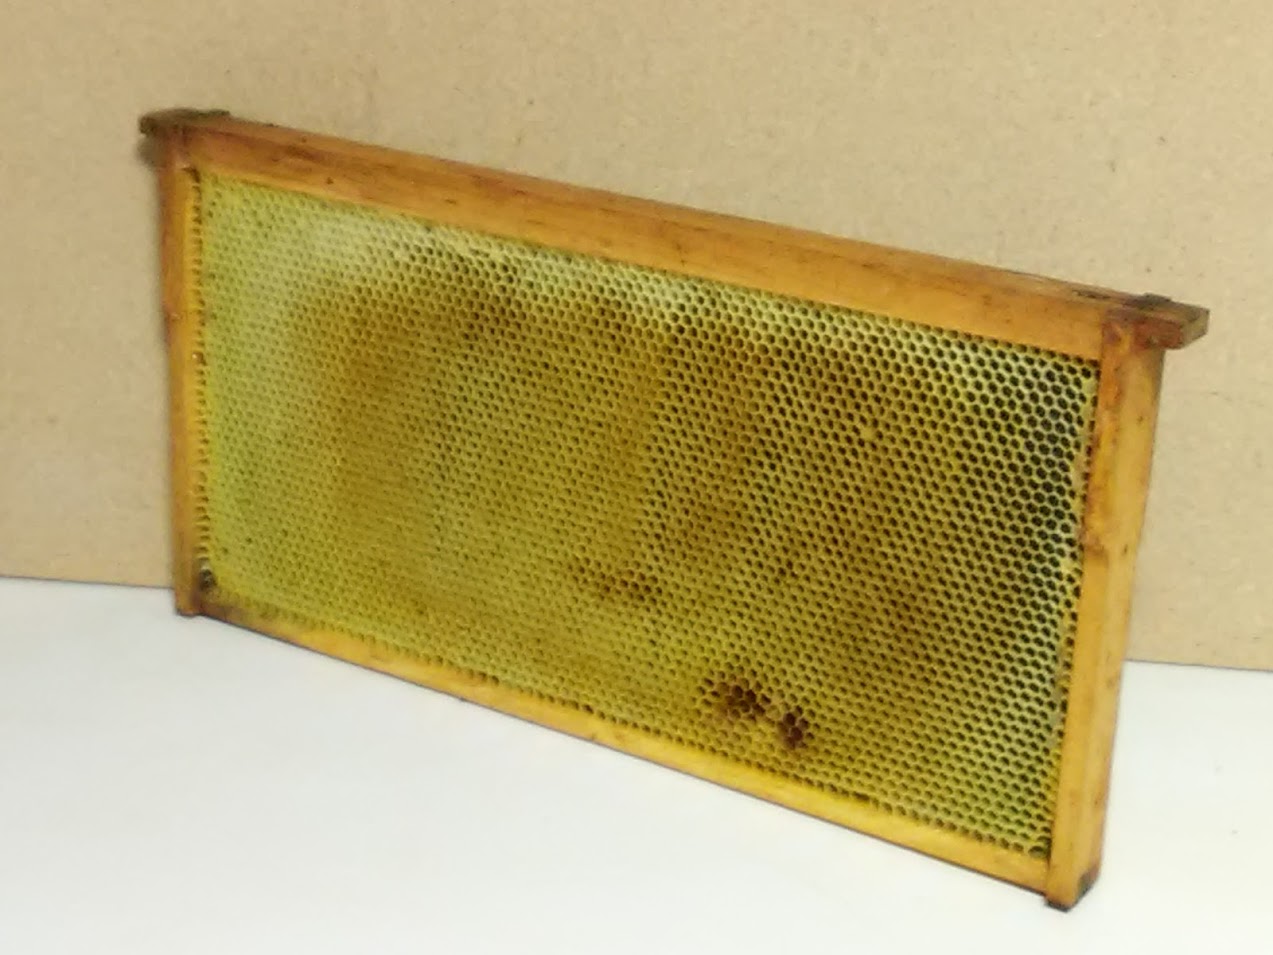
Once that initial inspection is done I like to wait another week or two before doing any splits or frame adjustments unless immediately needed due to space or food store requirements. Later inspections may only require a quick opening of the inner cover with no frames being manipulated. I am of the opinion that the less the hive is disturbed, the better it is for the bees. Also consider adding one to one sugar syrup and a pollen or protein patty to aid in bee build up if this has not already been done earlier in the Spring. Once honey supers are put on the hive, remove any sugar syrup feeder since you do not want the bees making honey from your syrup. Bees require a lot of nectar and protein during brood build up and any help that can be provided until honey supers are put on will increase the hive’s later honey productivity. Any partially or fully drawn wax comb from the previous seasons that has been emptied by the bees and that can be replaced in a hive is a real asset. It is estimated that bees need to eat eight to ten pounds of honey to produce one pound of wax.
Weather Considerations
Current weather conditions are a big factor in how calm the bees will be during an inspection. If there is a storm front coming or sometimes just a recent change in the weather the bees may be more irritable. Bees can sense bad weather and are more protective of the hive on a rainy, cloudy day than on nice days.
It is best to try to pick a warm, sunny day between 11:00 a.m. and 3:00 p.m. as that is when most of the forager bees are out collecting nectar and pollen which lessens the number of bees presently in the hive. Additionally, the foragers are the bees more likely to be the aggressive guards of the hive and the ones to become the first attackers if the hive feels threatened. In my northeast corner of Macomb County, Michigan, it is recommended the first deep inspection occur no sooner than when the dandelions are in full bloom. Prior to this time there is still a chance for weather to turn cold for a few days and if the cluster does not reform it could prove very detrimental for the hive. A case in point is that last year in my area, from the 10th through 12th of May temperatures returned to below freezing during several days and dropped into the 20°F range at night. I learned this lesson the hard way when I inspected two hives in a late March warm week one year and a month later found several clusters of bees dead in various locations in their hives.
Using a Smoker
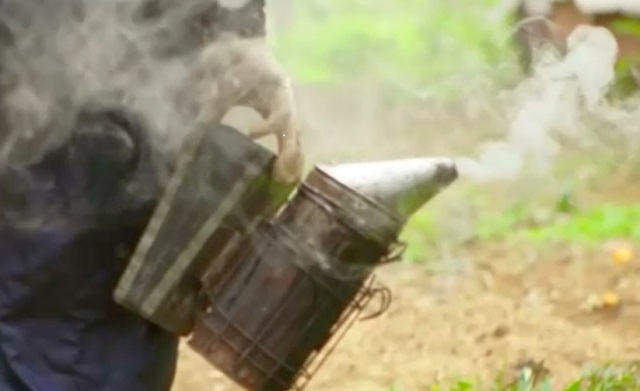
One of the first inspection steps is to get a smoker properly lit to provide a cool white, dense smoke. A very thin wispy smoke is more likely to be a hot smoke and more likely to irritate the bees. If there are flames or sparks exiting the smoker, the smoker has not been lit properly. This can be the result of the flame being on the top of your smoker fuel rather than the fuel being on top of the burn area. To get the proper result, start the flame with a bit of fuel dropped in the bottom of the smoker. Press the bellows several times to get a nice flame started and then add more fuel on top of that which has already started to burn. This should produce a dense whitish smoke that will be cooler and less irritating to the bees.
There are many types of smoker fuels used by beekeepers. Starter fuels may be newspaper, pine needles, dried leaves, burlap or wood bedding chips, among many others. Using a starter fuel different from the added fuel is not an unusual practice. Naturally the commercial bee catalogues offer a variety of fuels that can be purchased. I find that bedding wood chips work quite well with the downside being that there is quite a bit of creosote buildup in my smoker after repeated use. Another method that does not create as much creosote is to start the smoker with a wad of newspaper and once a nice flame is going make a tight wad of the brown packing paper often sent in boxes received with commercial bee products and shove several wads on top of the starter newspaper. This makes a nice dense, cool smoke that will smolder for some time. A common mistake is to light the smoker and set it aside while completing several other tasks before using it. This will burn up fuel and the smoker flame may even die before it is used. Use the smoker immediately after lighting it when a good smoke occurs. Once the smoker is lit, give two or three light puffs at the entrance to confuse the guard bees. Lift the inner cover a crack from the back and send a few puffs into the hive just below the inner cover opening. Close the inner cover and let it sit for a minute or two and a light puff might also be given at the center inner cover hole if the bees seem to be a bit agitated. It should not take a lot of smoke to settle the bees. The less smoke used the better since smoke is only meant to mask the bee’s alarm pheromones. Bees sensing smoke will think there is a fire in the hive and will retreat to eat honey in preparation to leave the hive. Too much smoke can confuse the bees and make them more aggressive. It can also be absorbed by the honey comb if used in excess.
Steps for a Smooth Inspection
Set the outer cover to the side and if in a grassy area it is best to set it upside down on the grass. It can be used to place supers on it if supers need to be moved. This keeps grass and dirt from collecting on the bottom of a super that might be set directly on the ground. I like to first slowly remove one of the outer most frames in the super being inspected.
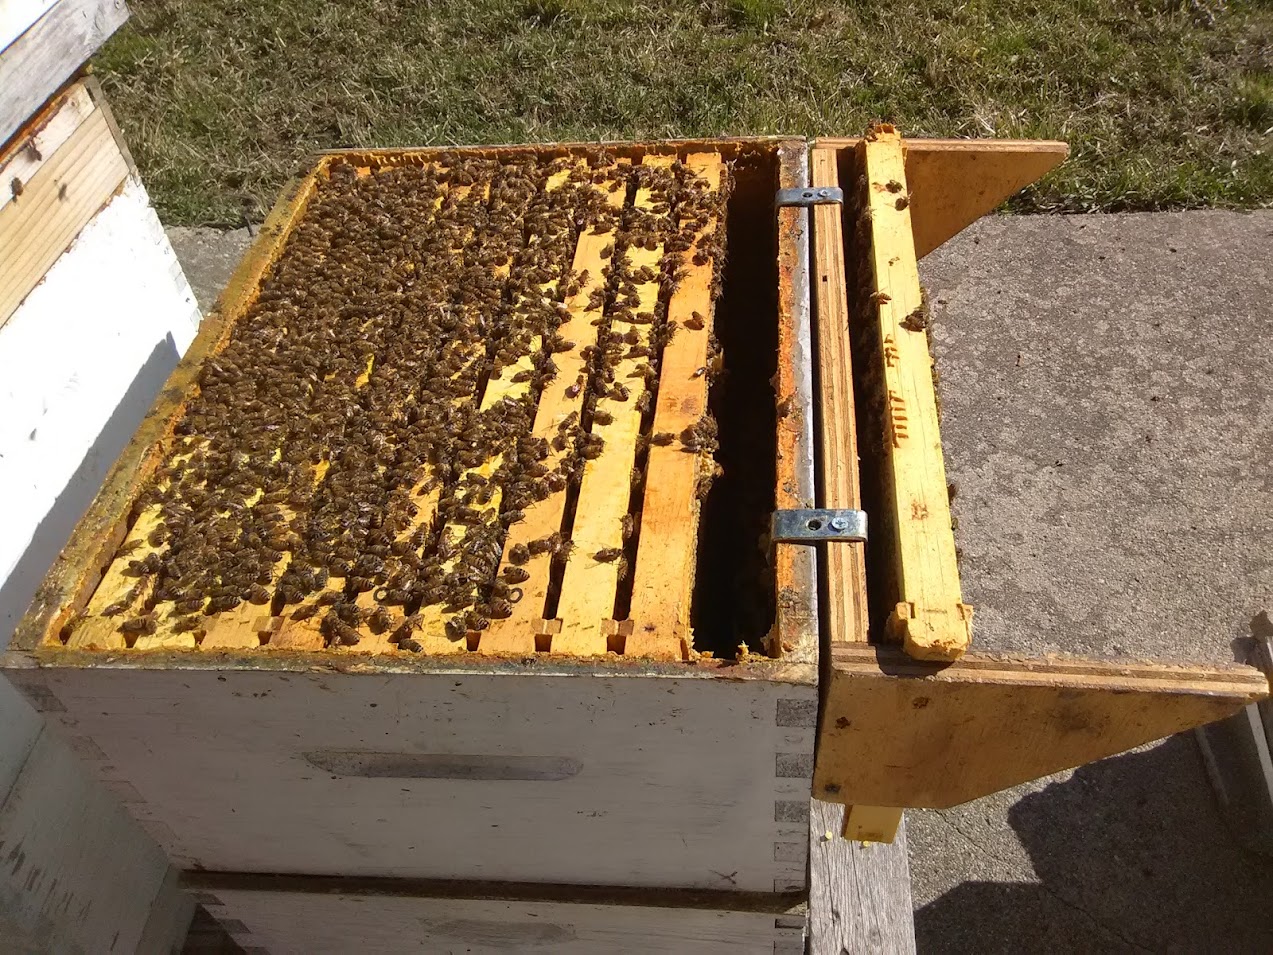
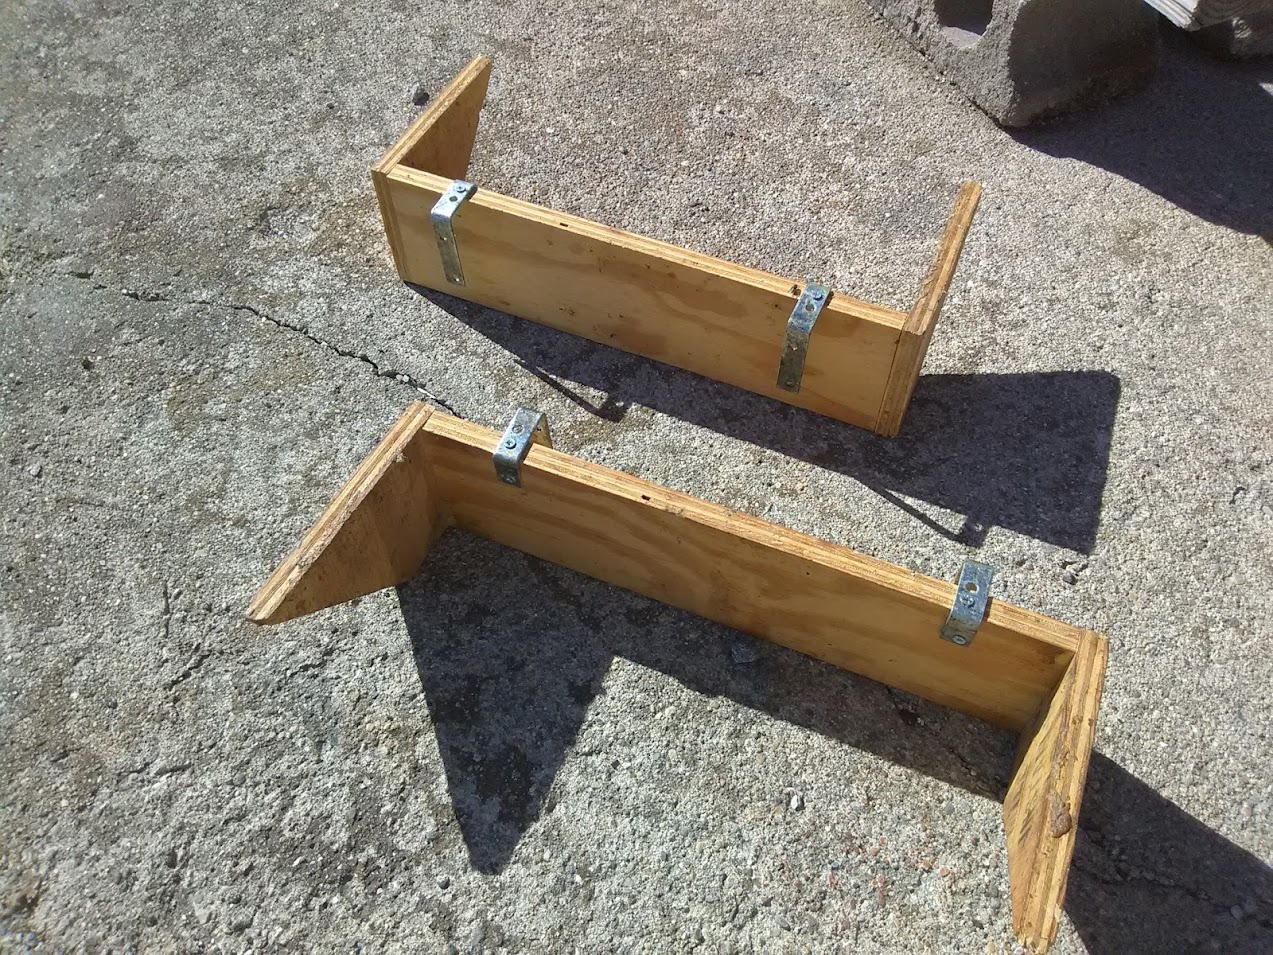
These frames are usually filled with pollen or nectar if not partially empty. The queen is also not likely to be on an outer most frame although it is a possibility. Carefully loosen the frame away from any propolis and slowly remove it from the super. I find a frame hanger on the outside of the super to be most useful. I’ve made several out of a few scrap pieces of plywood and some “L” brackets.
Now that there is room to move other frames, slowly pry them free and inspect each frame in turn as the previous frame is moved one space over. I find it useful to remove a second frame and also hang it outside the super if that frame has no brood or eggs on it. The reason for keeping egg and brood frames inside the hive is that the queen is more likely to be found on one of these frames than those that are capped with honey or that are nectar or pollen frames. If the queen is not spotted and she is on a frame moved to the outside of the hive there is the chance of losing her outside the hive. In any case, there is no need to remove any more frames after a nice capped brood and egg pattern is spotted. This is a sure sign a queen is present and if eggs are also seen, the queen has been present within the past three days as this is how long it takes before eggs hatch. Once the initial deep hive inspection is complete the frames should be slowly and gently returned in their original order and location unless a split or need for a replacement frame such as a drone comb frame is desired. Close up the hive and move on. A general rule of thumb is that inspections occur about once every two to three weeks during the Summer. These need not be deep inspections with frame movement unless there is a question about the queen’s presence or performance. Often just a quick peek under the inner cover to see how many frames are being worked by the bees is enough of a clue as to whether an additional brood or honey super is needed. If all but one or two frames are covered in bees and filled with eggs, larva, capped brood, nectar and pollen, an additional super will need to be added. With a bit of experience the state of the hive can be determined simply by watching the bees arriving and departing the hive entrance. If in a prior inspection things were fine, a look at the hive porch entrance with bees bringing in pollen is often enough to warrant not going into a deeper inspection. There are sometimes months during the Summer when I have not done a deep inspection with a newly established hive. I have found it useful to carry a clipboard or notepad and jot a few notes down as I go as to what I see in each hive. I transcribe these notes to a file on my computer. I cannot count the times I have gone through a previous year’s notes to refer to some action taken that seems similar to some current state while inspecting my hives. In any event, watching your bees is the best learning tool. Your beekeeping experience could vary based on your environmental conditions, experience or state of your hives. Have fun with it and hopefully there are a few new things mentioned here that may work
for you.


