by William Powers
If you have been keeping bees for, say, a decade or so, somewhere in the back of your mind is an equation that relates your age to equipment weight. It’s not in hard numbers, so it gives answers like “No way, I’m not lifting these bees in this heat”, or “Dang, I shouldn’t, but I just have to move these colonies to where there’s some forage for the girls.”
When it comes to my home apiary in the lower Piedmont of North Carolina, that equation is made more complex in that the colonies I host are located on a hillside amid fruit trees, berry bushes and rows of vegetables. This means if I am harvesting honey, or have colonies to move to the Blue Ridge Mountains for a second honey flow, I have to carry equipment from 10 to 30 yards to get to the honey house or pick-up truck. Fifteen years ago I thought nothing of carrying a full hive body, shallow super and medium super 30 yards to the pick-up truck. If I were fresh, I could lug three full nine frame mediums to the honey house. Time, numerous sprains and a hernia operation mean the medium super is off the stack. And getting a colony to the truck now requires stopping for my hands to rest, even though I have put extra wood on the sides of the boxes to get a better finger grip.
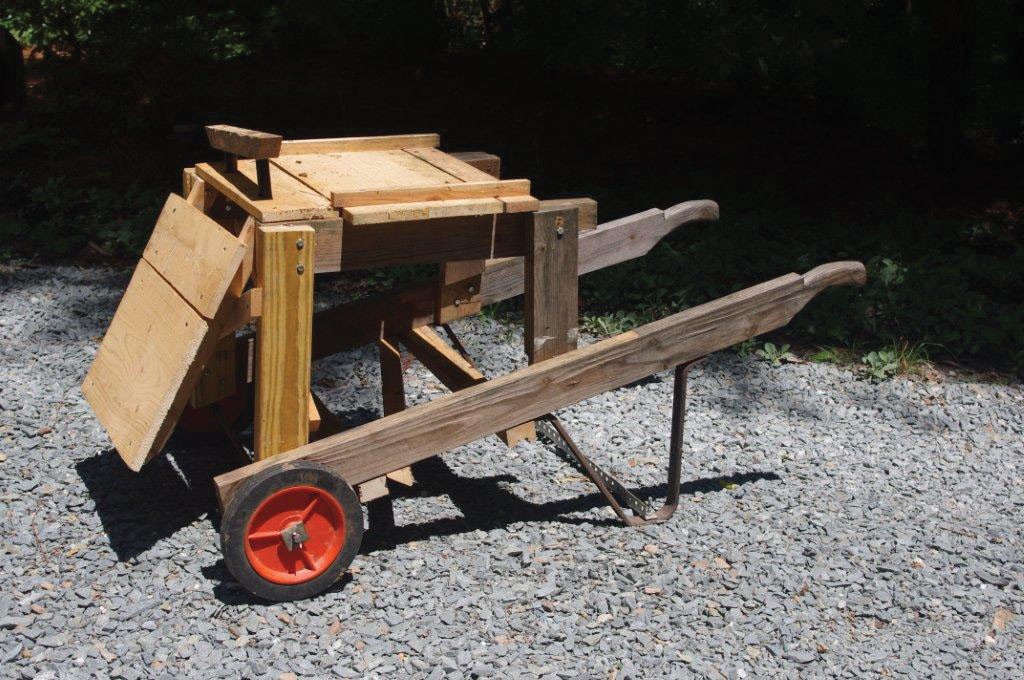
FAILED ATTEMPT: Too tall, tippy and troublesome to move, the initial idea and construction lasted through three attempts to move colonies or supers. From the failure, lessons learned and re-use of materials.
This year, with few Winter losses and numerous cut-outs and swarms coming into my care, I knew I needed some additional way to ease the moving process. I wanted something with a table like surface that was mounted high enough to minimize the lift into the pick-up truck or onto my outdoor table where I use a leaf blower to remove straggler bees off pulled supers.
Poking around my shed I found a pair of wheels from a lawn fertilizer spreader, some back legs from a wheelbarrow, plus 2x4s and 1x1s to realize my dream. So efficient was this creation that I even added an apron that pivoted so it would rest on the gate of the pick-up truck so I could slide colonies into the truck bed.
Upon completion of my dream machine, I found it was a nightmare to use. First, I discovered that I had to park it perpendicular to the slope, or it would tip when receiving a load. Second, in use, it demonstrated wild instability, ready to tip over when moving at any angle to the slope. Since I had to go down the slope on an angle to get anywhere, one wheel was always lower than the other. This started a rolling over motion that was made worse by the height of the deck. My attempt at countering the tipping became harder as the weight of the load increased. Third, since the wheels were only 9” in diameter and made of hard rubber, any bump against a tree root or drop while crossing a mole tunnel required a massive counter move by yours truly. I quickly realized that I needed a hand for each handle and one to keep the load from falling off the deck. Since I am not built that way, and cannot be so modified, it was time to dream up a plan B.
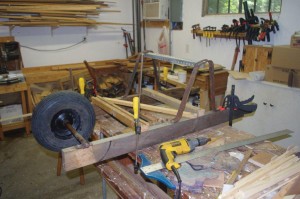
START SQUARE, STAY SQUARE: The frame is set square to my square workbench with four clamps. Now I can pre-bore and attach other pieces confident the cradle will rock without binding on the frame.
It did not take too much thinking to devise the base of a new equipment carrier. With the first carrier deemed unusable after three tries, I had reverted to a wheelbarrow to move hives. I realized that a big pneumatic wheel, centered under the load was the best part of that unit, and a must on a second carrier attempt. Of course, the drawback to the wheelbarrow is that the sides are too high and when the handles are lifted, the load wants to slide forward. And the bed of the barrow does not allow a super to sit flat, which is an invitation for robber bees to get into supers being harvested. So I thought about how I could have an easy to load flat bed that does not tip when I lift the handles to make a move.
The answer to my desire was to make a cradle that would pivot to keep the load level as I lifted the handles to move up or down hill. This idea, plus keeping the framing simple, drove the design of the carrier. It would be a rectangular frame, with a single wheel, with an easy to load, swinging cradle platform mounted inside the frame to keep the load stable on all four planes. Material would be on hand lumber and fasteners, plus a few off-the-shelf hardware items.
Figuring dimensions is an inside out process. I made my load carrying platform 19” x 22” using two pieces of 5/8” plywood. If you use longer bottom boards than I do, you would want to account for that in your design. Those plywood pieces are fastened with pan head bolts, nuts and spring washer sets to 1½” steel “L” pieces set longways. To make the two top side pieces of the “A” frame, I cut two 14” long pieces from pre-bored 1¼th” strap steel I got at a hardware store. A new hack saw blade and a little oil made any of the steel cuts an easy part of the work. I rummaged through a can of short nuts, washers and bolts to put these together, making a vertical triangle with the “L” bottom rails as bases. Again, if you make a longer platform, you would add length to the side pieces.
The wooden portion of the “A” frame cradle is made from simple half lapped joints forming an isosceles triangle with the square end at the apex. Old or treated 2”x4” is the material for these. Cutting the half laps is easy work with a cross cut saw and a rip hand saw. With a little set up, a stacked dado set on table saw or radial arm saw will do the trick, too. The only bit to notice for these pieces is that one leg of the triangle has half lap cuts on the same side, and the other leg has them on opposite sides. I put both on the same side of the shorter 19¼” piece and opposites on the longer 23” side. I used eight 1¼” deck screws to fasten the right angle joints; four on each side of the joint. Drill a 1/4” hole in the middle of each lapped right angle joint for the bolts that will provide the pivot for the platform.
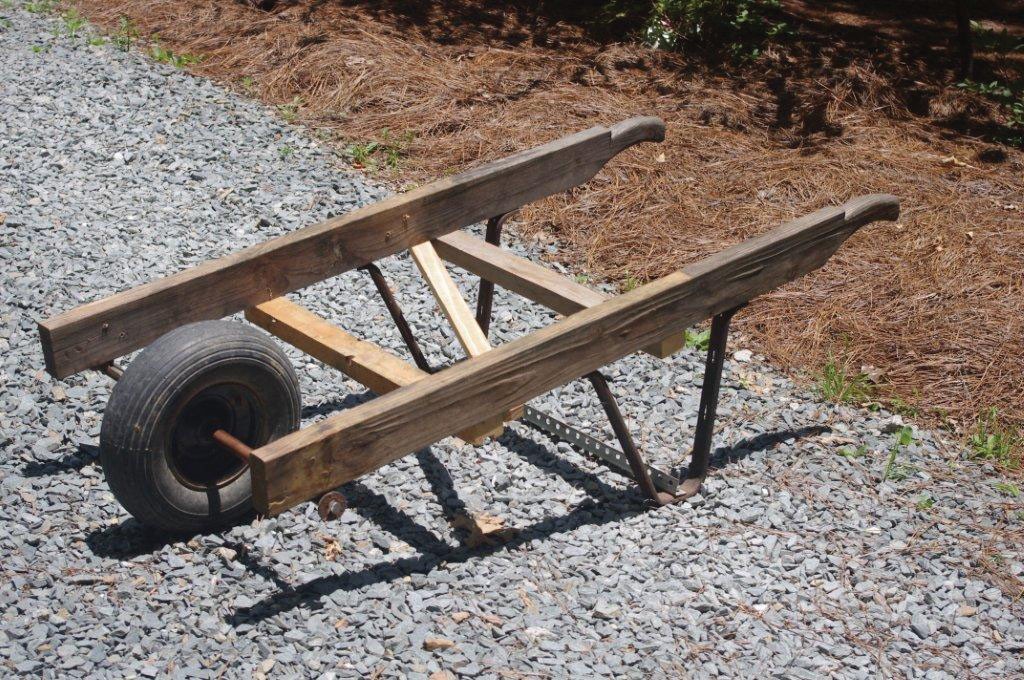
OFF THE BENCH AND ONTO THE GROUND: With the basics done, I can get a feel on how comfortable the unit is to lift and push. Field test will show the need for another diagonal brace.
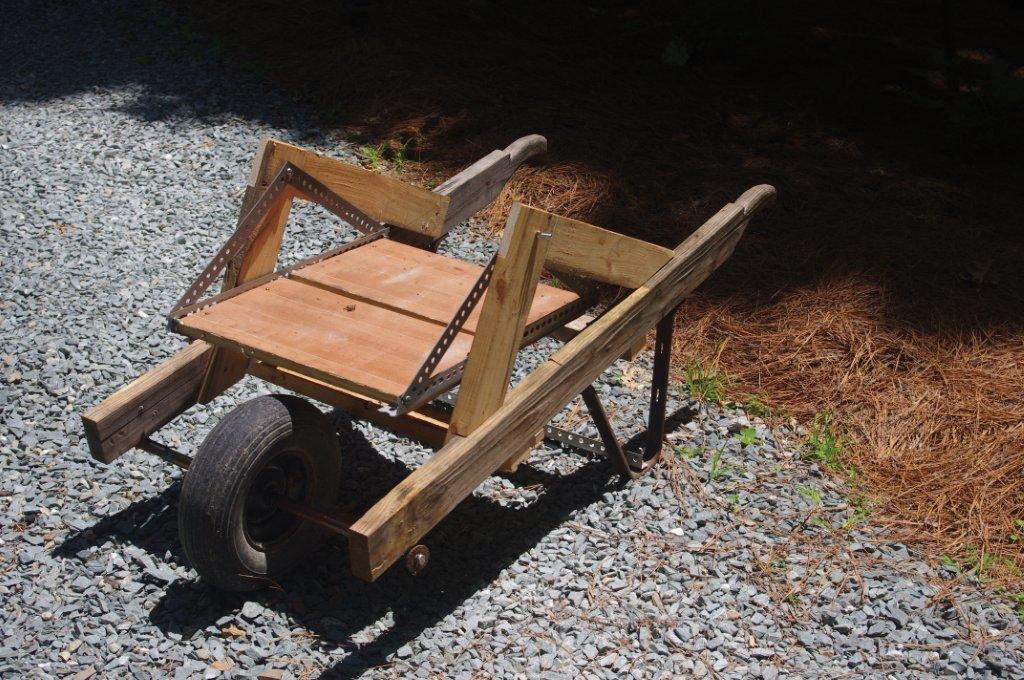
TRIANGULATED: Sturdy triangles hold components of the carrier in place. The platform pivots on the frame at the two arrows.
The wooden frame is next on the agenda. It consists of six pieces. There are two long rails, with the axle mounted at on end and handles at the other. There are two cross pieces to space the frame for the cradle. And, there are two diagonal pieces to stiffen the frame. I happened to have 4’6” long treated 2”x4”s from another project (and the failed first attempt carrier) for the lifting rails. I formed hand grips with a sabre saw, wood rasp and draw knife. Nothing says the same could not be done with a belt sander. Odd bits from the scraps pile provided the cross members and diagonal braces.
The key factor to this part is to make the frame just as square as possible. I did this by taking a large framing square and drawing a line across my work bench with a pencil. I then clamped one of the handles (top side down) to the bench. Measuring so there is 21 3/4” between handles, I drew another line. After clamping the other handle in place, I dry fit the pieces of the platform between the lifting handles. Satisfied with the clearance, I set two cross pieces 15” and 30” from the front of the long rails. These were fastened with 1/4” hex head carriage bolts with washers twisted into pre-bored pilot holes. I used 1”x3” scraps to make diagonals, with one mounted on the lifting handles and the other on the cross pieces. These were fastened with deck screws. If you have to purchase new wood for this project, I’d advise counter sinking and drilling pilot holes for the deck screws.
The axle guides from the old wheelbarrow were set so the axle is 4” from the front. Again, I pre-drilled for washered carriage bolts to hold them in place. I bought a length of 5/8” steel rod for the axle. That size has the heft for the work and will work with the axle hole of the pneumatic wheel. I cut it 27” long and filed a flat spot on each end. I took a metal punch and set a dimple on each flat spot. Then I drilled holes for cotter pins (I ended up using bent nails). The rod is slightly larger than the pneumatic wheel axle hole. I took a drill bit and reamed. Still snug, I coated the inside of the wheel axle with dish soap so I could push it into position on the axle. I centered the wheel under the frame using two pieces of copper water piping that was lying around; one could use PVC just as well. A washer between the cotter pins and frame helps prevent any binding. The front part of the wheelbarrow back legs were set 24” from the nose. Again, pre-drill for 1½” carriage bolts with washers. Then I fastened the rear portion of the legs to the long rails. I bolted on a left over piece of the “L” stock as a spacer to keep the bottom of the “U” shaped legs slightly wider than the wooden frame.
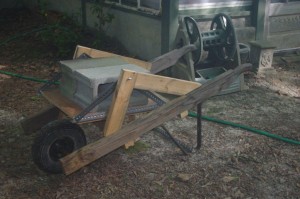
FIELD TEST: Loading the carrier with a few cinder blocks showed that front and rear platform lips are needed as material will move with vibrations from bumps in the terrain.
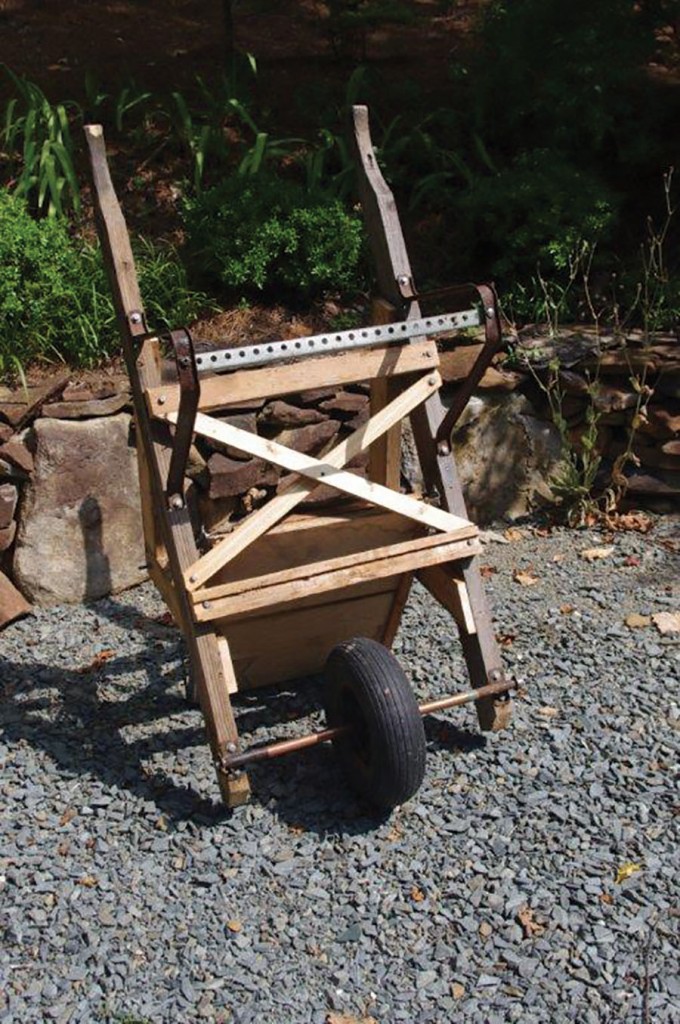
FIRMING THINGS UP: Field testing demonstrated that an additional diagonal brace was needed to hold the frame square. Here is the underside with the final bracing applied.
With the frame complete, I removed it from the workbench and set it right side up. I then set the wooden “A” frames in place with the shorter length sides towards the front. I set them so the lap joint intersected 11” from the nose. I clamped the pieces in place and secured them to the frame with 1-5/8” deck screws. Finally, I lifted the platform piece into place and I wiggled the pivot bolts through both frames and finger tightened them with nuts and lock washers. Nuts and washers being set to the outside.
Then I tested. Using two cinder blocks I learned that a front and back lip on the platform would be useful to keep equipment from walking off due to vibrations. I found that sharp turns could result in the lower nose of the lifting rails gouging the ground. I cut away 45 degree pieces there. Making quick lifts showed the cradle would rock severely, so I go slow, but might install stop blocks of bungee cables to restrain rocking.
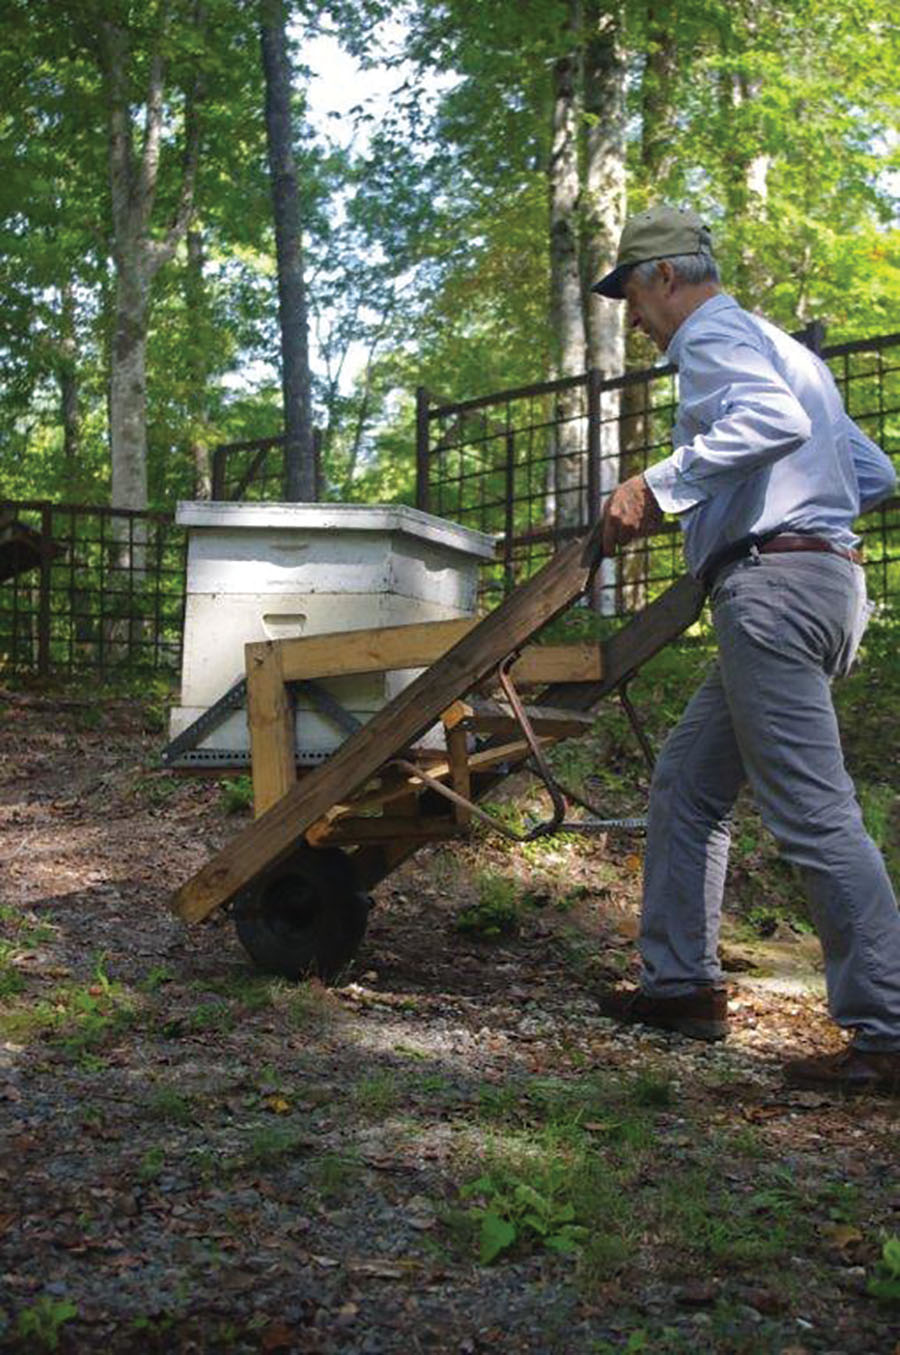
Upon completion of testing, I had to put it to use quickly. I found that in loading pulled supers or hives, it needs to be set perpendicular to the slope. Loading was easier than either the first try carrier or the wheelbarrow. What I have had to learn is that I must pick up equipment from front and back, not the sides. Three full supers are a good load, and a hive body and super is a comfortable move. I tried moving some empty supers on the carrier, but they wanted to jump off when I hit any bump, so I’ll still carry them by hand. I always wear gloves when working with bees, if you do not, you would want to wrap the handles of your carrier with tape if you use treated wood. With some thinking, in conclusion, I’d say, paraphrasing the old big band hit,“You should make an “A” frame.” if you want to save your body some big strains.


