


Ed Simon
Earlier this year (2021) the cost of lumber rose to unprecedented heights. Within ten weeks the cost of plywood doubled. The migratory tops that Ron Stevenson and I make took a major hit when ½” plywood went from $32.00 for a 4 x 8 sheet to $73.00 a sheet. Years ago, someone mentioned to me that they built tops from cement. Specifically, the cement or concrete backerboard used as a base for floor and shower tile. The cost of a 4’ x 8’ sheet of this backerboard was currently $24.00. Only 33% the cost of the plywood.
Since we had just received a request for a volume of migratory tops, we decided to see if we could offer cement tops as an alternative. We knew it would take time and testing to see if the results would be acceptable.
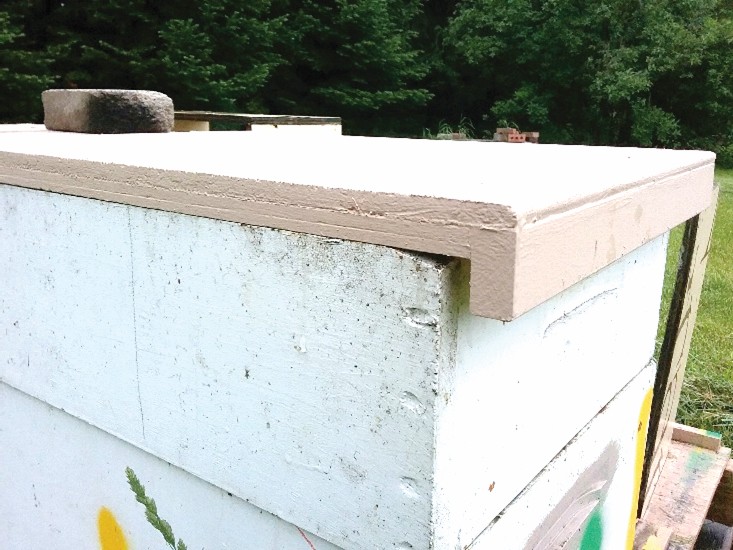
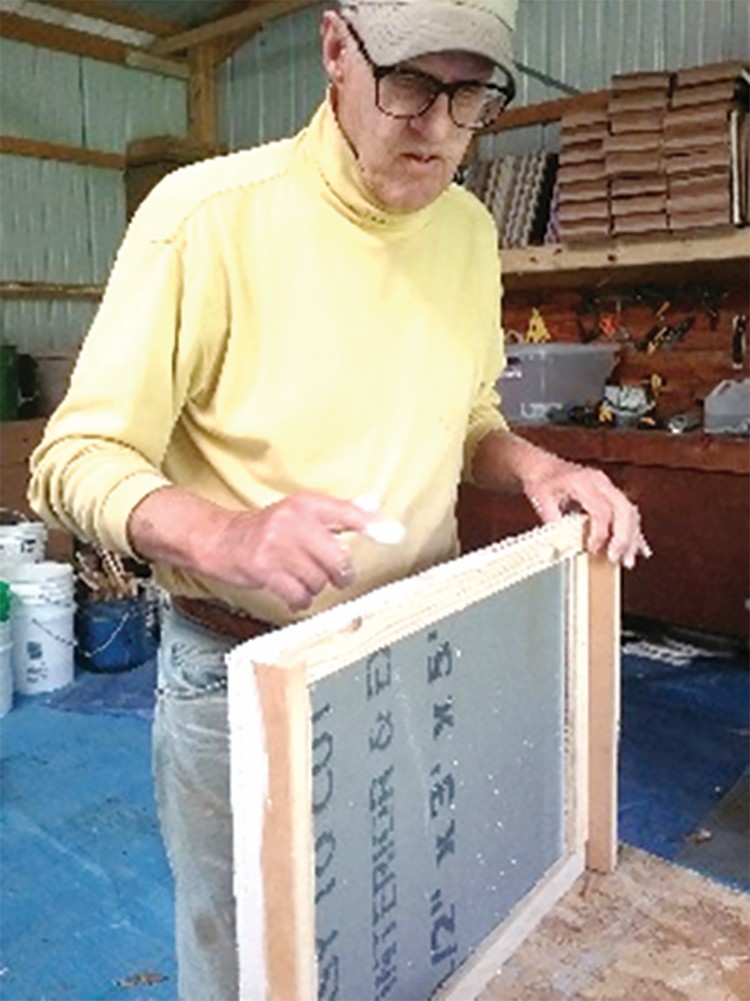
This is the result of our venture in making cement migratory tops.
There were problems/questions to be tested/solved before we could proceed.
- Will cement adhesive adhere to the wood cleats?
- Can the backerboard be cut without excessive chipping?
- Can we use staples to build the tops (not the special screws recommended)?
- Which of the two readily available backerboards would work best?
- Will the tops crack when treated roughly? (Thrown around)
- What type of paint is needed?
- Will they hold their shape? (Not twist or warp)
- Are they heavy enough to not require a “rock” to prevent them from being blown away?
The first question was answered by pure luck. While searching for a cement/concrete adhesive, I looked up and there was the answer. There was a strip of wood showing cement adhesive attached to it. Much to the salesclerk’s concern, I tried to pull the strip of adhesive from the wood. I could not remove it!
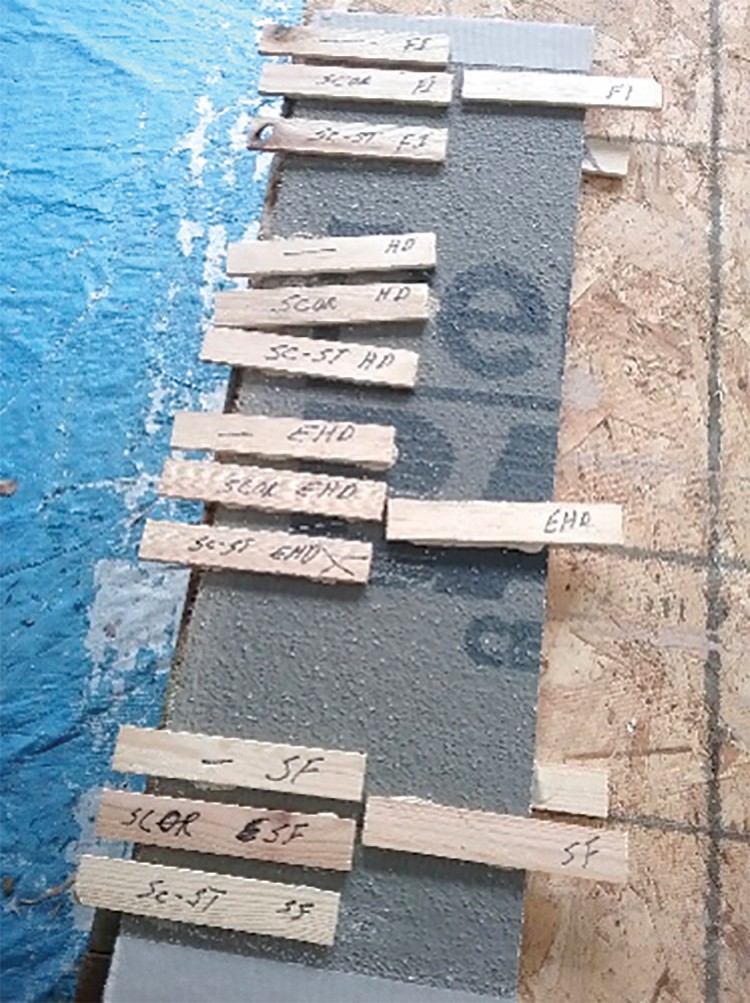
We then purchased 3’ x 5’ panels of the two different backerboards and a fiber cement blade for the circular saw. Both boards were able to be cut easily, although one produced more dust and chipped easier than the second. This answered question #2.
Note: Cutting the backerboard by scoring it and breaking it, although easy, produced ragged edges which was not acceptable for our tops.
Then we then tried using staples for attaching the cleats to the backerboard. Occasionally a staple would go astray when it hit a piece of aggregate used in the cement. This was a minor problem compared to the extra time and cost that using the special screws would entail. Problem #3 answered.
Question #4 was resolved by looking at the edges of the cuts. One was clean and smooth and the second was chipped and rougher. We decided on the brand Permabase® produced by National Gypsum.
Question #5 was resolved through testing.
The first attempt of creating a cement migratory top ended in a dismal failure. We slammed and tossed them around and a problem literally popped out. The wood rim lath partially separated from the cement and caused cracking. The cleats attached to the backerboard worked perfectly, but the rims attachment did not. The staples for the cleats were applied through the backerboard into the wood cleat. This seemed to provide for a solid attachment. We had applied the staples for the rims through the wood into the backerboard and this allowed the backerboard to come loose from the rim. In a later test we applied the rim staples in the same direction as the cleat staples. This helped solve the separation considerably but not completely.
We then tested additional construction adhesives, hoping for better adherence. Eventually we decided on using Liquid Nails Fuze-It™ for the adhesive. It was the most expensive but the savings on wood cost will more than compensate for the adhesive cost.
Note: The use of backerboard screws was difficult to manage. Any excessive penetration of the screw head caused board chipping.
For painting, we tried the no cost recycled exterior latex paint on the tops. Two coats seemed to adhere and looked as if the cheap paint would work. To fully answer questions #6, #7 and #8 will take a year of exposure to the elements. Permabase® has a smooth side and a rough side. Initially we used the smooth side on the top of the top and the rough side on the bottom of the top. Eventually, through testing, we changed our design to place the rough side toward the top (sky) and the smooth side toward the hive. It was considerably easier to paint the rough side than to try to fill in the bubble holes that were in the cement on the smooth side.
We believe that warping will not be a problem and the problem of plywood delamination does not exist.
Subsequently, a test set of 20 covers were built and will be given a real-world test this Summer.
Parts
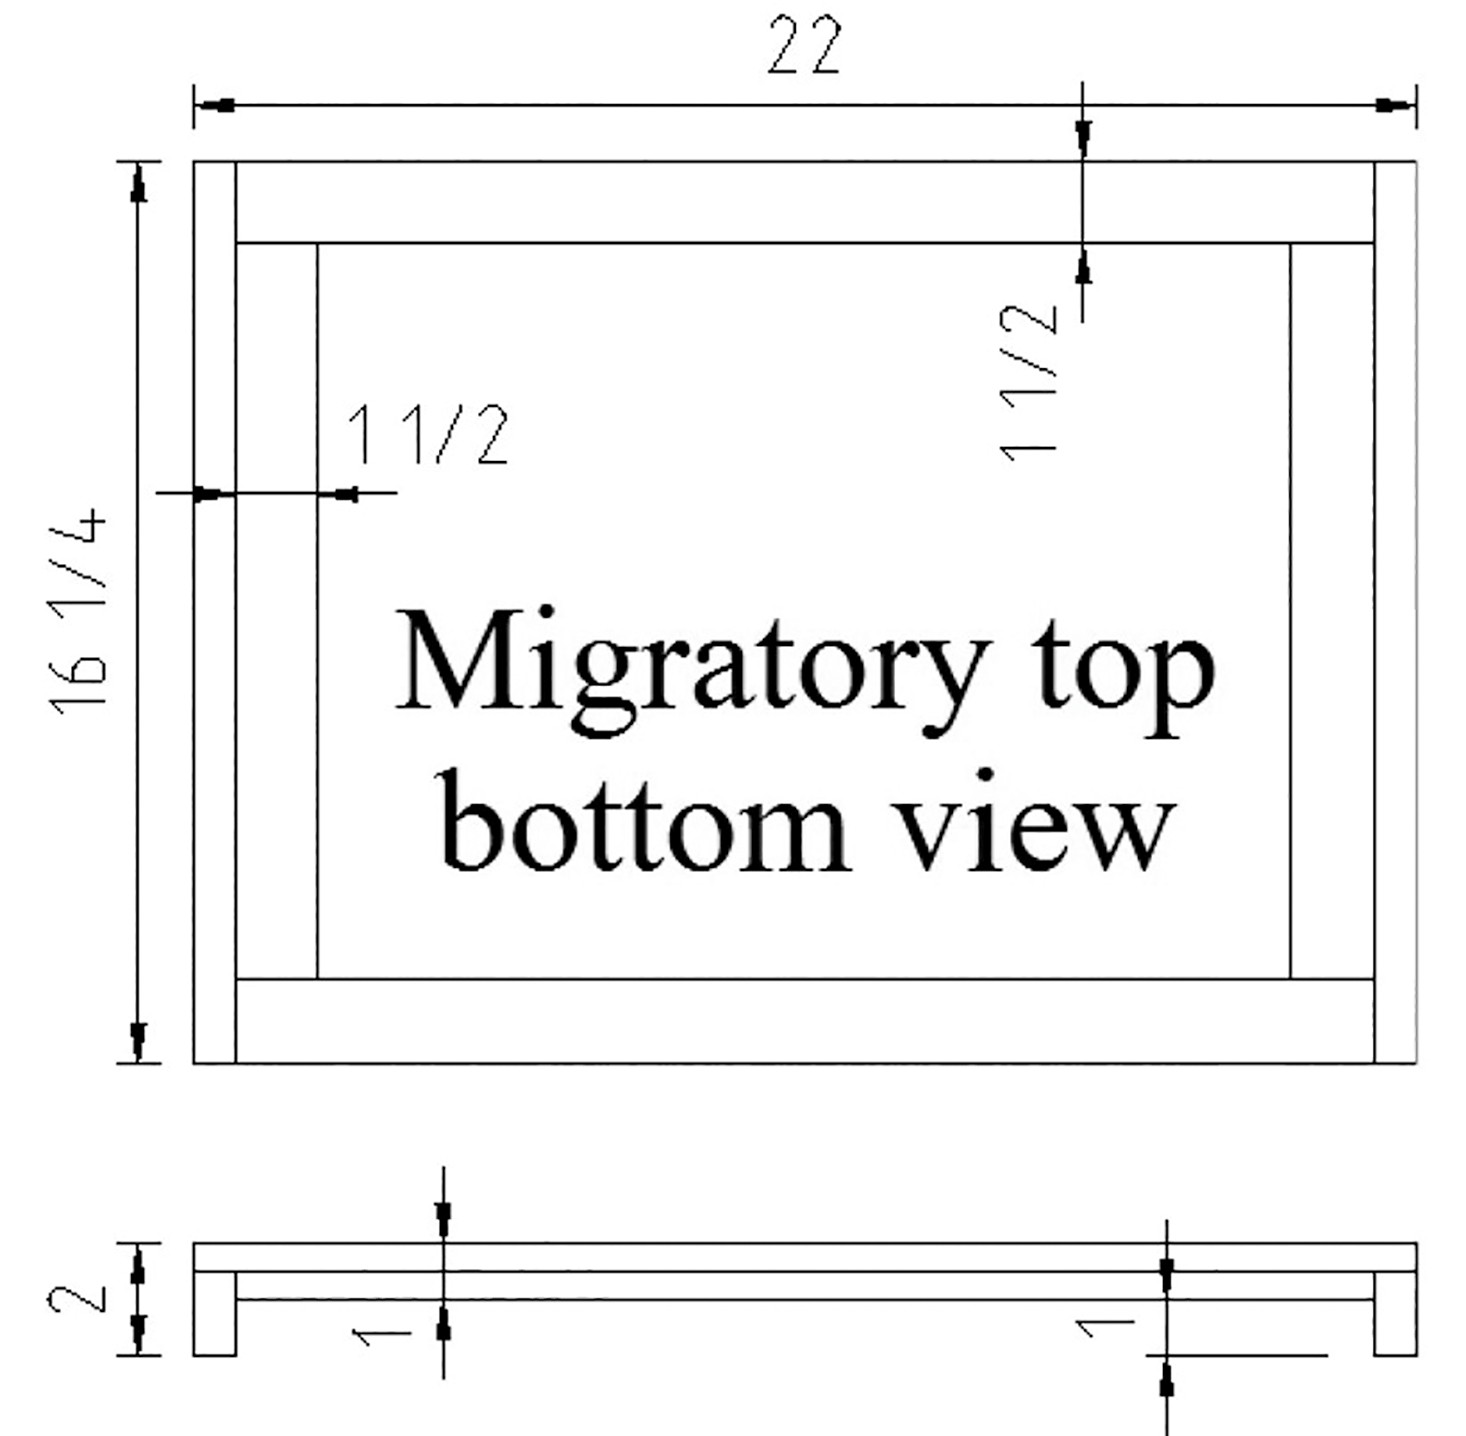
- 16¼” x 22” – Top (1)
- 16¼” x 1½” – Cleat (2)
- 1 ¼” x 20⅜” – Lath side Rim (2) – ¼” depth per layer
- 1¼” x 14⅝” – Lath end Rim (2) – ¼” depth per layer
- Construction adhesive – Liquid Nails – Fuze-It
- Spackle
- Special tool – fiber-concrete blade for a circular saw.
Construction
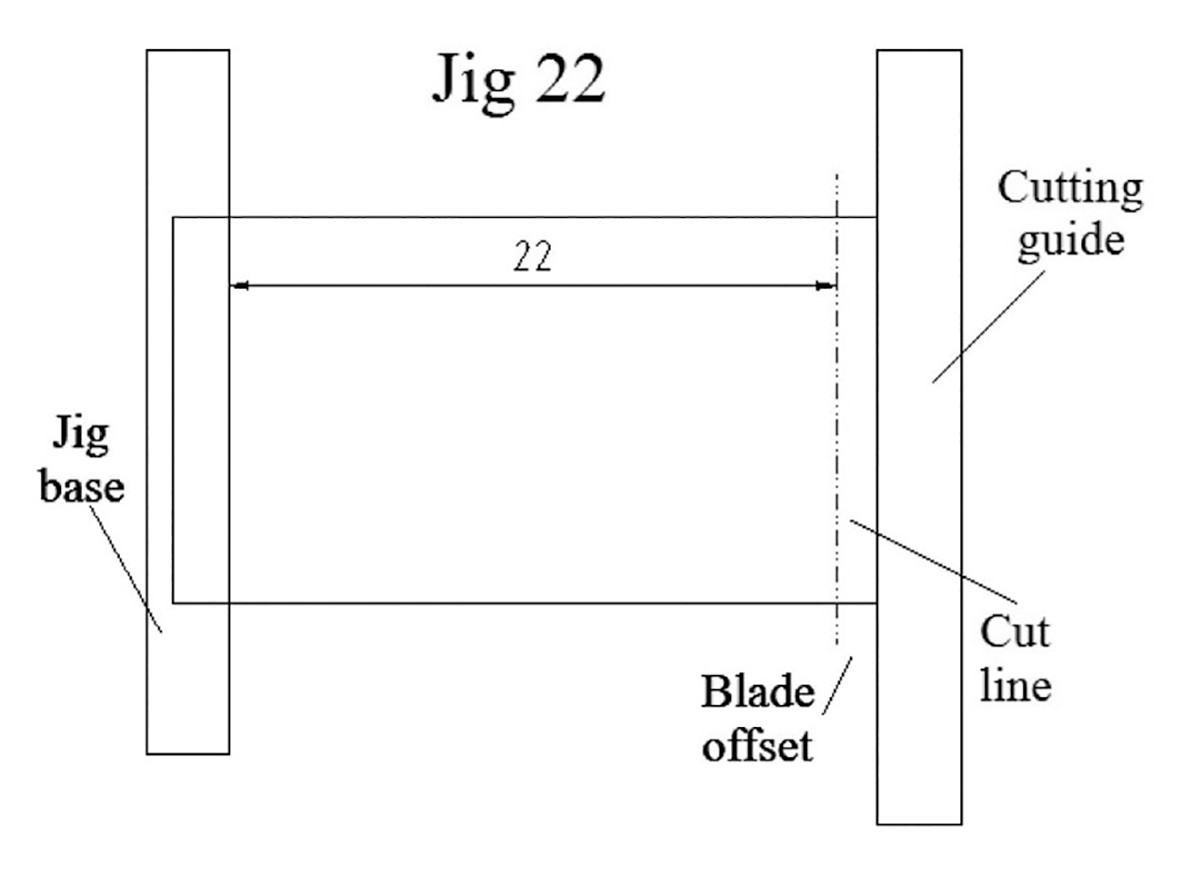
Using Jig 16, cut the 4’ x 8’ sheets of backerboard into strips and then use Jig 22 to cut these strips into the length needed for the tops. Then the end cleats are added to the top. The rim is added, and you complete the top with two coatings of free paint.
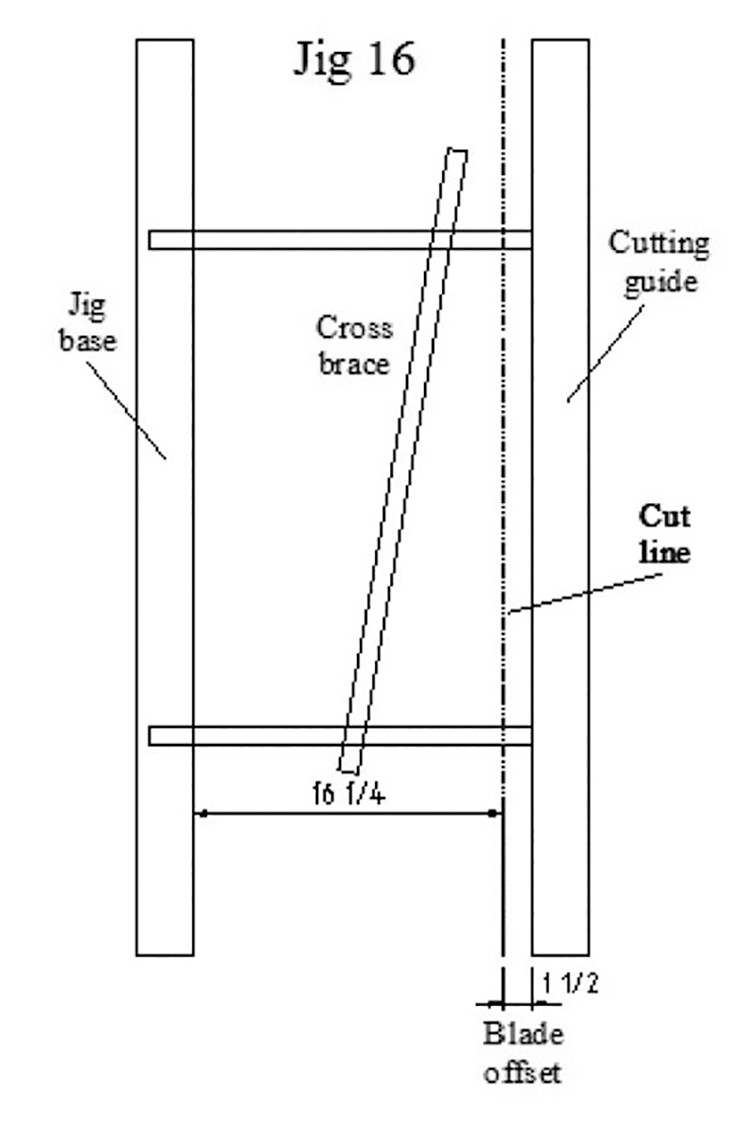
Step 1: Create two jigs.
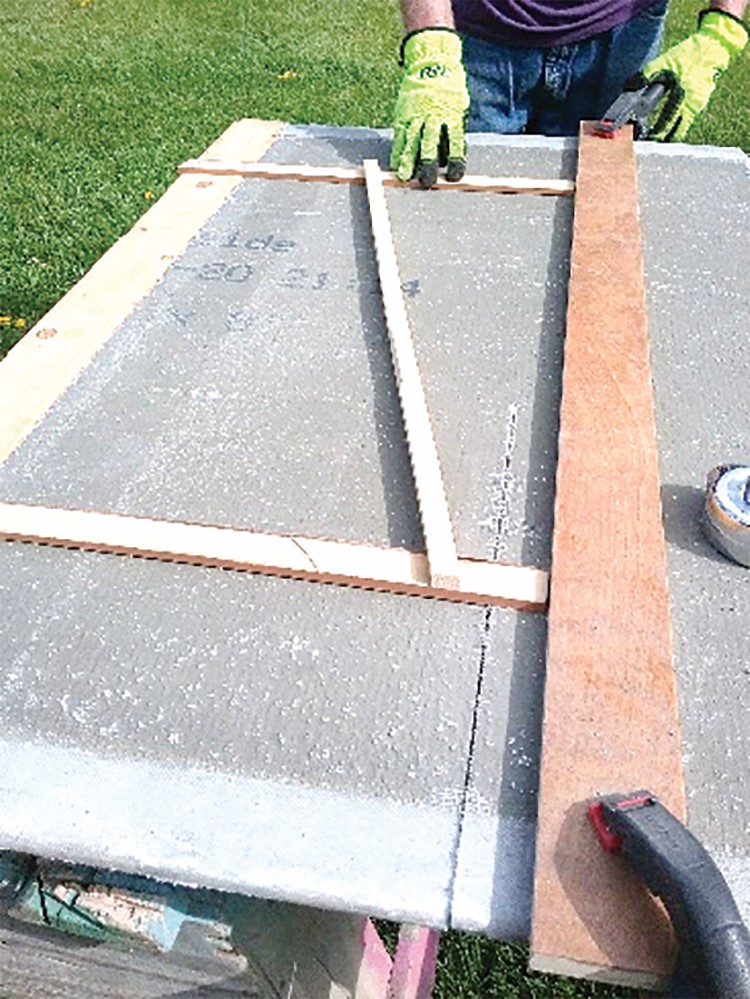
I am a firm believer in using jigs whenever repetitive operations need to be performed. Use the drawings “Jig 16” and “Jig 22”, to create these jigs for the width and length of the top. The jigs allow you to position a cutting guide for the circular saw. Using them result in straight cuts and a consistent top size.
Warning: These jigs position cutting guides, so the guides are offset by the distance of the saw cutting guide and the blade edge plus the blade kerf. The 1½” measurement in the drawings is for reference only. You need to use your own measurement. Be sure to double check the jig before committing it to use.
Step 2: Cut the top (part 1).
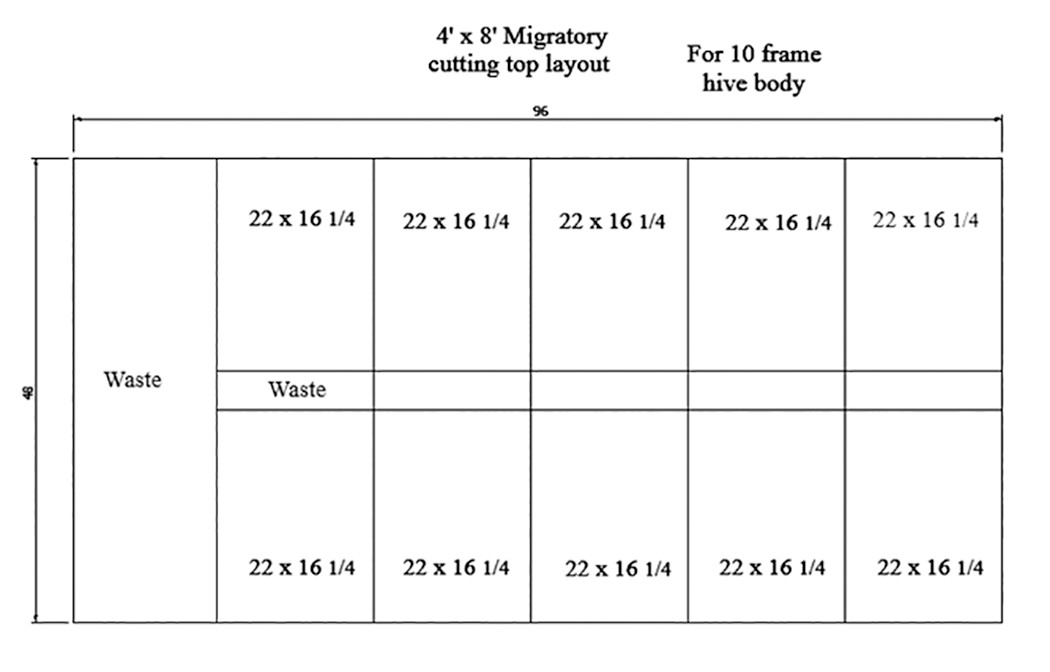
Using a fiber-concrete blade on a circular saw and your two jigs, cut the 4’ x 8’ backerboard into 10 migratory tops.
Place the jig base against the edge of the backerboard and then clamp the cutting guide to the backerboard. Remove the jig and the guide will be positioned correctly. Be sure to double check all measurements and perform a test cut before committing yourself to a complete cut.
Ref: See the Drawings section for the cutting layout of a 4’ x 8’ sheet of backerboard.
Note: Cut from the smooth side. The saw glides easier on the smooth surface.
Note: A 3’ x 5’ backerboard will allow for three tops. The 4’ x 8’ sheet of backerboard allows for 10 tops. Three tops at $3.33 each or 10 tops at $2.50 each. (spring 2021 prices)
Note: A 4’ x 8’ Sheet of backerboard is heavier and more flexible than its plywood equivalent. Use caution and help.
Warning: Wear safety glasses! Small cement and stone chips will chip regular glasses and harm unprotected eyes.
Step 2: Cut the cleats (part 2).
The width of the cleats is based on the use of a rim. The width of the cleats is 1” plus the thickness of the rim you need. This calculation ensures the cleat will have a 1” overlap on the hive body.
Note: A 1” x 8” x 8’ board will be able to be cut into 20 16¼” x 1½” cleats.
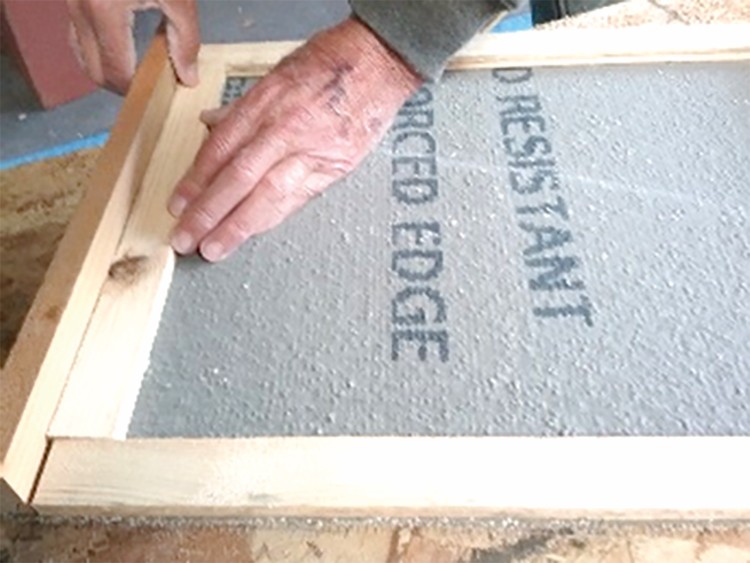
Step 3: Add the cleats (part 2).
Use construction adhesive (part 5) and staples or backerboard screws to attach the cleats to the top.
Important: The staples should go through the top into the cleat!
Information: The Permabase® backerboard has a smooth and a rough side. After testing, we positioned the rough side on the top. The smooth side has lots of tiny holes which are not easily filled with paint. The rough side has no holes, so it paints easier and better.
Step 4: Cut the side rims (part 3).
Set a stop-block on your radial arm saw and cut the lath for the rims.
Depending on the depth of the rim you need, you may need to cut additional pieces. Each additional piece adds ¼” to the depth of the rim.
Hint: Measure the distance between the cleats of your top. Cut the length slightly shorter than needed for an exact fit, this wiggle room allows for flexibility during assembly.
Note: Lath is available in most lumber stores. Unfortunately, it is not of consistent size and quality. It is sold in bundles of fifty pieces. Each piece is about ¼” thick and four-foot long. Choose a bundle that is consistent in thickness and of decent quality. The width of the strips does not make any difference.
Note: By adding the lath (rim) to the underside of the top you provide a larger space above the frames in the same manner as an inner cover and it adds rigidity to the top.
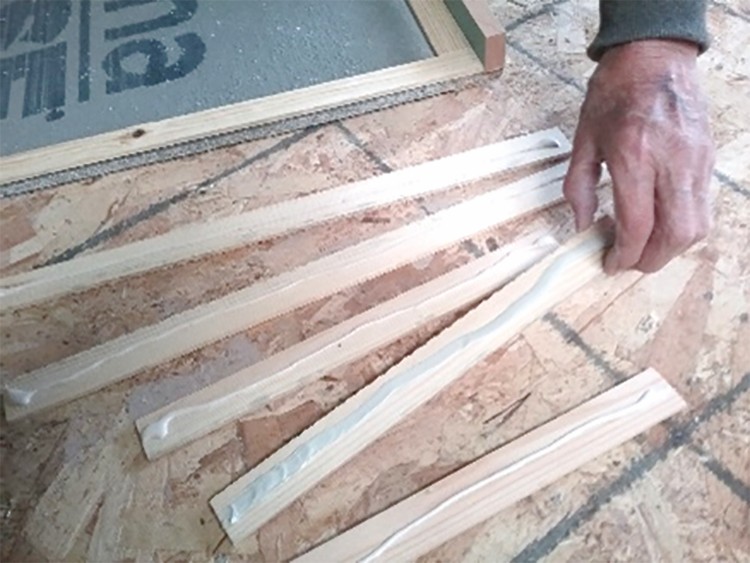
Step 5: Add the side rims (part 3).
Using construction adhesive and staples add the lath cut in a previous step to the underside of the cover. If using multiple layers of lath, assemble the rim first. Use exterior wood glue between the wood layers. Then add the wood to cement adhesive (part 6) to the still wet assembly. Install the rim to the top by placing two alignment staples from the wood into cement top to hold the rim in place. Then turn the top over and add the cement to wood staples to finish the installation.
Step 6: Cut the end rims (part 4).
Measure the distance between the side rims that you installed in the previous step.
Set a stop-block on you saw and cut the lath to your measurement less a ⅛” wiggle room.
Step 7: Add the end rims to the top.
Glue and staple or nail the lath cut in the previous step to the ends on the underside of the cover using the same technique you used in the previous step.
Step 8: Spackle the edges.
Using exterior spackle, coat the edges of the top. Then sand the spackle when it is dry. This makes the painting of the top considerably easier.
Step 10: Paint the cover
Using the external latex paint, you got from the recycling center, paint the cover.
Two counts of paint are needed, you should be extremely careful about covering the end grain of the cleats and the side grain of the lath.
Conclusion
Cheap, easy and fast to build, this migratory top will last for a decent time. With a cement top, warping should not be a problem. The extra weight of a cement top may also eliminate the need for the rock you place on your covers.
The tops we made will now undergo a yearlong test to prove or disprove the usability of using a cement backerboard as a migratory top.
Drawings – Migratory Top
Note: The double rim lath of ½” is used to keep the hive heights consistent with older migratory tops.
This was needed to help with the stacking of pallets and hives for shipping.
Get a copy of Ed Simon’s new book Build Bee Equipment with detailed drawings, construction hints and how-to-use instructions for over 40 beekeeping tools and equipment from www.LULU.com. Under the LULU sales section, search for “Beekeeping”. Ed can be contacted through SimonEdwin41@gmail.com