


No More Plastic
Ed Simon
Are you tired of using a plastic uncapping tank that moves whenever you bump it and then needs to be repositioned with your sticky hands? Then when you are only halfway through the uncapping process, it needs to be emptied. You can build a stainless uncapping tank that will solve this problem. By using your dumpster diving and scrounging skills the cost of a stainless-steel uncapping tank can be reduced to a minimum. Even the welding cost can be eliminated by asking a relative or friend to help. Thankfully, my grandson Logan provided the metal working skills that were needed to construct this tank.
- Criteria/Discussion
- Easily cleaned.
- Inexpensive
- Easy capping/honey collection.
- This must be easily unloaded or emptied.
- All parts that touch the honey should be made of stainless steel, brass, plastic, or aluminum.
- A strainer needs to be included to allow for the initial draining of honey from the cappings.
- Usable from both sides (left or right-handed).
Parts
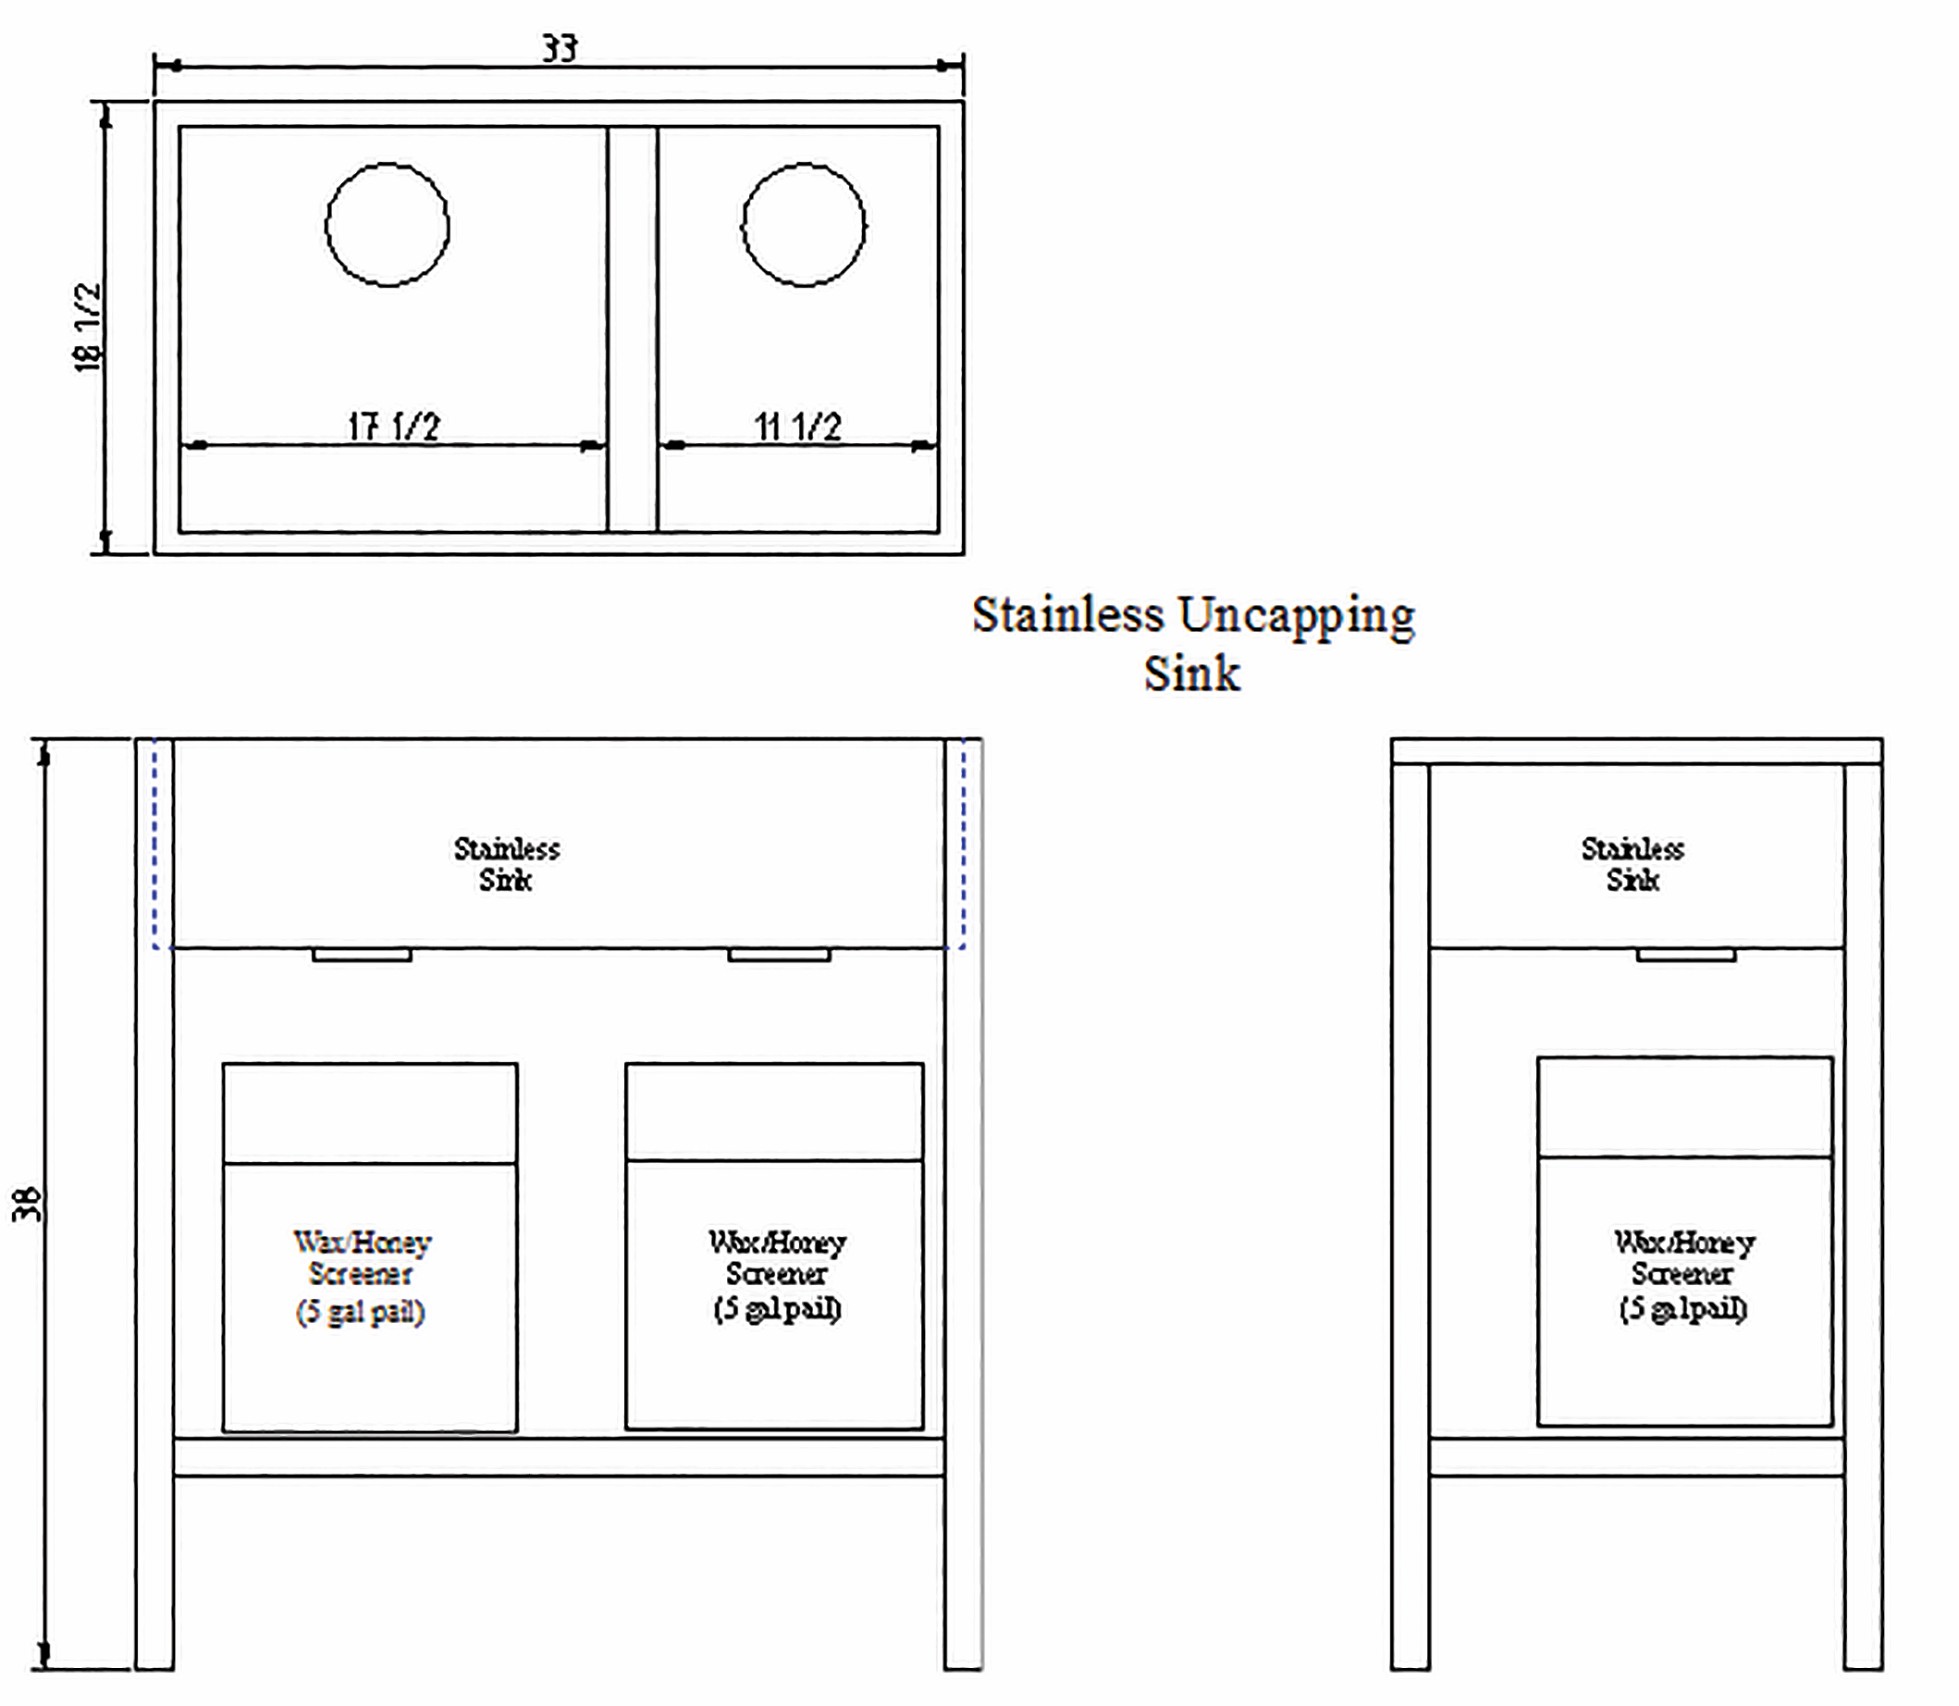
- Stainless sink (1)
- Angle iron
a. Sink rim long side (2)
b. Sink rim short side (2)
c. Legs (4)
d. Shelf support/brace long side (2)
e.Shelf support/brace short side (2) - Leveling bolts and nuts ¼” (4 sets)
- Silicone seal
- 11” x xx” x xx” – Shelf (1) (optional)
Construction
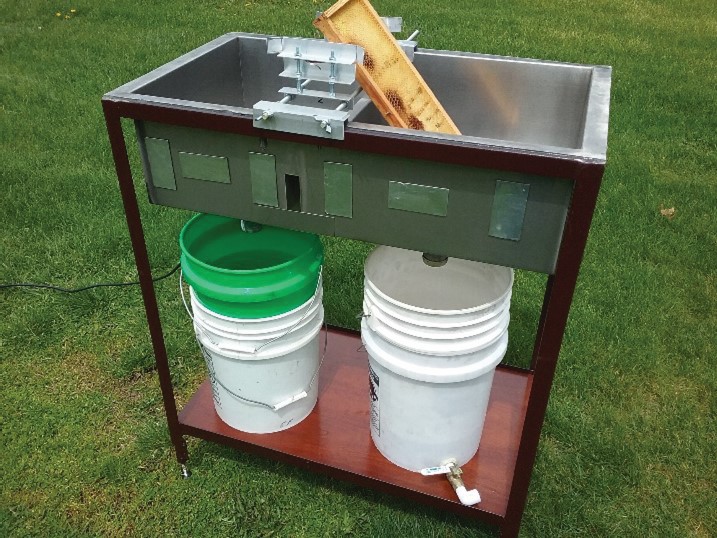
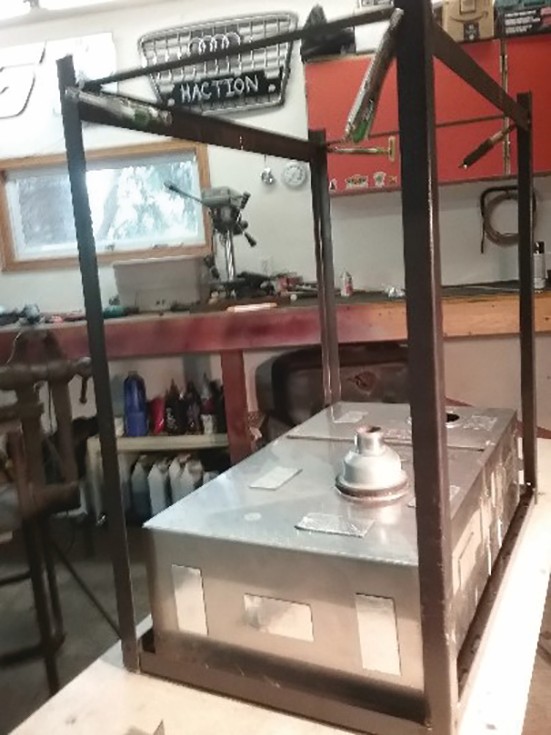
The building of this uncapping tank is straight forward. A stainless-steel sink is suspended in a welded angle iron frame. Keeping the frame square while welding is required but not difficult. By adding the leg levelers, you can make it stable on unlevel surfaces.
Note: Dimensions in the drawings and in this text are for reference only. Actual measurements for your sink and support are based on the sink’s dimensions and wax collector.
Note: All angle iron needs to be cleaned and deburred after it is cut. Welding is considerably easier and stronger if the metal is properly prepared.
Note: All welds were initially tacked in place. Before the unit was the finished the welds were finalized.
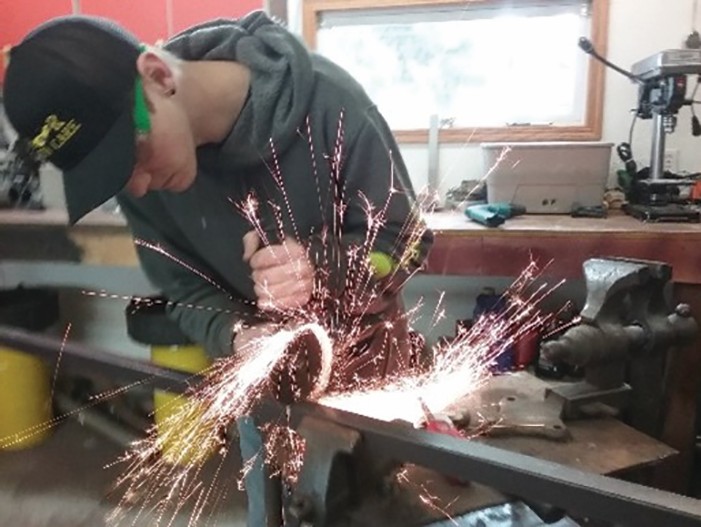
Note: All the metal for this sink stand was cut with a 4½” angle grinder. The resulting cut was cleaned and deburred with a sanding disk on the grinder.
Warning: When working with welded material, be careful. It retains the heat for a long time after the weld is complete.
Warning: Do not look at the welding process without wearing welding glasses. It will damage your vision.
Warning: When using an angle grinder, wear safety glasses. Metal particles can damage your eyes.
Step 1: Acquire the sink.
Some things to consider when selecting a sink:
- Size
- Depth
- Extra faucet holes
- Number of sections
- Does the sink fit under the counter or set into the counter?
This is where your dumpster diving skills and your relationship with local businesses is important. Check the local kitchen remodelers in your area. When they remodel a kitchen, the old sink is scrap. I had unlimited used scrap sinks available at one remodeler. It did require me to continually check the scrap sink pile for a usable candidate. After selecting two candidates from this source, I found a better square farmhouse style sink at the local Habitat for Humanity Resale Store for $25.00. I could now eventually make three uncapping sinks.
Step 1: Acquire the angle iron.
Angle iron is expensive when purchasing it new. But it can be obtained from mattress manufacturers or sales. Often when a mattress is sold a new set of support rails is needed. The old rails end up on the scrap pile at the sales location. Another source of cheap angle iron is the local Goodwill, Salvation Army or Habit for Humanity store. A Set of bed rails that can be repurposed were available at the Habit for Humanity Resale store for $15.00.
Step 2: Clean and prepare the sink.
Under rim of the sink there is accumulated dirt and possibly mounting brackets. Remove these so the sink will set flat on the frame you are building. Leave the sink drain attached to the sink.
Inside the drain there is a cross piece that is used to stop extraneous material from entering the drainage system and clogging it. Remove the cross piece and smooth the edges with a grinding drum. Removing the cross piece allows larger chunks of wax to drop through the drain and smoothing it eliminates cuts when you use your fingers to clear it.
Note: Leave the weird looking patches that are on the sides and bottom of the tank in place. These are used to suppress noise.
Step 3: Weld the stand top.
Cut and weld the rectangle the sink will sit in. This needs to be tight so the sink won’t shift while using it. After finishing the frame, add a couple spot welds to freeze the sink in place.
Step 4: Cut and weld the legs to the top frame.
The leg length in the parts section is only a suggestion. Remember you will probably be standing while using the sink so the leg length should be longer than needed for a standard table. You will also be adding adjustable feet to the legs that will increase the height of the sink.
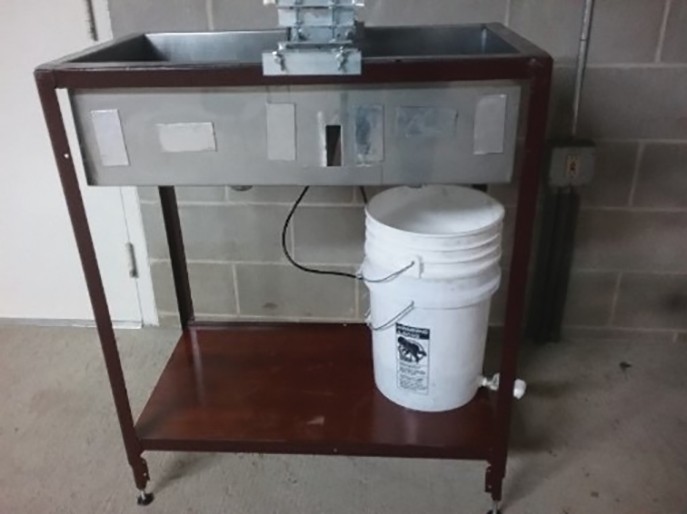
Step 5: Add the shelf support/leg stabilizers.
Explanation: The shelf support accomplishes multiple objectives. It stabilizes the legs and holds them in alignment and at the same time it supports a wax/honey collector.
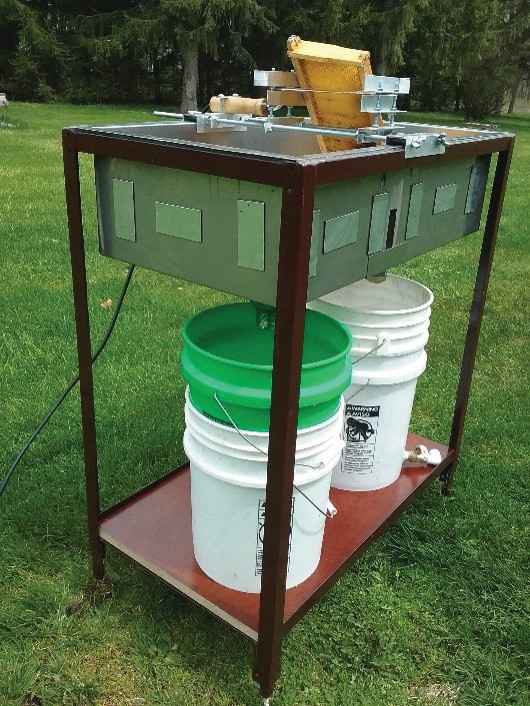
Note: We use two five-gallon pails with straining bottoms that are located under the sink drains to collect the cappings. Whatever you use, to collect the cappings, it needs to be easily removed and replaced during the uncapping process.
Reference: See “Build a Honey Strainer” Bee Culture March 2020 issue.
An easy way to locate the shelf support is to place your collection device under the sink and then keep all pieces of wood under the device until it is at a height that works for you.
Tack the support rails in place and give it a try before permanently welding it to the legs.
Step 6: Add leveling bolts.
Weld a nut to the inside angle at the bottom of the legs. Then thread a bolt with a large head through this nut.
Note: Some bed support rails have feet that can be used to stabilize the bed. We were lucky and were able to weld these feet to the bottom of the sink legs.
Step 7: Permanently weld the frame and clean it up.
Finish welding the frame where you placed the tack welds. Then clean and smooth all the welded spots.
Step 8: Paint the frame.
A rust inhibiting glossy spray paint from a can is the easiest way to paint the frame.
Step 9: Seal the sink to the frame.
Use clear silicone seal to seal the cracks between the sink and your new frame. This will stop the honey and wax from getting into in these openings which will make cleanup easier.
Hint: Edge each side of the area to be caulked with masking tape. Then after applying the sealant and before the sealant dries, smooth it with a wet finger. When satisfied and before the caulk dries, remove the masking tape. This makes an excellent joint.
Step 10: Add Wax Shelf. (optional)
Cut the piece of plywood to fit on the leg braces added in the previous step. Then seal and paint it before it is used. This will make cleaning it a lot easier.
Suggestion: Get a section of old countertop to be used for this part. The Formica covering is much easier to clean than varnished plywood.
You did it again! You now have a stainless uncapping sink that will last a long time. You will still need to attach your uncapping device to the sink. Many designs are available for these devices or you can develop your own.