


By: Ed Simon
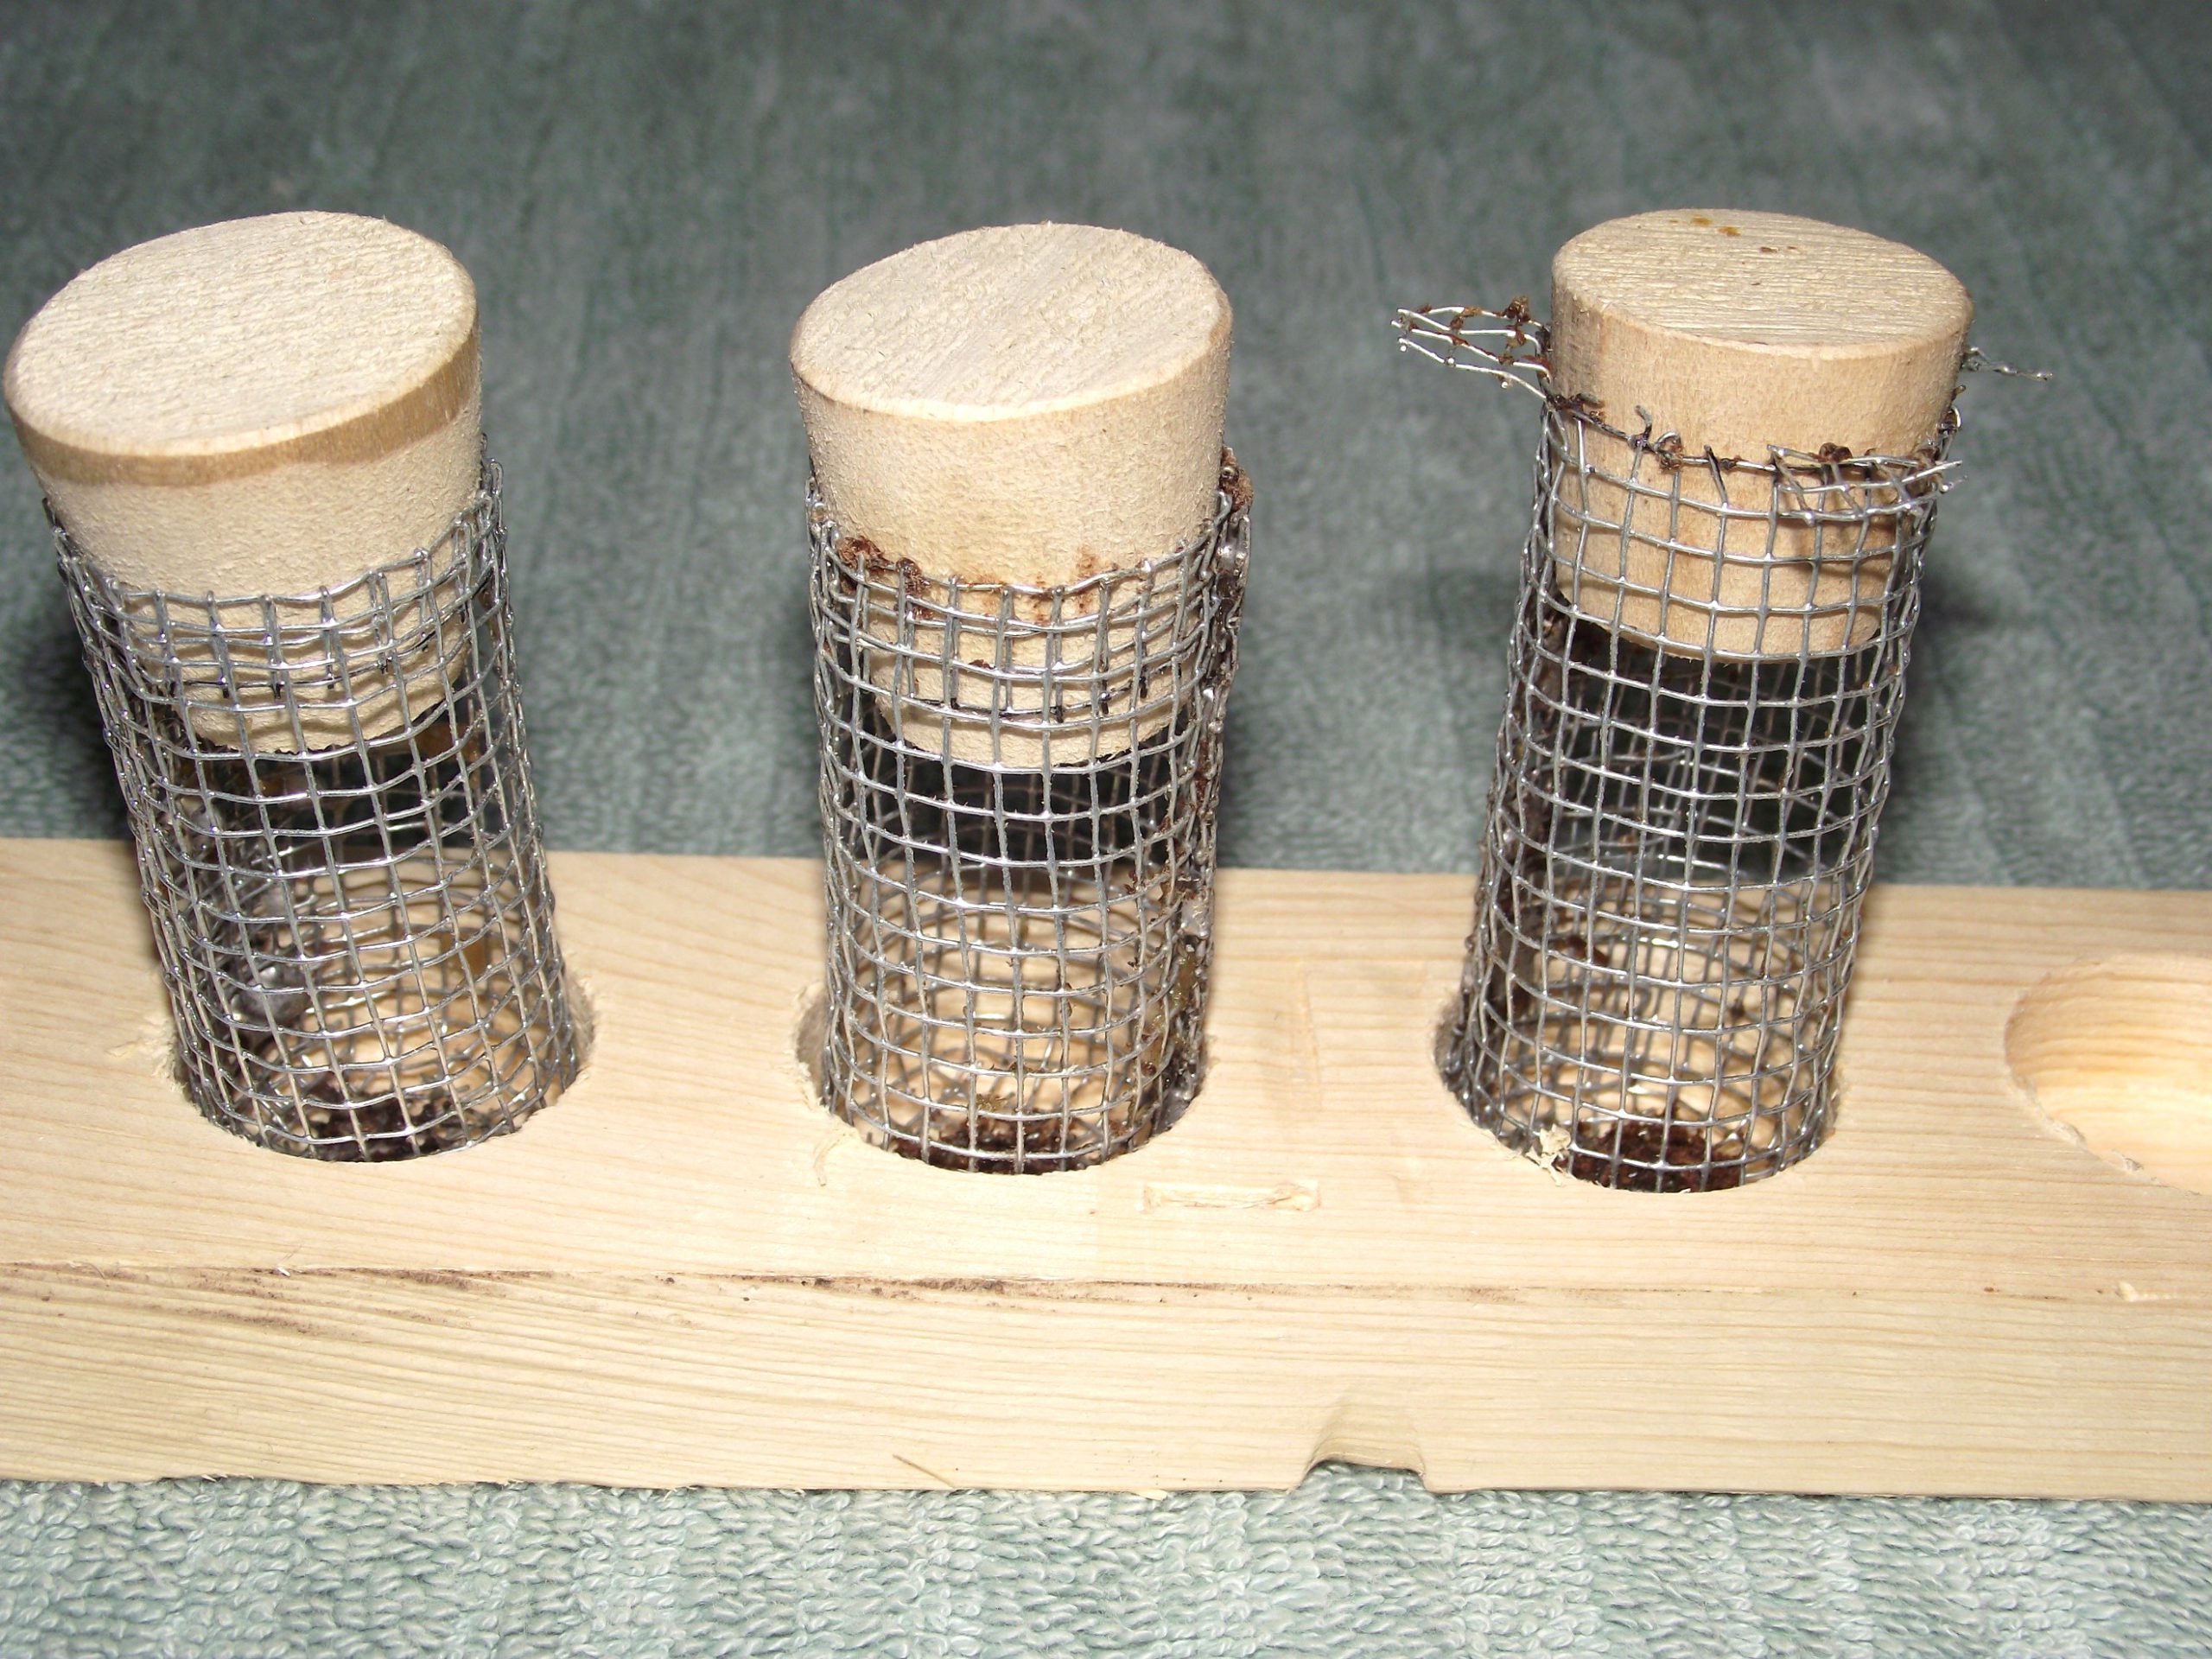
When raising queens, it may become necessary to store virgin queens for later mating or sale. Once mated, queens need to be stored until they are used or sold and delivered. By isolating queens within individual cages, you can use them at your convenience and reduce the amount of equipment needed. Queen containment cages and a “Queen Bank” provides a safe and convenient storage.
Objective
Provide an inexpensive way of isolating multiple queens so they will not kill each other.
Parts
1/8” hardware cloth
Soldering equipment or Epoxy
Wood dowels – multiple diameters
Note: There is a grain to woven hardware cloth. The wires that run the length of the cloth is called the “WARP”. The cross wires are called “WEFT”. “WARP” wires are usually straight whereas the “WEFT” wires are seldom straight. These standard weaving terms will be used during the following explanation.
Construction
First, we will build two jigs and then build a tubular hair roller style cage that is used to store the queens and then build a wood stopper or cap for the cage.
Preparation
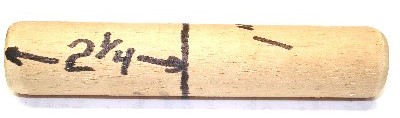
Let’s assume that you will eventually create multiple roller cages. Using jigs creates consistency. They also help keep parts in alignment during assembly. The following construction steps are for a one-inch inside diameter hair roller care with a working length of 2¼”. For different diameter or length cages, use different diameter dowels and adjust the dimensions accordingly. Once these jigs are created, save them for reuse. They will provide consistency across different assembly sessions.
Step 1 – Cut a cage template (jig)
Cut a four-inch by four-inch square piece of scrap wood that you can use to lay out the basic cage.
Step 2 – Make a cage jig
Cut an appropriate size dowel to a length of around five inches. Then bevel the ends slightly so you can slide it in and out of the cage without it getting caught. Add markings for the diameter and length so you can use it again with consistent results.
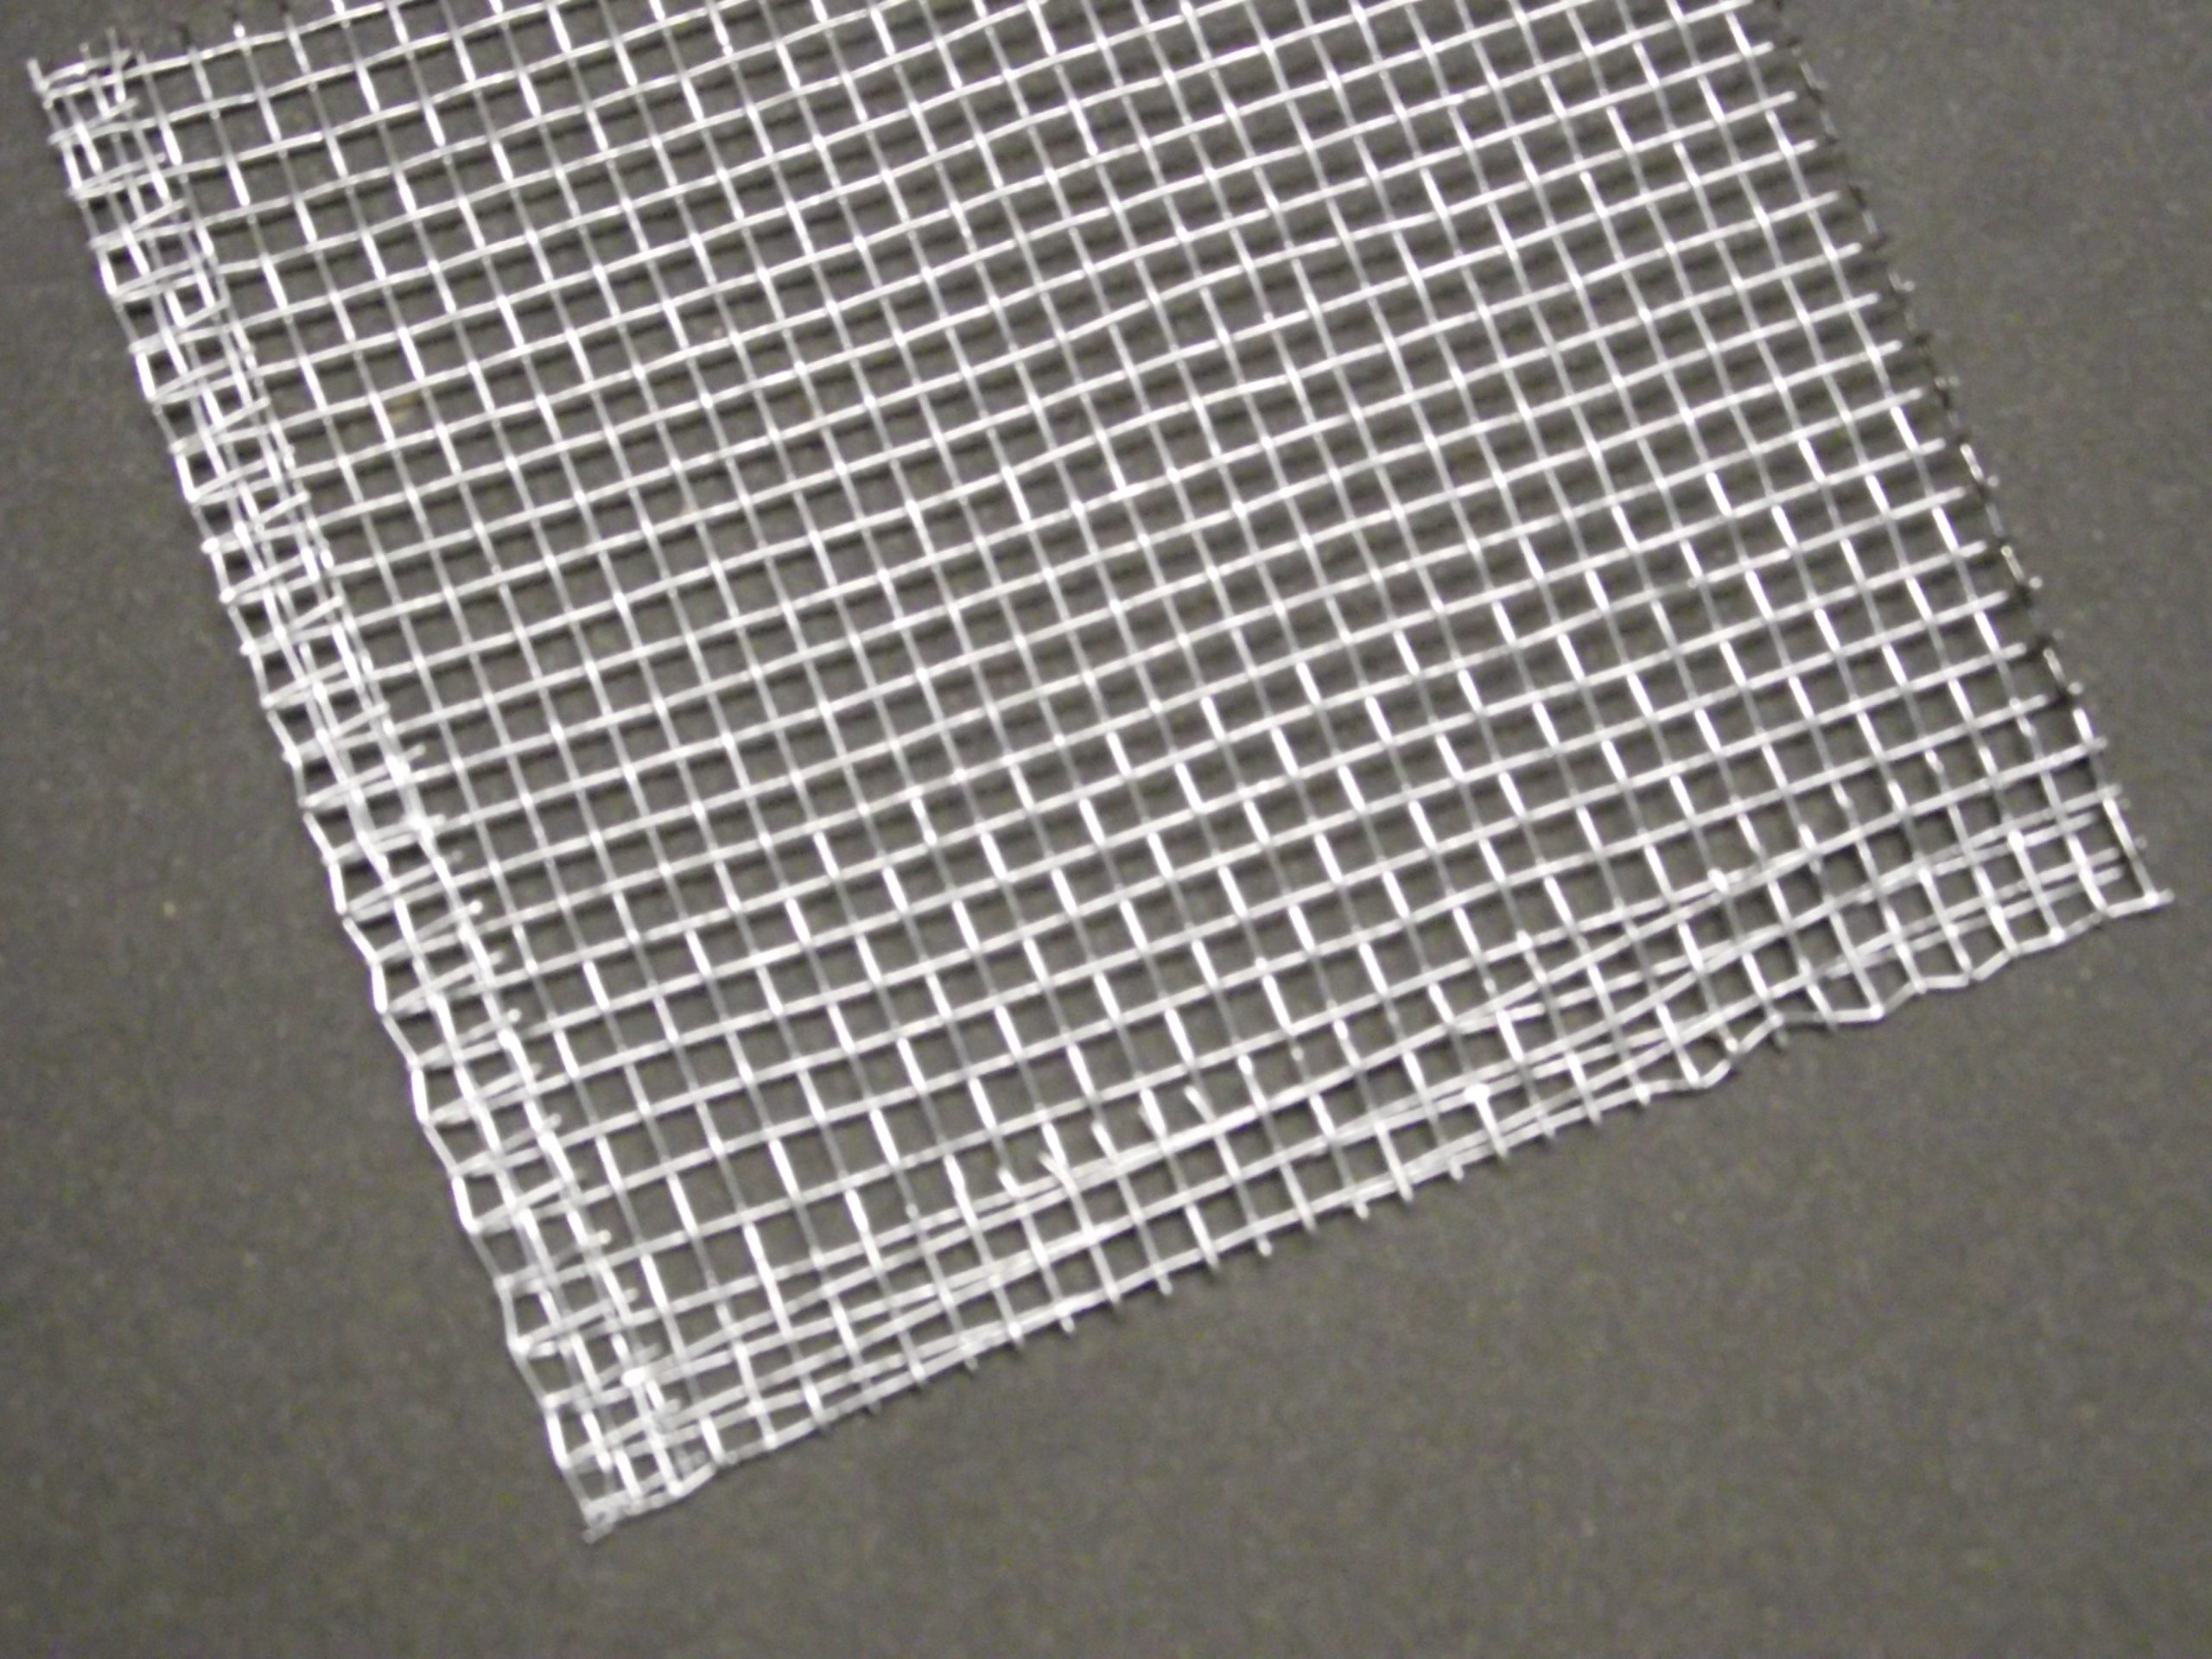
Step 3 – Cut the basic cage
Using the template jig created in step 1, mark cutting lines on a piece of hardware cloth. Very seldom is the hardware cloth wires straight or square. Align the cage template the best you can with one of the wires. Then, use a felt tip marker to draw the cut lines.
Note: Aligning the pattern with a warp wire is usually the best option.
Step 4 – Cut the basic cage body
Cut along the lines. Keep the cut edge as close to the wires as possible. This eliminates some of the nasty words later when you are forming the cage body.
Note: For safety, the following “Hemming steps” are designed to eliminate most of the raw end of the wire.
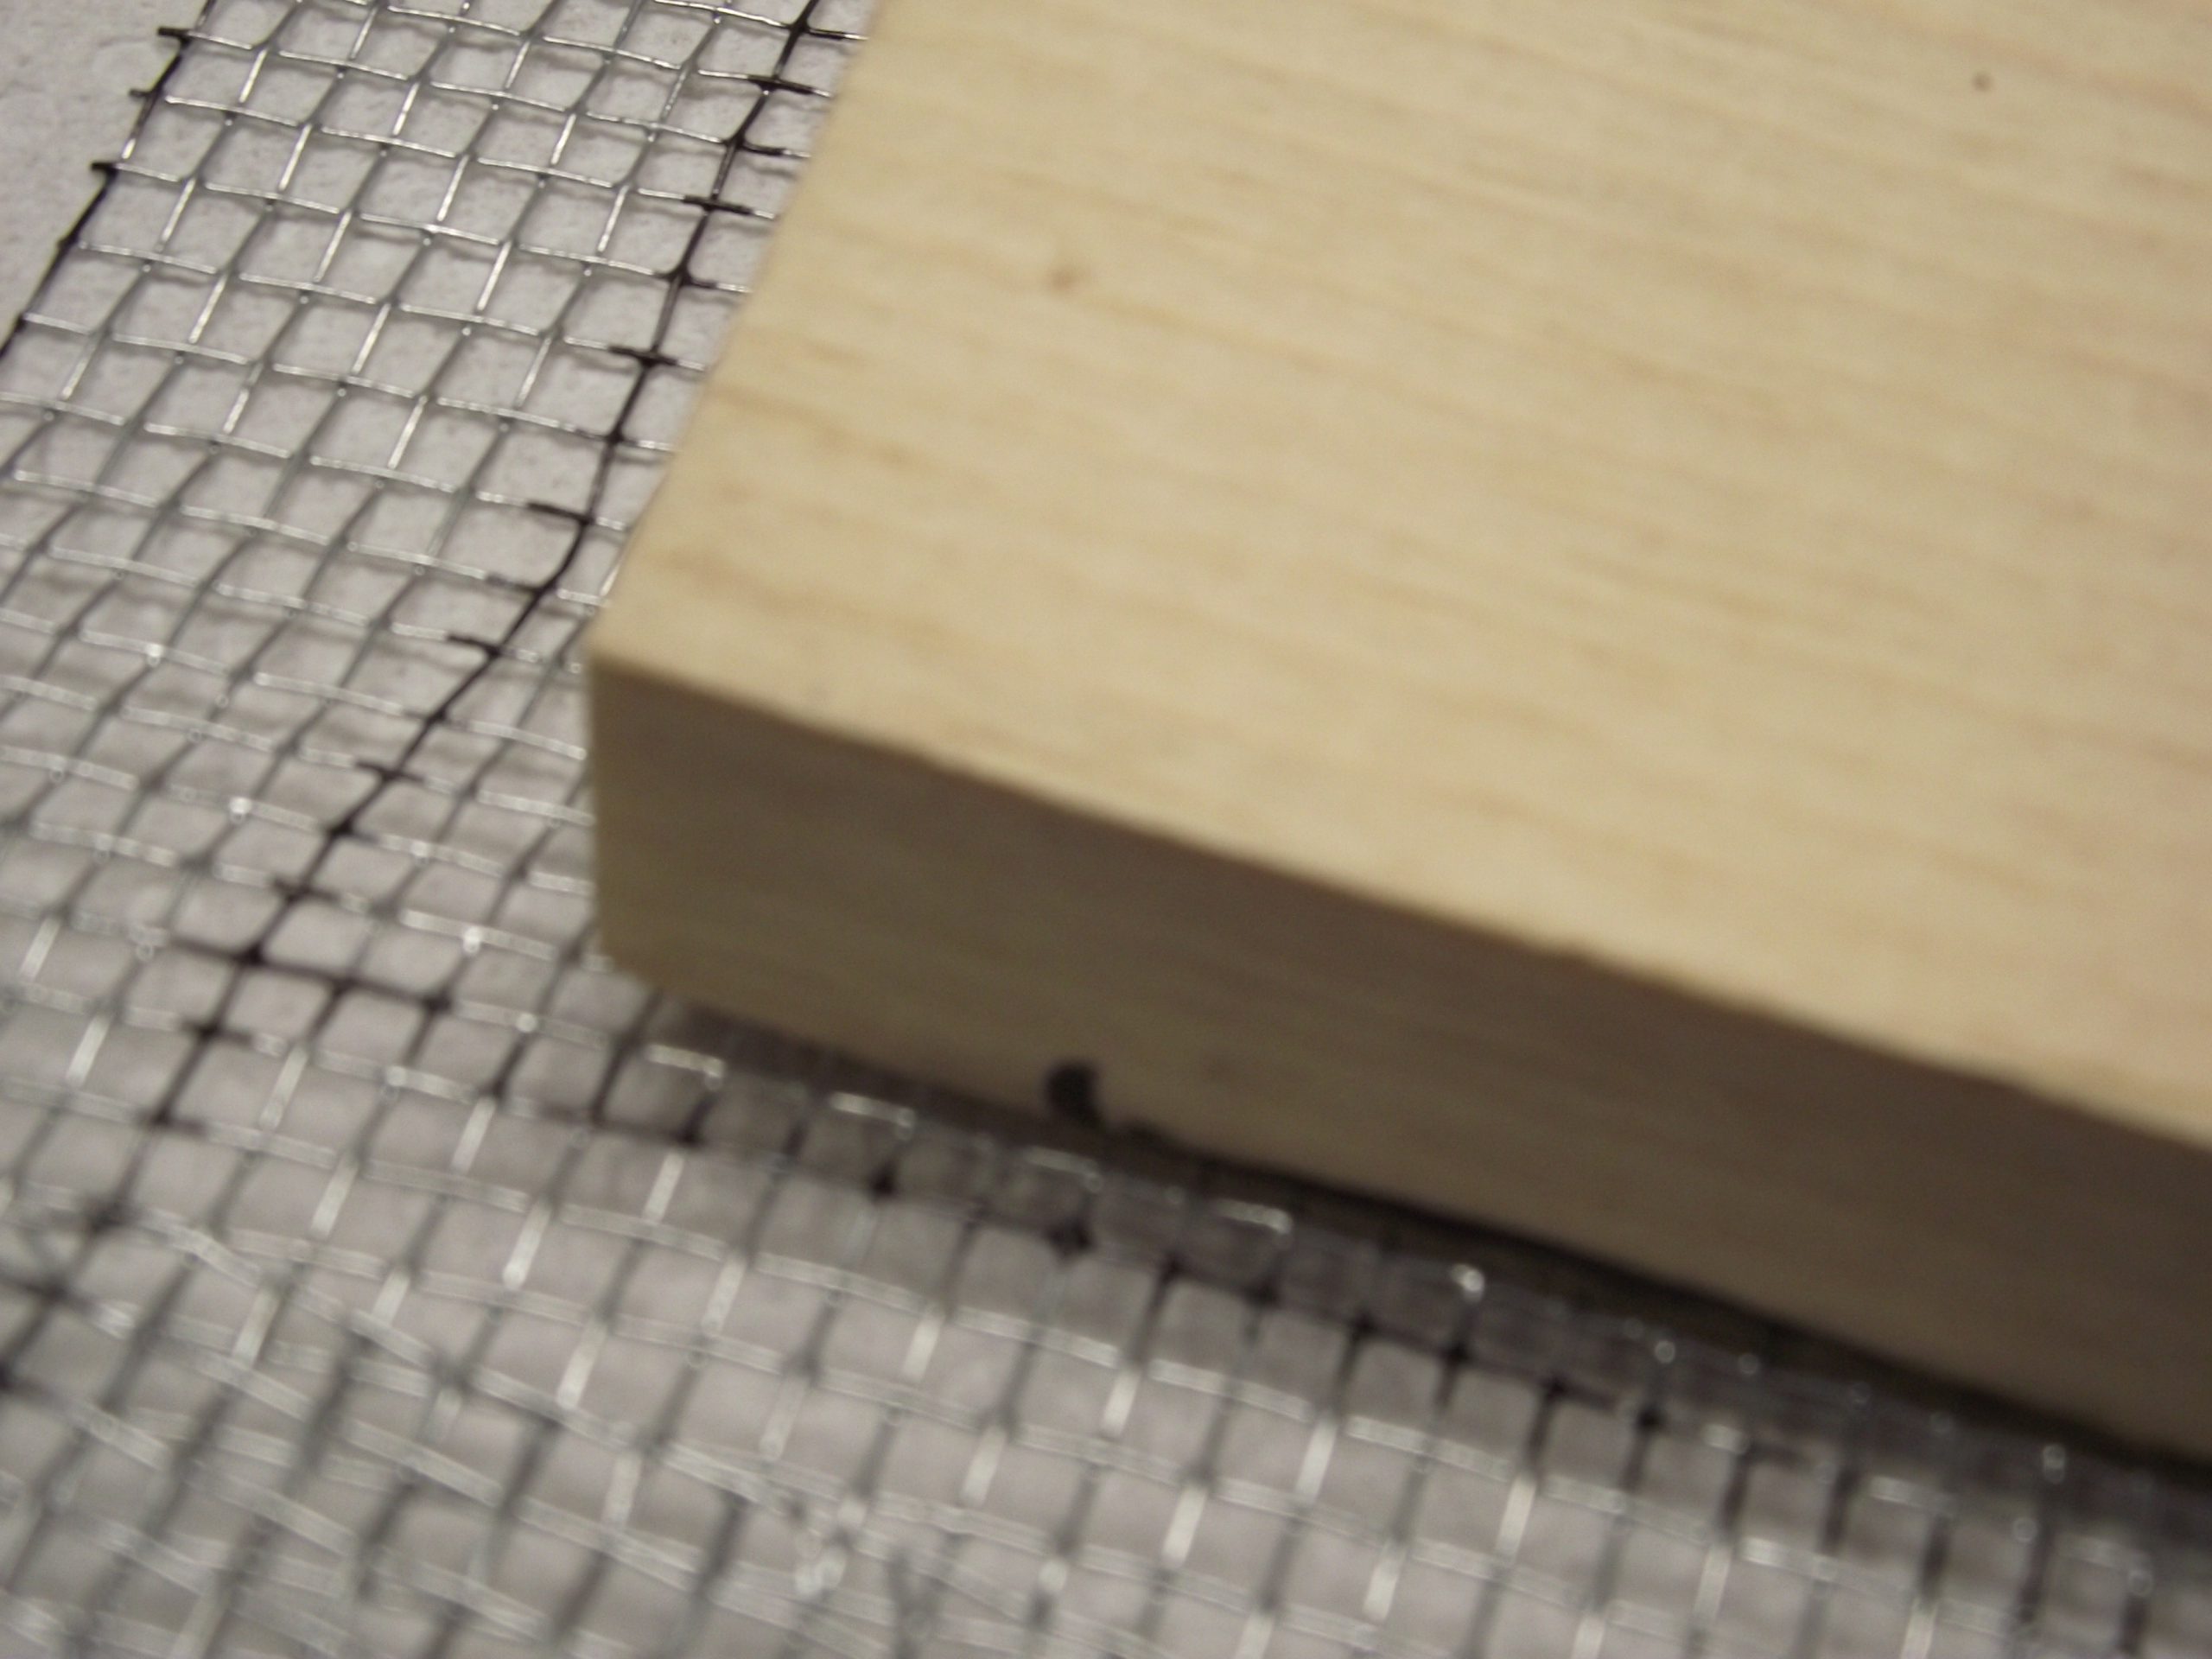
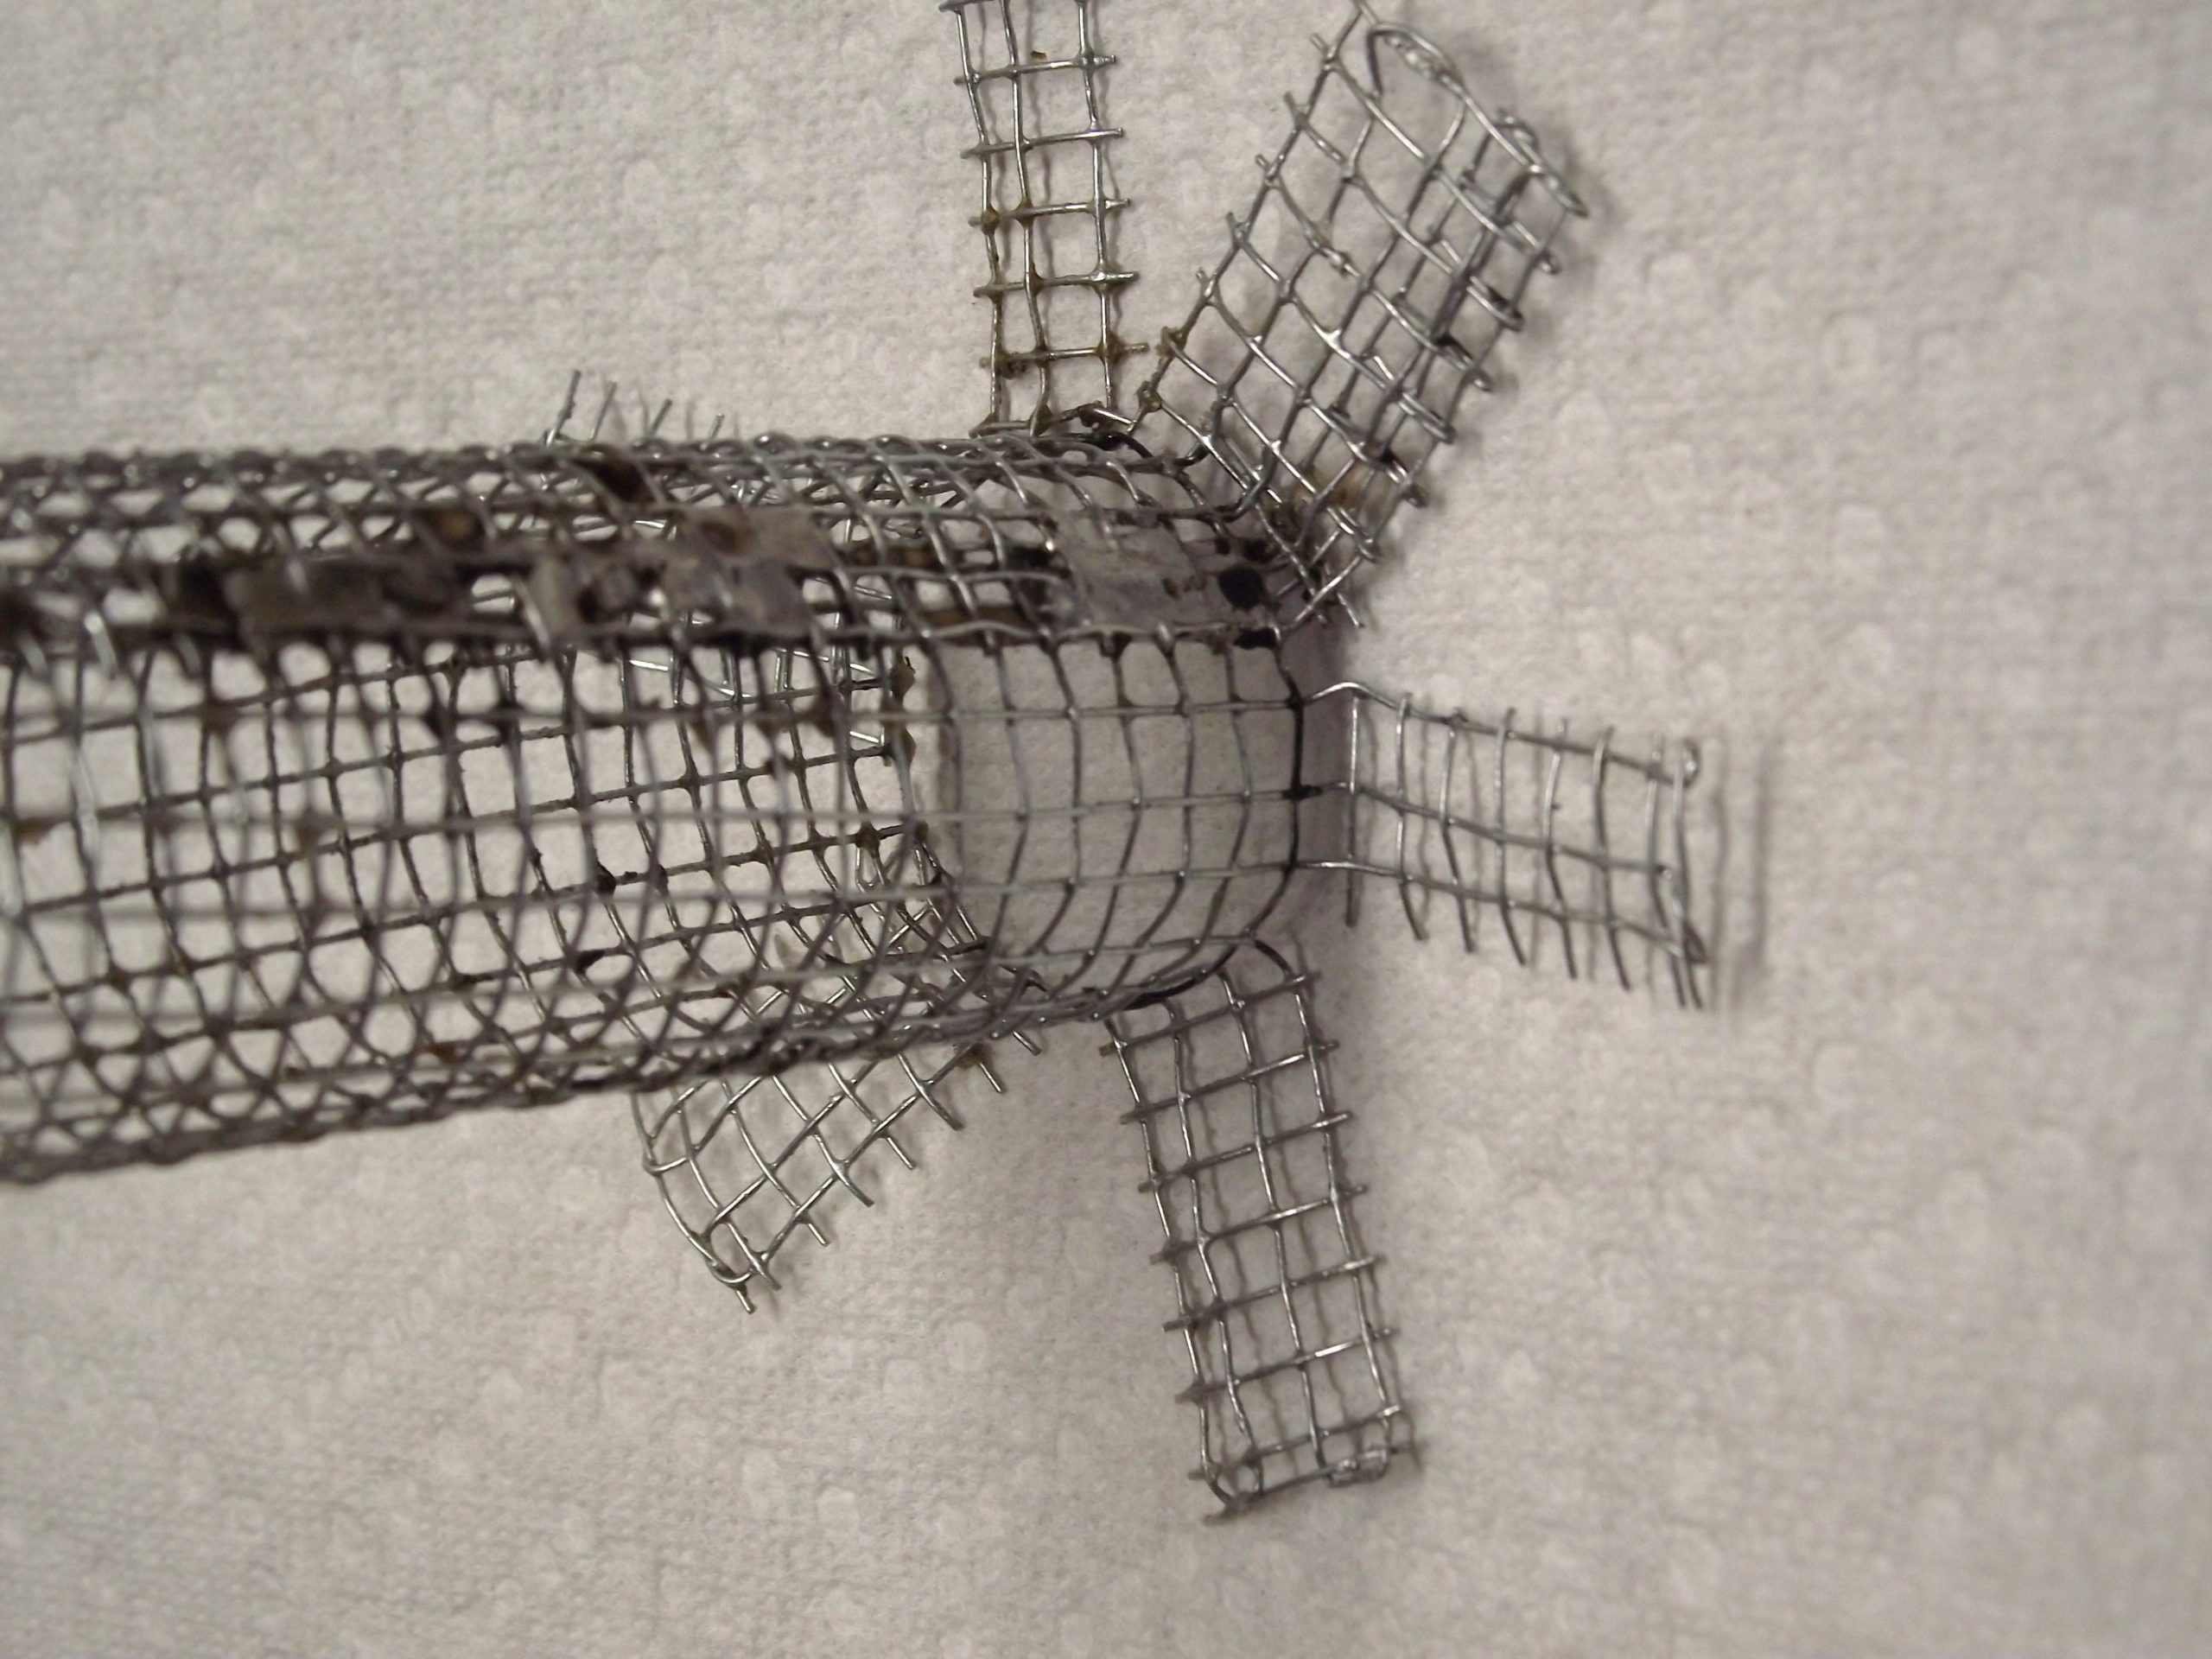
Step 5 – Remove the corner section from the cage body
Cut a ¼” x ½” section from a corner of the cage body.
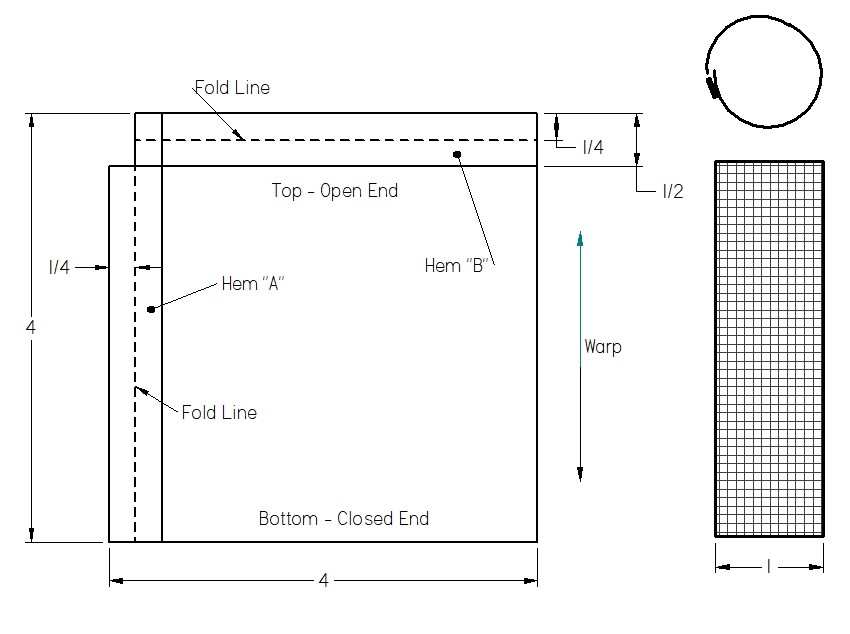
The corner cutout is so the wires will not overlap when the cage is hemmed. The measurement for this removal is easy. It is two holes by four holes.
Note: See the diagram for the basic cage layout.
Step 6 – Hem the cage body (Hem “A”)
Using a warp (straight) wire for alignment, bend the hem at the ¼” (two hole) mark. This is an easy alignment since each hole in the wire is ⅛” and the warp is usually the straightest.
Step 7 – Hem the cage body (Hem “B”)
Bend the adjacent edge over to form the second hemmed edge. Unless you are extremely lucky, this will not line up with a weft wire. Make the hem as straight as possible with a 90° corner.
Checkpoint: You should now have a square with two of the adjacent edges having a ¼” hem.
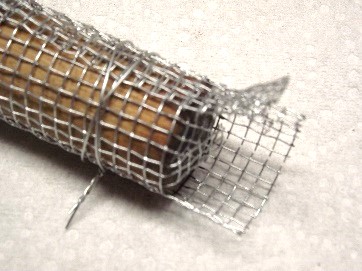
Step 8 – Form a tube with the cloth
Using your fingers, roll the wire into a tube. Start with the unhemmed edge and work your way around the wire. Be sure to position the wire so the warp is parallel to your fingers. When finished, the rough edge should be on the inside of the tube with the hemmed edge on the outside. The smooth side of the hem should also be on the outside of the tube.
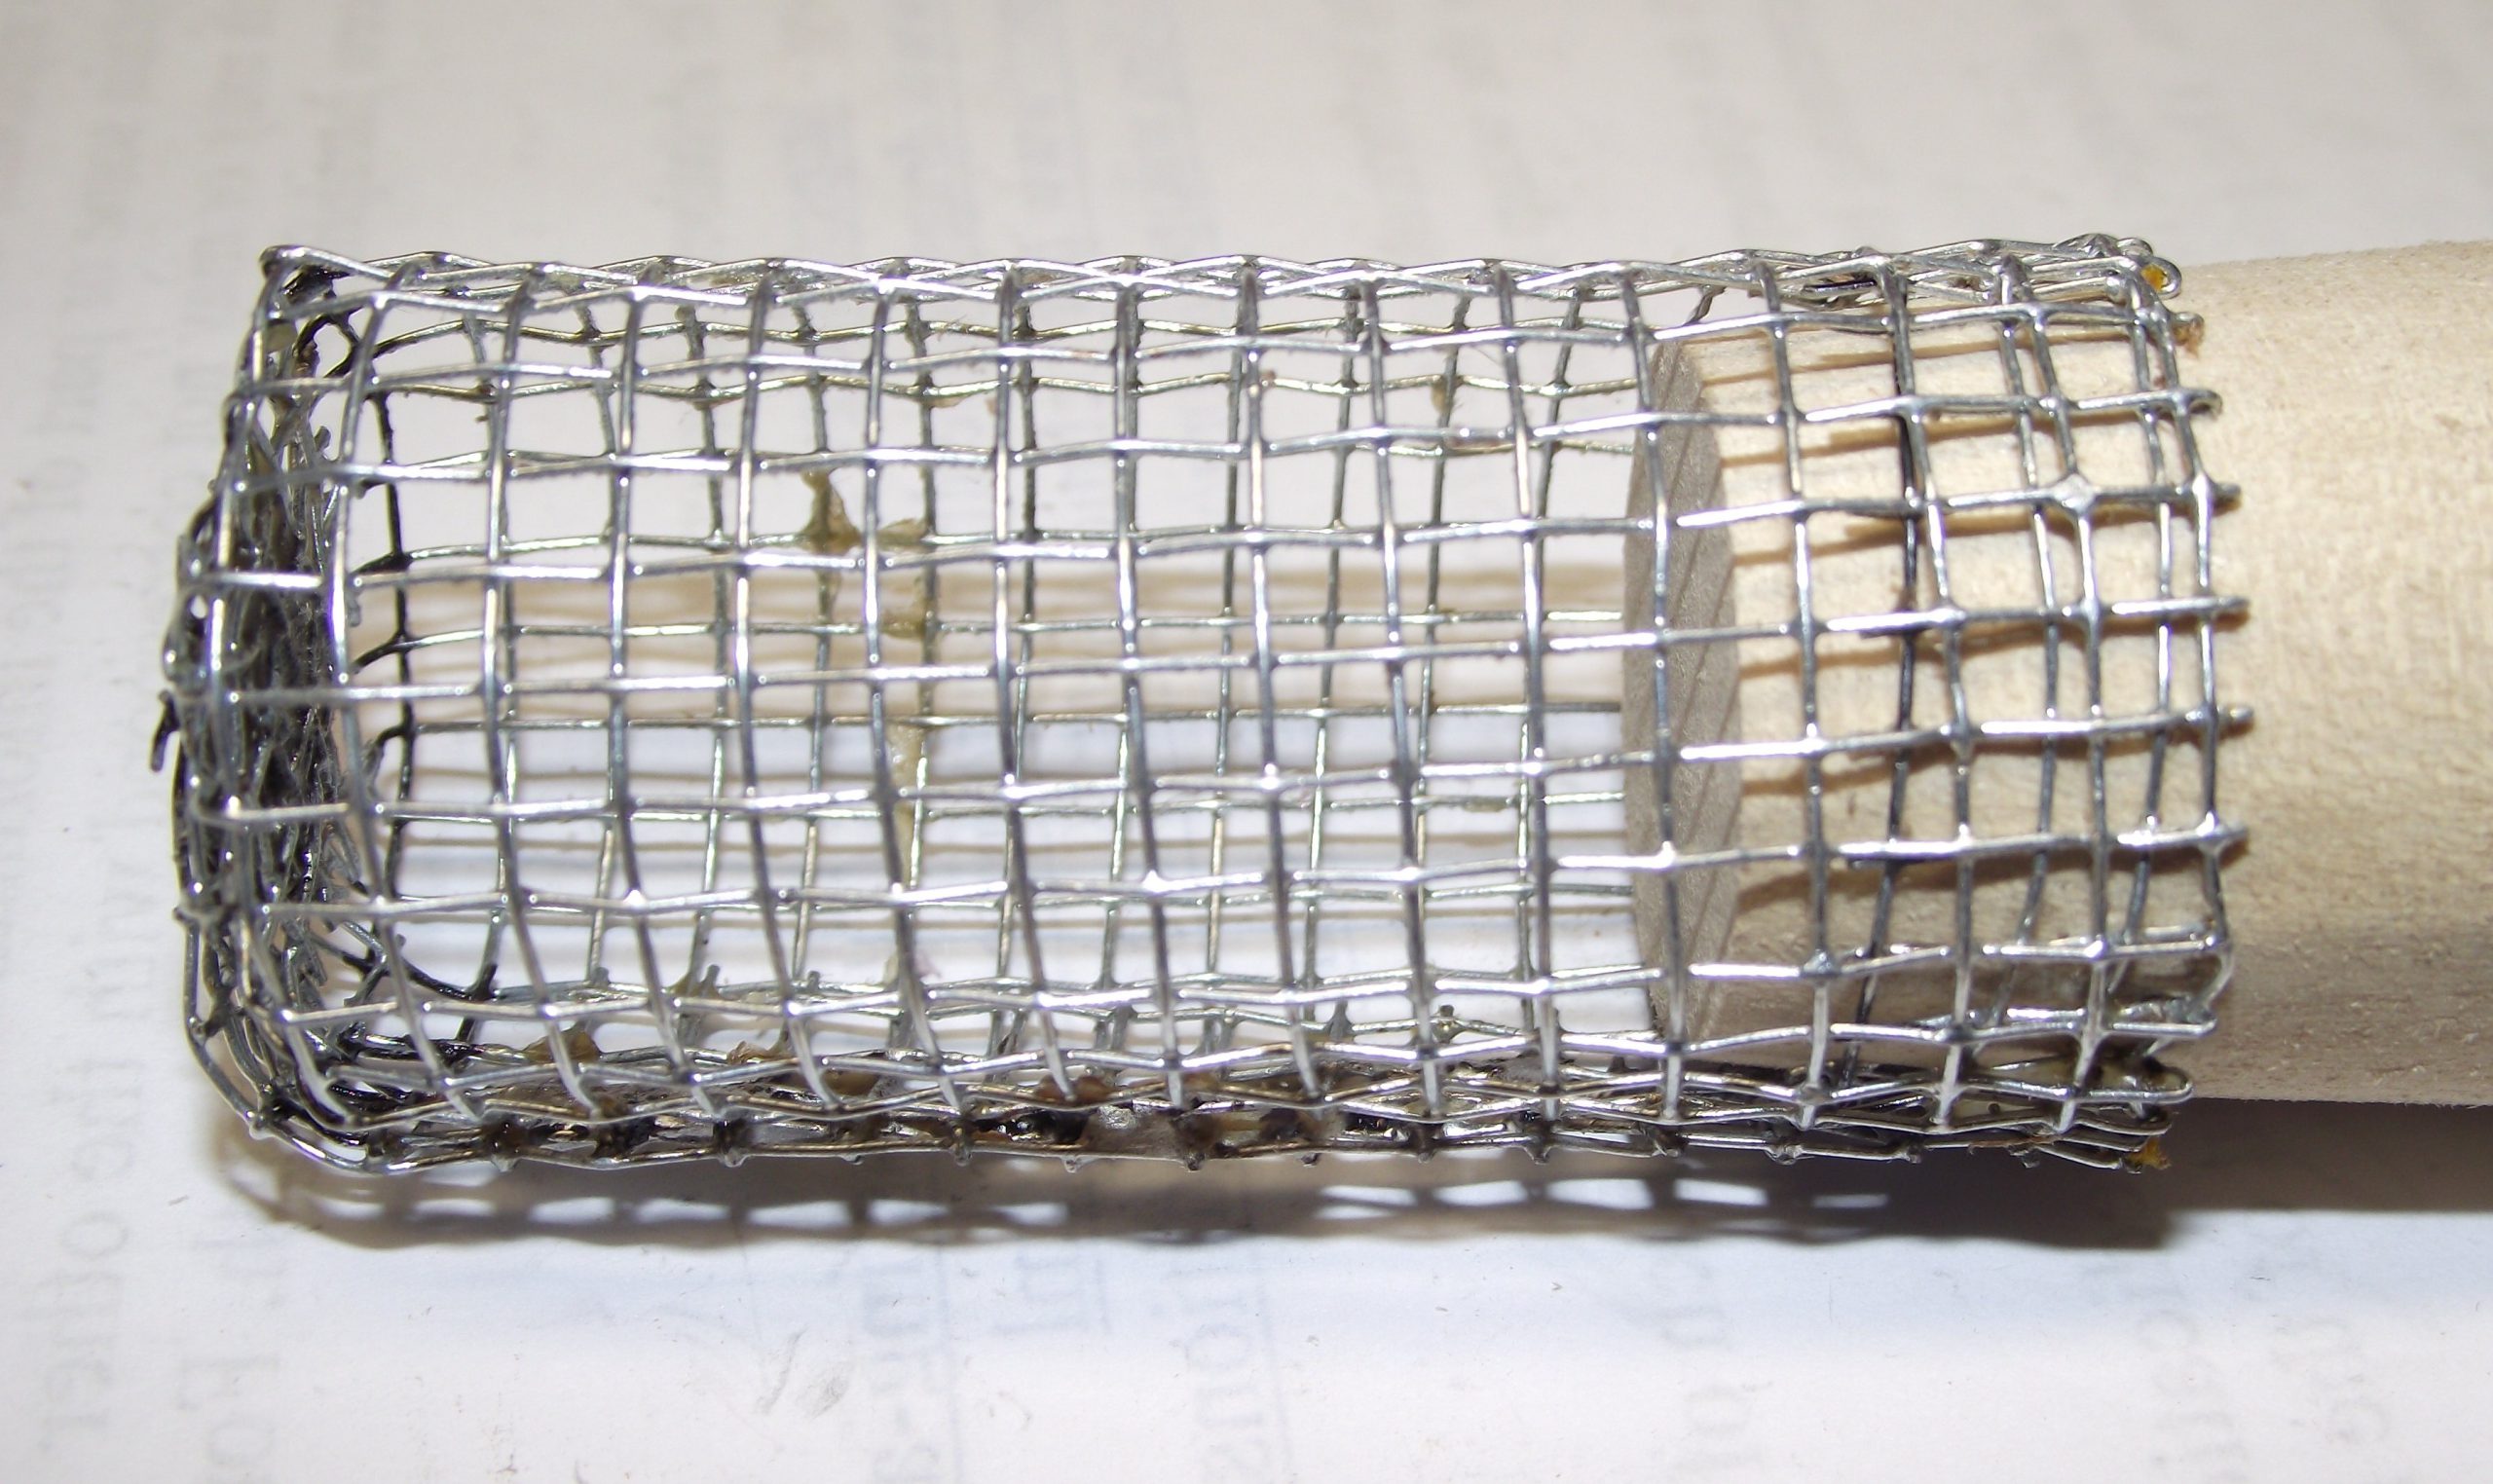
Step 9 – Form the cage bottom
Slide your jig into the tube. Hold the tube tight to the jig by either wrapping wire around it or clamping it with vice grips. The overlap at the side seam should be about ½”. Position the end of the jig to within one-inch (one diameter) of the bottom edge of the cage. Then, cut the bottom end wire every three squares down to the dowel. Trim the sharp ends from the cuts. Then, bend the cloth to form the bottom.
Step 10 – Seal the bottom
Place the dowel in a vice and use solder or epoxy to form the bottom of the cage. Be careful to keep the hardware cloth wrapped tightly around the dowel.
Note: If the bottom of the cage will not stay in place, use a small screwdriver to hold the tabs down until the solder cools or the epoxy sets.
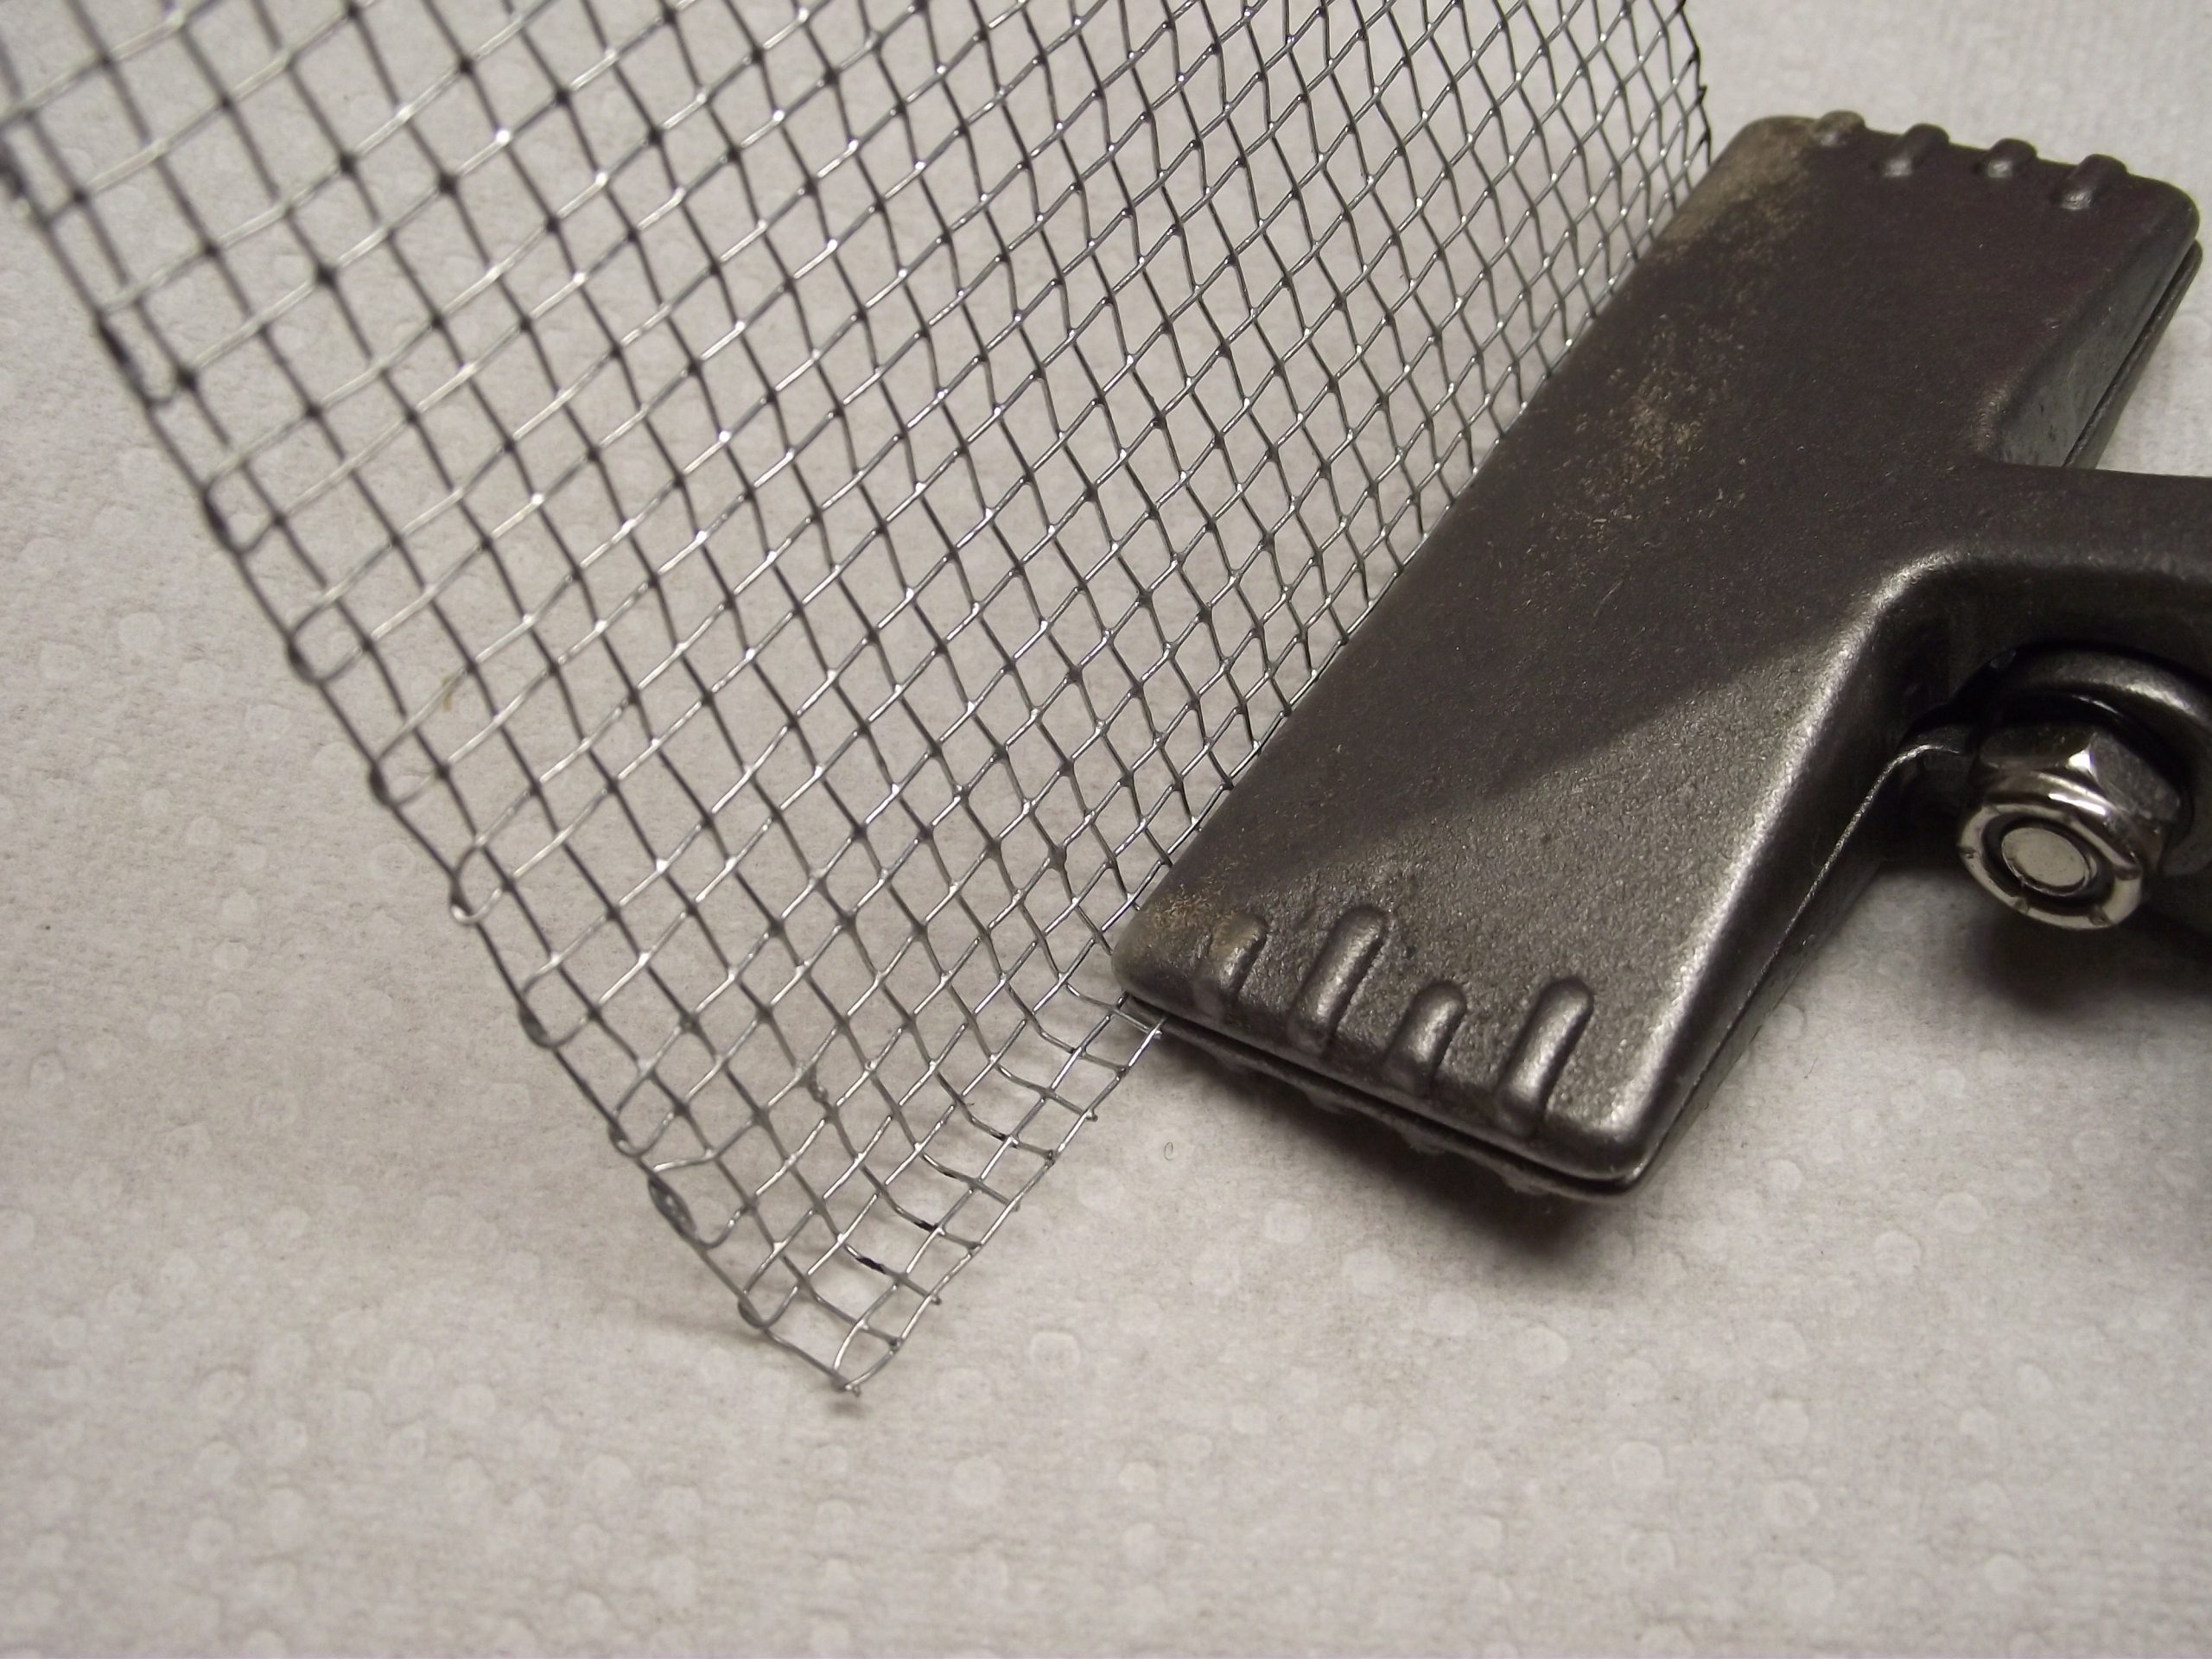
Step 11 – Seal the side seam
Slowly withdraw the dowel while soldering or epoxying the seam. The seam does not have to be solid. Tacking at intervals will work. The last tack needs to be at the top end of the cage.
Step 12 – Clean it up
Remove any excess solder or epoxy and use a hammer to smooth the cage around the dowel.
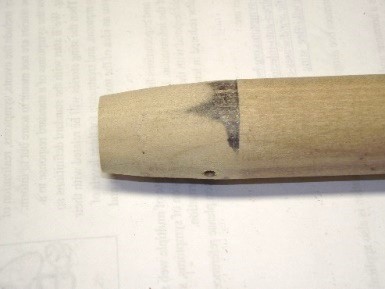
Step 13 – Create a lid (stopper)
If you can find a cork that fits the opening in the cage, use it!
If the cork is too large, you can taper it with a sander to fit.
If no corks are available, a stopper can be made from a dowel. Select a dowel that is larger than the one you used for the jig and taper the end to fit in the cage. Cut the dowel to length after you are satisfied with the taper.
Conclusion
Making queen cages is not hard, although it does take some practice and probably results in some sore fingers. Once you understand the process, it is easy to work in batch mode and make ten or more at a time.
Usage
Cheap and easy to make, these cages are extremely handy when you need to isolate a queen and work great for banking your queens.
Thoughts
If you use the Hopkins System for queen rearing where a frame is laid horizontally over a colony, try making a second version of this cage. Don’t hem the top edge, cut the hemming wires the same way you did to form the bottom of the cage. Then, bend the cute sides outward. The extra surface provided by these “braces” allow for greater adhesion to the wax.
The cage can then be places over a capped queen cell to trap the queen as she emerges.
See: “Build a Horizontal Frame Support” in the June 2011 issue of Bee Culture or in Ed’s book Bee Equipment Essentials.
Get a copy of Ed Simon’s book Bee Equipment Essentials with detailed drawings, construction hints and how-to-use instructions for dozens of beekeeping tools and equipment from www.wicwas.com.