


Ed Simon
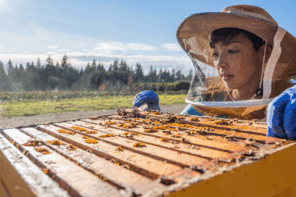
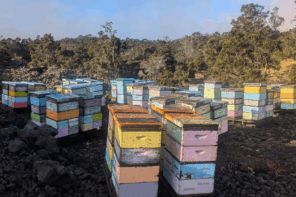
I just started reading Beekeeping at Buckfast Abbey, by Bro. Adam…. of course. One thing that got my attention was his support of what he calls the Modified Dadant (MD) hive, with his dimensions of 19⅞” x 19⅞” x 11⅞”. In application not two ‘deeps’ of this size for a colony but simply one for his climate. He [Bro. Adam] admits that for migratory beekeeping this size is perhaps too large but for most other beekeeping applications it is superior. Supers are ‘square’ same dimension but hold a 6¼ frame.
That is how Jerry Hayes started his email to me last summer.
The kicker was at the end of the email when Hayes asked me to build a hive to match these dimensions as close as possible.
The result is a design and implementation that can be built using currently available dimension lumber.
Design Decision:
Modifications were negotiated to the design that would allow for the use of available material with a minimum amount of labor and for the reuse of existing beekeeping equipment. These were:
Hive Body
- To make building the Modified Dadant (MD) hive easier and cheaper, the width and height dimensions are changed slightly from the original. This was done to make use of current precut frame parts and currently sized dimensioned lumber.
- To keep with the original twelve frame Dadant hive, the width is changed to 19”. This width maintains the currently accepted bee space at each side of the hive body at ½”.
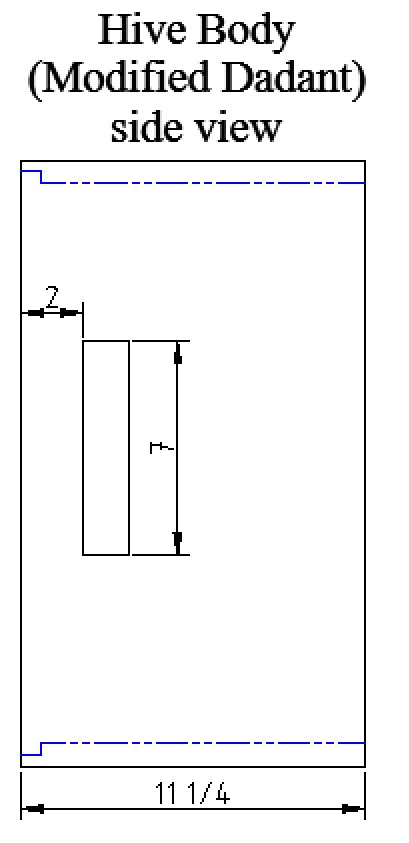
- The height of the brood hive body is reduced to 11¼” to make use of the standard 1” x 12” lumber available at your local home improvement store or lumber yard. This reduces the labor, cost and expertise needed to join two pieces of wood.
- A standard medium hive body height (6⅝”) will be used for the honey supers. The width and length will match the MD hive body dimensions.
- Easy to cut DADO Blade handles will be used on all four sides of all boxes.
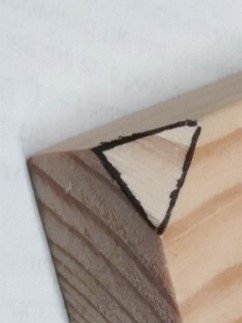
- Gargoyles1 are added to the top corners of all hive bodies to ease the placement of a hive tool.
Parts
- ¾” x 11¼” x 19⅞” – Side (4)
- ¾” x 11¼” x 17½” – End (4)
- ¾” x 6⅝” x 19⅞” – Super Side (4)
- ¾” x 6⅝” x 17½” – Super End (4)
Construction
This is a terse description that assumes that you are comfortable reading construction drawings and that you have experience constructing Langstroth style hive bodies. If there is any ambiguity in the description, please reference the accompanying drawing “Modified Dadant Hive Body”. Please read the complete instructions and resolve any questions before starting the construction process.
Build MD hive bodies
Step 1: Cut the MD brood box and honey supers sides and ends.
Using the diagrams provided cut all the hive bodies sides and ends (parts 1, 2, 3, 4) to length and width.
Step 2: Add the handholds.
Using the diagrams provides cut the handholds to the hive bodies sides and ends.
Note: A DADO Blade handhold was used for these hive bodies. Use whatever style handholds you are comfortable with.
Note: Depending on the choice of a top, the distance to the top of the handhold may need to be changed. The top of the handhold needs to be below any extension (lip or cleat) on your style of top.
Note: A 1½” to 2” drop to the top of a handle will probably work for most hive top designs.
Hint: Make it easy on your fingers. Double cut the DADO handholds so the height is at least 1½” high. Depending on the size of your hands a larger cut may even be needed.
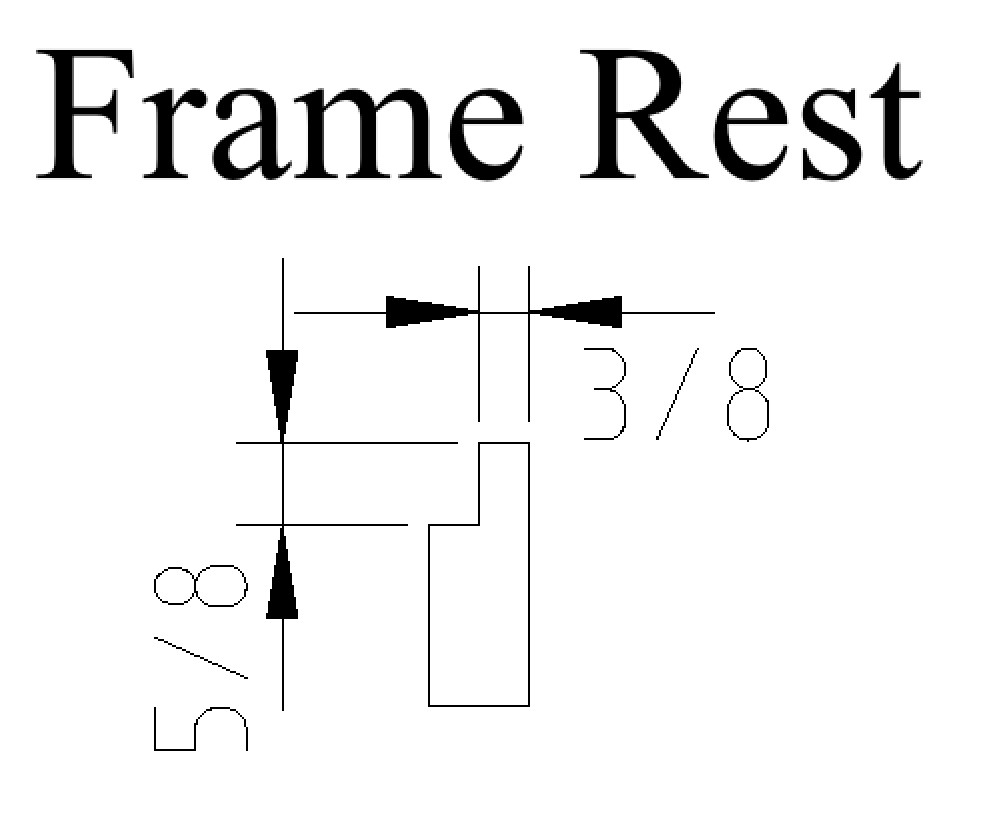
Step 3: Cut the frame rests in the hive body ends.
Using the diagrams provided cut the ⅜” x ⅝” frame rest on the ends (parts 2, 4).
Warning: Be careful. Mark the ends as ends. The length measurements for the sides and ends are close. Once a frame rest is cut it is impossible to uncut it.
Step 4: Add gargoyles to the side top corners.
Using a belt sander to remove the top corners from the sides (parts 1, 3) of the boxes.
Important: Only add the gargoyles to the top of the sides and on the handle side. I repeat ONLY the handle sides top corners.
Step 5: Assemble the boxes.
Use a high-quality external glue, and staples, screws or nails to join the corners. The hive bodies must have square corners. When assembling the boxes measure the distance to opposite corners. The measurements should be the same.
Check Point In addition to being square, use a frame top bar to insure it fits in the box and it can be easily removed and replaced.
Step 6: Paint the boxes.
Get some recycled free exterior latex paint from your local recycling center and paint two coats on the hive body.
Many additional instructions and steps are needed to build a complete Modified Dadant Hive. They will follow in subsequent months.
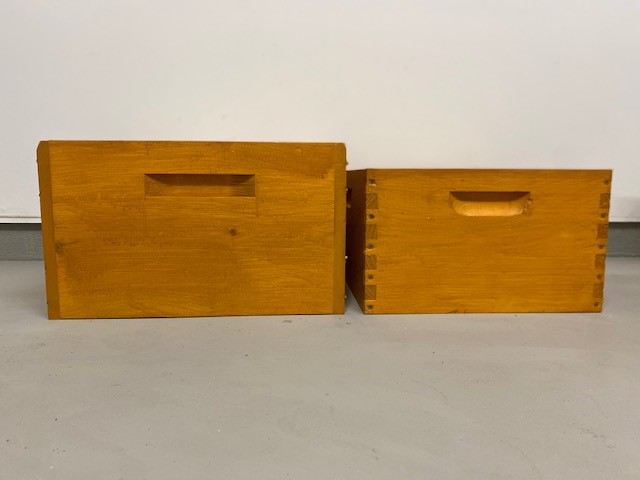
Two of these modified Dadant (MD) hives are scheduled to be used by Jerry Hayes during 2022.
Good Luck!
Get a copy of Ed Simon’s new book Build Bee Equipment with detailed drawings, construction hints and how-to-use instructions for over forty beekeeping tools and equipment from www.LULU.com. Under the LULU sales section, search for “Beekeeping”. Ed can be contacted through SimonEdwin41@gmail.com.
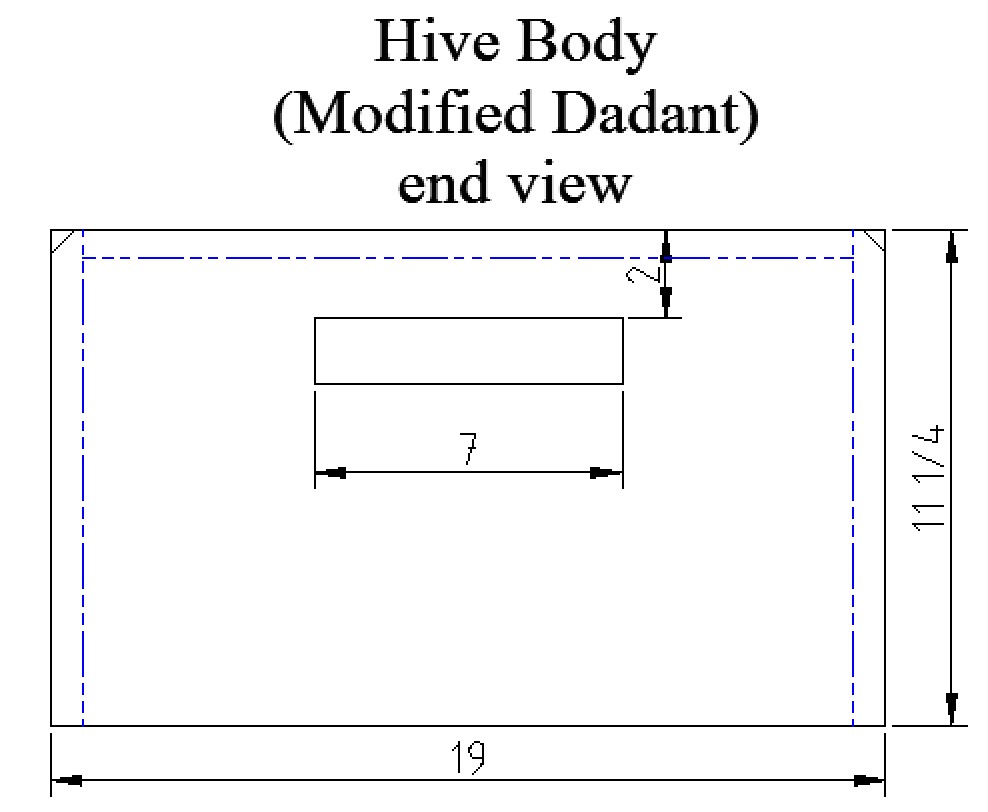
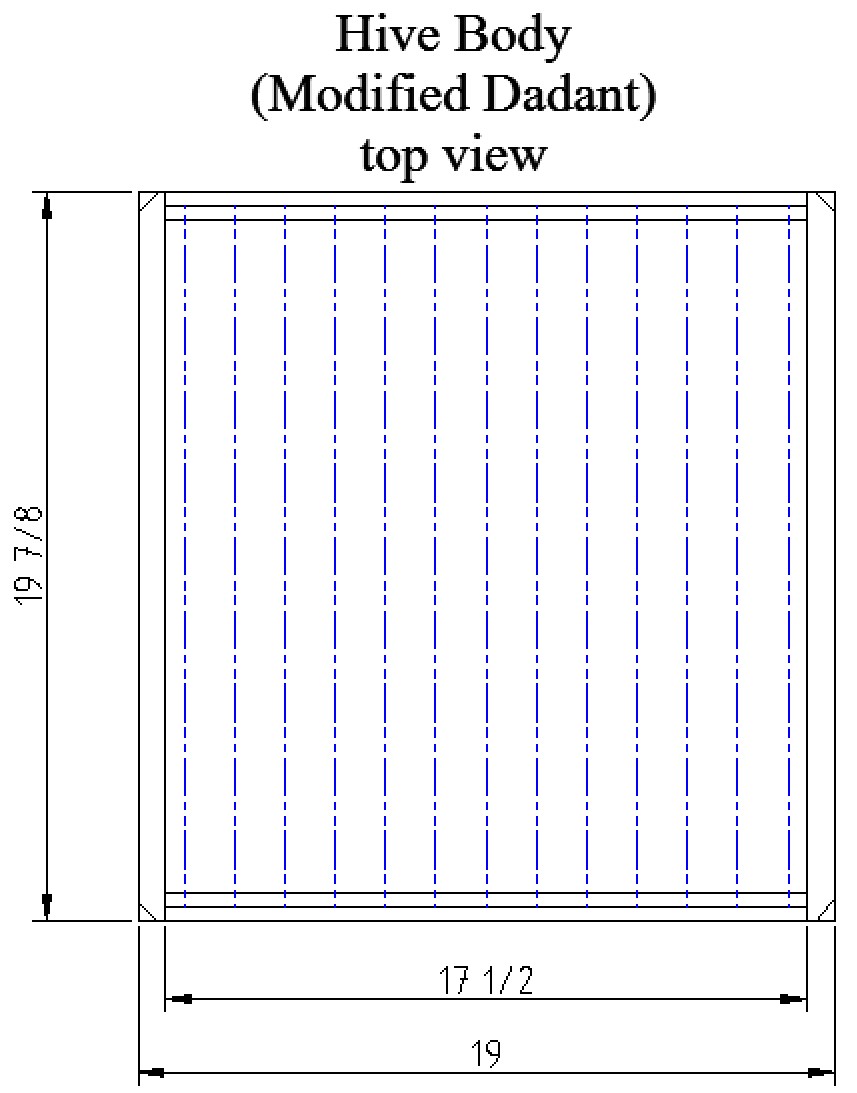
Drawings – Modified Dadant Hive Body for use with standard lumber dimensions.
MD Hive Body (Brood)
- 19⅞ x 19” x 11¼” over all dimensions (holds 12 Langstroth frames)
- ½” Standard bee space on the outside of the side frames.
- Standard bee space on the top and bottom of the frames.
- Dado Blade Handles – ½” to ⅝” deep, 7” wide, 1½” high – The top of the handle is 2” below the top edge.
- Gargles on all top corners (Triangle cuts for easy hive tool insertion.)
- Stapled and glued corners
MD Hive Body (Honey Super)
19⅞” x 19” x 6⅝” over all dimensions (12 Langstroth frame contents)
- The associated honey super for the MD Hive body has a height of 6⅝” so the standard medium frames and foundation can be used.
- Sized to hold 12 commercial Langstroth medium frames.
Note: There are no independent drawings for the honey super. The only difference between the brood box and the honey supes it the height.
Note: The side view drawing does not show the Gargoyle top corner cuts for drawing clarity.