Boring Spring Management

By: Roy Hendrickson

This article originally appeared in the Summer 2016 issue of BEEKeeping Your First Three Years

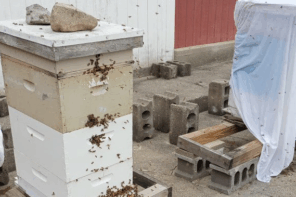
No matter how many colonies you operate there are certain early Spring chores that require attention prior to the start of the active beekeeping season. I’m talking about the really boring, nasty stuff, those jobs you would prefer to put off indefinitely. In my opinion, number one on the detestable jobs list is cleaning up Winter dead-outs. Locally this event generally takes place sometime around the middle of March, depending on the temperature and the amount of mud in the apiary. In the home yard I simply use a wheelbarrow to move any deadouts to the equipment storage building. In the out yards the pickup bed becomes the initial staging area prior to transfer to the storage facility. Should circumstance prevent deadout removal, the affected colonies are sealed tight to prevent any robbing. Weak colonies have their entrances reduced for the same reason.

On the first cool-dry day when the bees aren’t flying, I begin the cleanout process. My first goal is to perform a simple post-mortem. If I can figure out why a colony died, perhaps I can prevent a repeat loss in the future. My first question, was starvation an issue? The absence of honey, coupled with dead bees head first into the cells makes the diagnosis easy. If that’s not the case, is there any honey in the immediate proximity of the dead cluster? Had the colony started to rear brood? Honey bees won’t abandon their brood. In a continuously cold climate this often results in partial or total starvation. The colony starves to death with honey only a couple of inches away. On the other hand, the absence of brood might indicate that the colony died early in the Winter before brood rearing could be initiated. Starvation can take many forms and more frequently than not the final diagnosis is nothing more than an educated guess.

Next to starvation, I’m looking for any sign that Varroa played a role in the colony’s demise. The first and most obvious sign that Varroa was involved is the absence of dead bees. With starvation, dead bees are everywhere, not so with Varroa and its associated viruses. Occasionally a small cluster of dead bees will remain, but just as often the colony will be virtually devoid of dead bees. Generally speaking, Varroa deadouts will have ample honey in and around the broodnest area, assuming the colony had sufficient stores going into Winter. Locally, about half of the Varroa deadouts will contain varying amounts of dead brood. However, trying to make a diagnosis based solely on dead brood is a very tricky business. Instead, factor in colony strength, late season mite loads, the treatment schedule, or lack thereof, and the condition of any other surviving colonies. This analysis combined with the dead colony’s obvious symptoms should aid in the final diagnosis.

Starvation and Varroa aside, both queenlessness and outright queen failure also contribute to over Winter colony loss. Queenlessness is defined as queen loss just prior to, or during the over Winter period. It’s not uncommon for queenless colonies to survive the Winter. If you can identify the condition early enough in the new season, it’s quite practical to unite the queenless unit with a queenright colony in need of additional bees. If the queenless colony has perished, the lack of brood or any evidence of an existing queen makes for a relatively easy diagnosis.

Queen failure is expressed somewhat differently. Perhaps the queen became a drone layer, (lost her ability to fertilize eggs) or died outright in late Summer or early Fall. If the colony’s attempt to replace the queen was unsuccessful, the end result is usually a laying worker colony. These colonies rarely survive the Winter. Again the evidence is clear-cut. Quite often the center brood combs will be filled with drone brood that has been reared in worker size cells. This is an an obvious sign of a drone layer! If all the brood has emerged, the tell-tale evidence is clearly exhibited on the face of the comb. Hold the comb in question, horizontally at eye level. The surface of a normal worker comb has a flat or smooth appearance. Once a colony becomes a drone layer, a comb where all the brood has emerged will have an uneven or mountainous appearance. This is the result of a larger drone having been reared in a smaller worker size cell. With a little experience this condition is recognizable at first glance.

Regardless of what caused a colony’s demise, I’m constantly on the lookout for any residual sign of brood disease, particularly AFB. (American Foulbrood) I carefully scan all of the dark brood combs for any sign of this despicable disease. Diagnosing an active case of AFB isn’t all that difficult once you’re familiar with the symptoms, and assuming the disease is somewhat advanced. Diagnosing AFB in a Winter deadout is an entirely different matter. In a Winter deadout it’s very easy to confuse or misread dead brood. To the casual observer there is very little difference between brood that died because the colony died, dead brood resulting from virus issues, or brood that died as a result of AFB.

There is however one major distinguishing difference. If the brood died as a result of AFB, the affected combs will contain dried down scale. The scale is formed as dead larvae gradually disintegrate and dry out. Black in color, the scale lies flat on the bottom wall of the cell. Unlike European Foulbrood or dead brood resulting from virus issues, both of which can produce scale, the scale from AFB adheres tightly to the cell wall. It’s virtually impossible to remove AFB scale without destroying the cell wall. If you’re unfamiliar with AFB and its various symptoms, contact an experienced local beekeeper, or your local bee inspector for assistance.

Successive stages of ABF: (A-C) Progressive stages of decay; (B,C,E) show tongue adhering to cell roof; (D and E) show scale. USDA photo.

Comb quality or condition is the last major consideration in the deadout cleanup process. Current wisdom dictates that due to pesticide contamination one third of a colony’s brood combs should be replaced on an annual basis. With a couple of notable exceptions, I respectfully disagree. If your colony(s) are repeatedly exposed to agricultural pesticides, or if your Varroa control program relies on any of the heavy-duty synthetic controls such as Apistan, Check-Mite, Apivar, or certain essential oils, that idea is certainly valid. However, the vast majority of small or startup beekeepers do not fall into either of those categories. When you couple that with the fact that producing top quality brood comb is perhaps the greatest challenge facing the new beekeeper, that idea is totally lacking in merit! Remember, next to the bees, top quality brood comb is the most valuable asset in your apiary. Don’t needlessly throw it away!

Instead, be selective. Damaged or poorly drawn combs that contain large patches of drone comb should get the heave-ho. If your inventory contains any ancient pitch black brood comb, get rid of it. The same holds true for moldy combs, particularly those combs that contain the sodden remains of the deceased Winter cluster. I view these combs as a detriment to productive beekeeping. Perhaps most detrimental of all are the pollen filled combs where the pollen has started to mold. These combs are usually the result of a heavy Fall pollen flow where the excess incoming pollen has filled most of the open comb in the lower brood box. Anyone operating in good goldenrod territory will recognize this picture. Once the weather turns cold, the cluster will move upward to maintain contact with the Winter food reserves. During the Winter period the now unprotected pollen gradually deteriorates and begins to mold. Once this happens the pollen becomes totally worthless. To rid themselves of the offending pollen most colonies will remove everything down to the foundation mid-rib and replace it with drone comb. Why not save them the time and effort?

Colonies can die for a multitude of reasons. Regardless of the cause, I view the loss as an opportunity to completely rework the now empty equipment. The first and most critical rework involves the brood comb as described above. Beyond that I take a hard look at the hive components, the bottom board, the inner and outer covers, and especially the brood boxes. If there is any sign of wood rot, warping, or structural integrity, the offending component is either replaced or repaired before it’s returned to use. I also pay close attention to the brood nest frame spacing. Are the brood boxes and frames in sync? If there is an inappropriate buildup of propolis or burr-comb on the frames between the brood boxes, the corresponding bee space is out of whack. I make the necessary adjustment by either increasing or decreasing the depth of the offending brood box(s). Generally speaking, deep brood boxes that have a standard 5/8th inch rabbit will have the correct bee space if the box is 9 ½ inches deep, give or take a 16th of an inch. This may sound like overkill. But, I learned long ago that it’s far easier to replace or repair hive components when the equipment is out of service, than when it’s occupied by a strong colony that’s less than happy with the untimely intrusion.

The last phase of the rework consists of removing the excess propolis and burr comb from the brood box walls, corners, and especially the rabbits. I also routinely scrape bottom boards along with the inner and outer covers as needed. I sharpen the curved end of a standard hive tool for this purpose. I use a collapsible workbench (a pair of saw­ horses will work equally well) to maintain proper height, and an old outer cover to catch the scrapings. The rest is self explanatory. There is one caveat, make sure you wear a pair of gloves; otherwise you run the risk of a nasty gash, or worse yet, a trip to the emergency room!

Depending on your latitude, late Winter or early Spring is an excellent time to replace, repair, or set up new hive stands. Again, it’s not the most exciting of work, but it’s far easier to perform these chores when the bees are not flying than vice-versa. The same goes for tree trimming or brush removal should the need arise. If you’re an urban beekeeper this is also a great time to plant shrubbery or construct a barrier to keep your colony(s) out of the sight of unhappy or overly inquisitive neighbors.

In summary, while early Spring cleanup and maintenance work may not be the most exciting of jobs, it’s important in the sense that it gets the nasty stuff out of the way. Once warm weather arrives, more time can be spent on the truly important bee work, colony management!

Roy Hendrickson a 40 year beekeeper from North East Ohio. He writes for many bee journals and is active in the Ohio State Beekeepers Association.