


Click Here if you listened. We’d love to know what you think. There is even a spot for feedback!
Read along below!
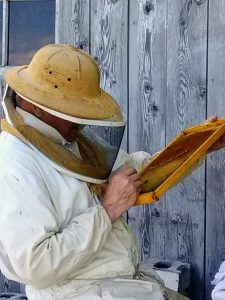
Richard Wahl began learning beekeeping the hard way starting in 2010 with no mentor or club association and a swarm catch. He is now a self-sustainable hobby beekeeper since 2018, writing articles, giving lectures and teaching beginning honey bee husbandry and hive management.
Off the Wahl Beekeeping
New(ish) Beekeeper Column
Winter, When Things Slow Down
By: Richard Wahl
Take a Step Back
For the beginning or second year beekeeper, the amount of information and options to be decided can seem overwhelming. But as the Winter months arrive it’s time to take a step back, re-evaluate what has been learned, make adjustments and plans for the next season. Quite often false starts and applying erroneous information or the correct interventions at the wrong time are the norm for the new beekeeper. For this reason the recommendation to find a mentor or join a club is the best advice any new beekeeper can receive. Often what is provided by the Internet or videos as a broad brush stroke generalization, which works for the person giving the presentation, but is not specifically geared to the environment of the beekeeper doing the research. Following advice from someone in a southern state may not directly apply to someone in a northern state. As a co-instructor with four or five other “experienced” beekeepers, the annual classes of beginning students wanted information on winterization techniques and maintenance before the last class meeting in October. Development of winterization steps and procedures for that class is the focus of this article.
Preparation for Winter Begins the Previous Summer
Although we are now past the Summer and most of Fall, I will recap a few things that should have already occurred or that can be applied in future beekeeping years. The first and foremost is that the monitoring, testing and treating (if necessary) for mites cannot be over emphasized. There may still be time in milder climates to make one last mite treatment if needed. Some form of oxalic treatment seems to be the preferential choice in the late Fall or early Winter, weather permitting. There are currently three options with oxalic. They are the vaporization method, the dribble procedure or the newly commercialized oxalic crystals dissolved in food grade glycerin option. I have never used the vapor method as equipment costs for the vaporizer and the required mask are a bit out of range for a hobby beekeeper. The mask must meet both of the U.S. National Institute for Occupational Safety and Health (NIOSH) standards of being able to curtail inhaling of both organic vapors and acid gases. A simple paint or dust mask will not do. For a number of years I used the oxalic dribble method which entails dissolving oxalic crystals in warm water and the adding the granulated sugar to the mix. It is much harder to get the oxalic crystals to dissolve if they are added after the sugar. I made this application as late in the year as possible as oxalic does not penetrate capped brood cells. Since the mixture is dripped directly on the bees I make sure the following nighttime temperature will not fall much below 45°F (7°C) as the bees do need to clean the dribbled liquid off each other. Again, Oxalic vapor or dribble does not impact mites under capped brood cells. Therefore using these treatments may require additional treatments a week or two later to impact mites that were still in capped cells. Oxalic crystals dissolved in food grade glycerin gets around this limitation. For the past three years I have used the oxalic crystals dissolved in food grade glycerin method, which I believe is less stressful on the bees and is a longer lasting treatment when needed. This method, championed by Randy Oliver, a California bee researcher, recently received EPA approval. Commercialized this past year as the product VarroxSan is now sold in the bee catalogues or by larger bee equipment outlets. Although the oxalic/glycerin mix does not penetrate beneath capped cells, its 45 to 60 day efficacy will impact any mites as new bees emerge from cells. In addition the EPA has approved this method with honey supers on if a beekeeper chose to use it earlier in the beekeeping season. I have had very good results by inserting the pads or strips at the last hive inspection in the late Fall and leaving them in the hive until the first Spring inspection. Coupled with Spring brood breaks and green drone frame use, I have been able to eliminate late June or early July treatments altogether and quite often have been able to eliminate half of my treatments for the remainder of the Summer.
Additional Fall Preparations
Providing additional food resources for the bees in late Fall allows the bees to gather ample food stores for the Winter. Up until freezing temperatures are reached each night, liquid two parts sugar dissolved in one part water is a good option. Whether top feeders, frame feeders, Boardman quart jar feeders or inverted bucket feeders placed over the central hole of the inner cover are used, the choice is up to the beekeeper. In any case, it is best to provide the sugar syrup in a way that only the hive occupants can get access to it. While this may require a specific feeder type for each hive, it prevents the risk of starting a robbing event that often occurs with open feeding provided for the entire apiary. Additionally, any hive spacers or future sugar shims should be in place at least a few weeks before freezing temperatures arrive, giving the bees time to fill cracks or crevices with propolis to seal the hive to their liking. Later in the Winter, when solid sugar bricks or granulated sugar need to be added, it is simply a matter of briefly removing the outer and possibly inner covers, to place the sugar in the hive without disturbing the propolis seals the bees have already made. I normally do not introduce supplemental granulated sugar until around the first of each year. If given earlier in the Fall some hives have a tendency to go up to the granulated sugar before using their own stored reserves first.
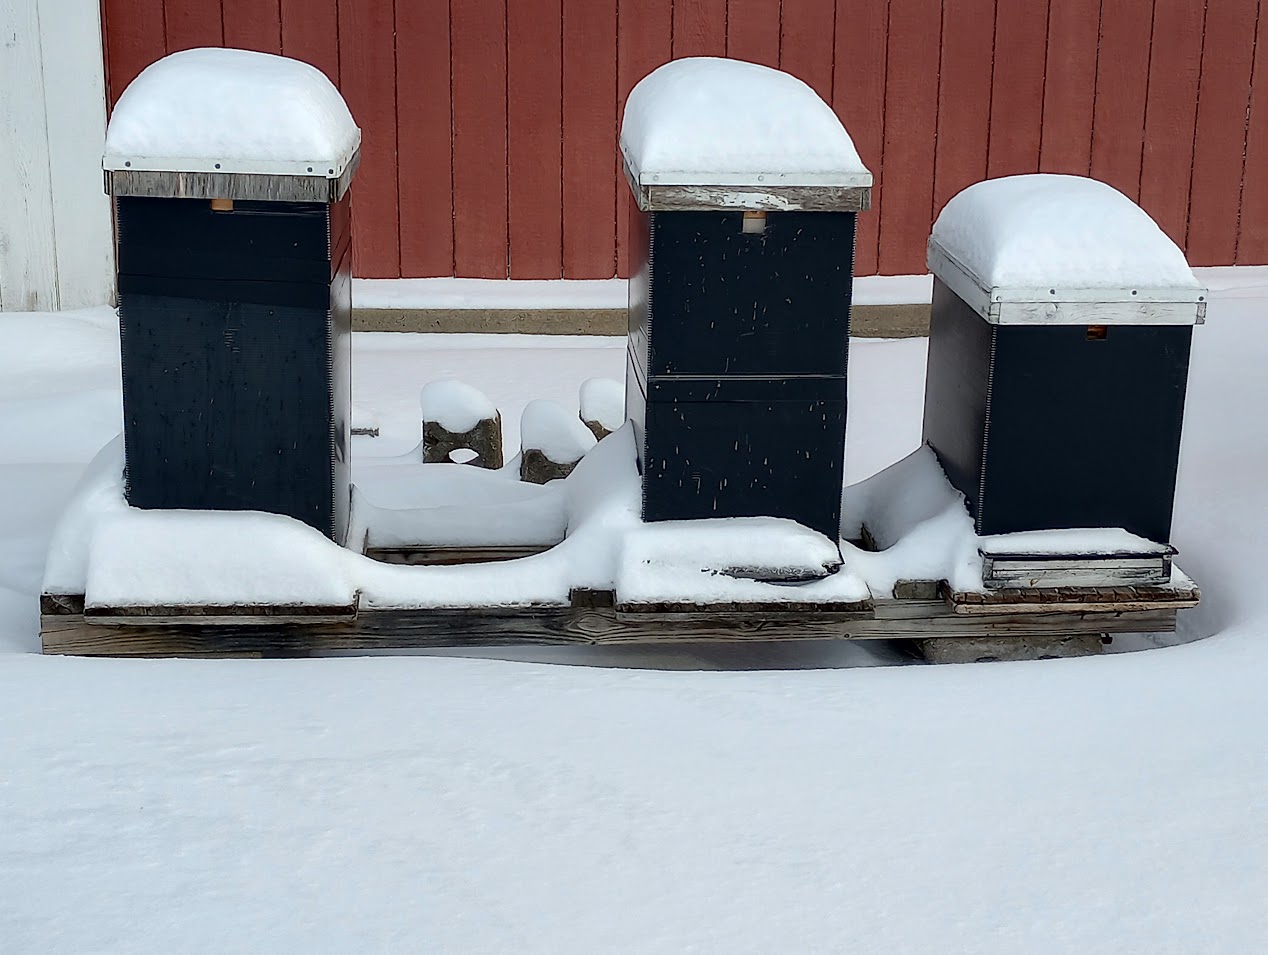
Insulation, Windbreaks and Tie Downs
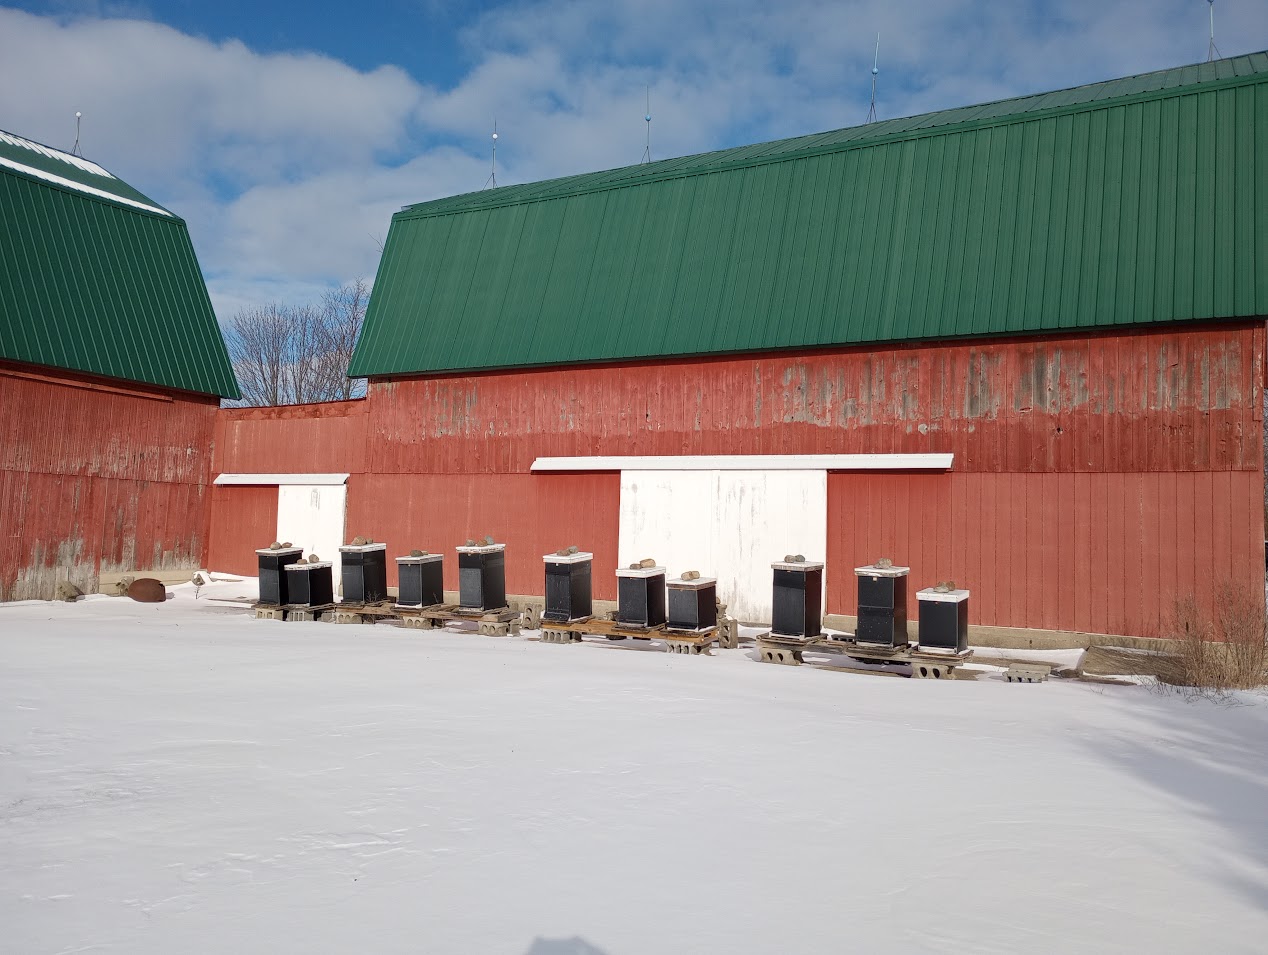
Regardless the location of the hive, a little extra insulation never hurts. Top and bottom insulation can be left on year-round. I have found that a one-inch thick piece of insulation, cut to just fit inside the outer cover that sits on the inner cover, can remain in place all year. In the Winter, the insulation helps reduce condensation problems while also providing added protection from the cold. Left on through the Summer, it significantly cuts down on heat penetration and the need for bees to beard outside the hive to regulate the temperature to their liking. This also reduces the energy bees expend by muscle twitching in the Winter to generate heat and fanning in the Summer to cool the hive. I wrote an entire article on the merits of additional insulation “beneath the bottom board” published in the July 2025 issue of this magazine under that same title. Suffice it to say, that a few inches of extra boards or insulation under the bottom board can be just as beneficial as the insulation overhead. There are numerous options for insulation around the sides of the hive. In the past a favorite technique was wrapping hives in one or two layers of tarpaper stapled to the hive. Since stapling and removal are somewhat labor intensive, modern alternate methods such as hive blankets, Styrofoam sheets, or Coroplast sleeves cut to fit each side, are now the most common insulating methods used in today’s beekeeping.
Windbreaks are another measure that can be advantageous for the bees. Anything that breaks the constant cold north or west winds directly hitting the hives will help the bees maintain the core temperature of 92°F to 95°F (33°C to 35°C), which is the norm around the queen and any early brood that may be starting to develop in late Winter or early Spring. Buildings, plywood or metal roof sheets supported on stakes, thick brush plantings, or any of a number of wind blocking elements, just a few feet away from the hives will aid the bees in maintaining optimal internal temperatures through cold, windy Winter days. While speaking of winds, it is also a good idea to use some sort of strapping to keep hives from blowing over in those occasional very gusty days. Another advantage of strapping is that curious critters interested in the hive will not be able to push it over or remove the cover. Speaking of critters, mouse guards come to mind. If hives sit in a grassy area or next to an open field, mice have a tendency to take an interest in the hive as temperatures begin to fall. It is not beyond the capability of mice or voles to chew a larger opening in the entrance reducer to gain access to the hive interior. Anyone who has found a mouse nest in the corner of a hive during the first late Spring hive inspection knows what a mess they can cause. As the bees become more lethargic and remain clustered, mice take this opportunity to chew their way into the hive, often via the entrance reducer, to get to the ample warmth generated by the bees as well as a food source. Mouse guards can be put in place any time after the last Fall hive adjustments are made.
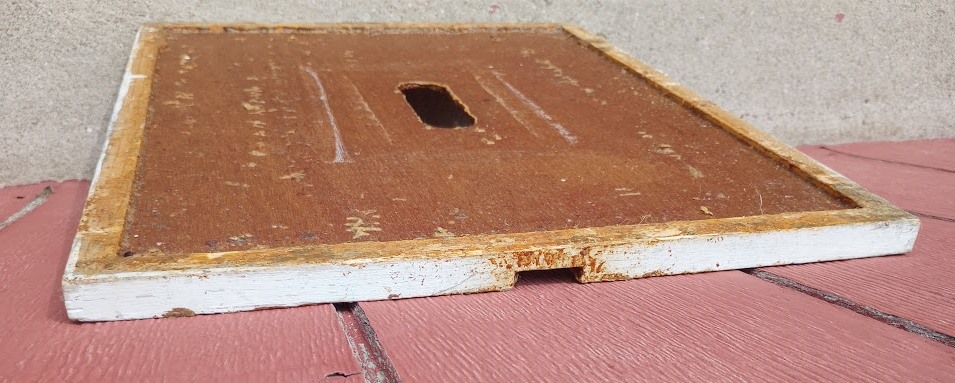
Screened Bottom Boards
I have found that I can leave my screened bottom boards on all Winter with no ill effects. My screened bottom boards all have a very snug fit in the bottom rear and so there is almost no chance for air movement from that area. In fact if the rear wood shim that runs across the rear top of the screened bottom board gets damp, they become somewhat difficult to pull out from the hive when needed. I have on occasion, resorted to sanding the top of the wood shim to aid in better movement. If there is a gap at the rear of the hive where it is inserted a strip of duct tape can be placed across that area, or across any other cracks to reduce unwanted cold air flow. On the front of the hive my entrance reducers remain inserted through the year with the two to three inch cut out remaining in place for the bee’s porch entrance/departure opening.
Inner Cover Notch Position
When it comes to the inner cover notch, one of the first questions new beekeepers usually ask is, “Notch up or notch down?” The standard instructions say notch up in the Summer and down in the Winter. That would seem to make sense as manufacturers designed the inner cover so the notch side has a little more bee space than the flat side. With the notch up in Summer, the shallower space above the frames supposedly discourages burr comb while still giving the bees an upper entrance. When it is flipped with the notch down in Winter, that extra space makes a handy exit for moisture while still giving the bees an upper entrance, if the bottom entrance gets blocked by snow or ice. In practice that is the theory. But many of us, including myself, leave the notch down year-round without any real trouble. There may be a bit more burr comb built on the frame tops during Summer, but I find this easy to scrape off. The real benefit is the bees gain a consistent upper entrance. This can be advantageous when honey supers are stacked high and foragers are trying to unload nectar without needing to run the gauntlet through the brood nest. Ventilation is another factor to be considered. Warm, moist air rising through the cluster in Winter can condense on a cold outer cover and drip back onto the bees. It is the condensed cold water dripping back on the bees that kills them, not the cold temperatures. Before I began using the insulation sheet between the inner and outer covers I would often find puddles of water, which had collected from condensation, sitting on the top of inner covers. That notch, when down, gives the moisture an escape route and helps the bees balance airflow. As with all things in beekeeping, not everyone agrees on the best orientation. Some would argue that keeping the notch up in Winter holds in more heat, while others worry that in Summer an open notch down can invite robbers. The bees, for their part, will tell you what they think by filling the notch with propolis if they decide they don’t like your setup. Only occasionally have I seen them nearly close the notch off. That is the beauty of beekeeping; you set the stage, but the bees always have the final say.
Wrapping It Up
Winter really is that season when the beekeeper’s frantic pace finally slows down, giving both bees and beekeepers a little breathing room. For the bees, the cluster tightens, the queen takes a rest, and survival becomes the name of the game. For us, it’s the chance to reflect on what worked, what did not, and what we would like to do differently when Spring rolls around. If there is one thing Winter teaches us, it’s that preparation does not begin with the first snowflake; it started last Summer and Fall with mite management, food stores, and insulation. By the time we watch the first frost creep across the meadows, most of the heavy lifting should have already been done.
Whether it’s oxalic treatments, adding sugar reserves, strapping down hives, or fussing over inner cover notch positions, every little detail plays a role in tilting the odds in the bees’ favor. As much as we plan, insulate, and adjust, the bees are still the ones in charge. They will seal cracks with propolis, rearrange their brood nest, or even shut down a notch if they decide the need to do so. That is the humbling beauty of beekeeping. Our job is simply to set the stage so they can perform the miracle of making it through another Winter. Just remember, Winter isn’t wasted time. It’s a season for learning, regrouping, and planning. The bees are doing their part in the dark, cold hive and it is up to us to be ready when they go back to work on the first warm Spring day. Every successful Summer honey crop begins with the careful preparations made in the Fall and early Winter seasons just before.