


Ed Simon
Eventually, you will wish you had a double screen board available. It is a versatile device that allows you to manipulate your hive in multiple ways.
The double screen board was originally developed by L.E. Snellgrove as a swarm control mechanism. It has been found useful in solving additional problems. It can:
- Help when you split a hive\
- Help when you combine hives
- Act as a ventilated top when transporting bees
The eight entrances (four on top and four on the bottom) can be opened or closed individually to allow for easy manipulation of the hive.
Two Designs
Two versions of this device are shown. They both work equally well.
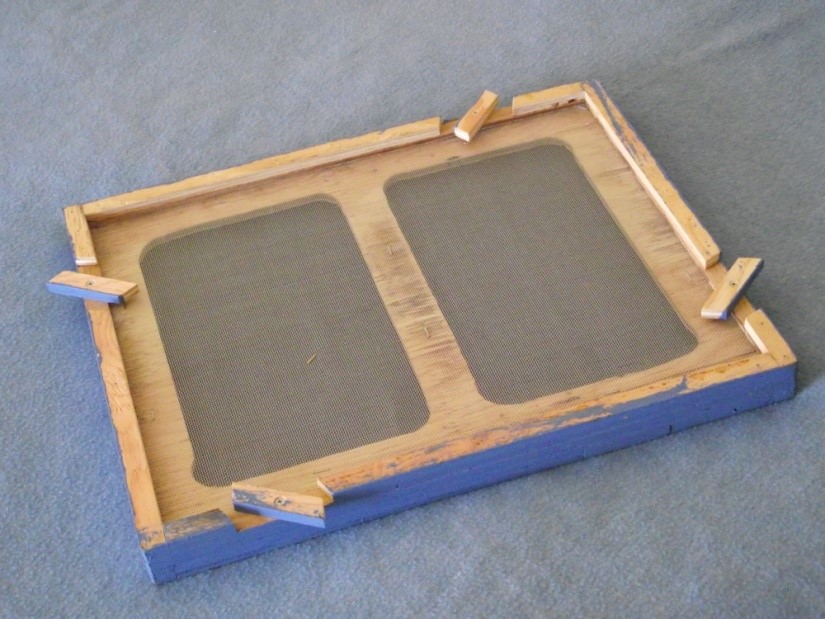
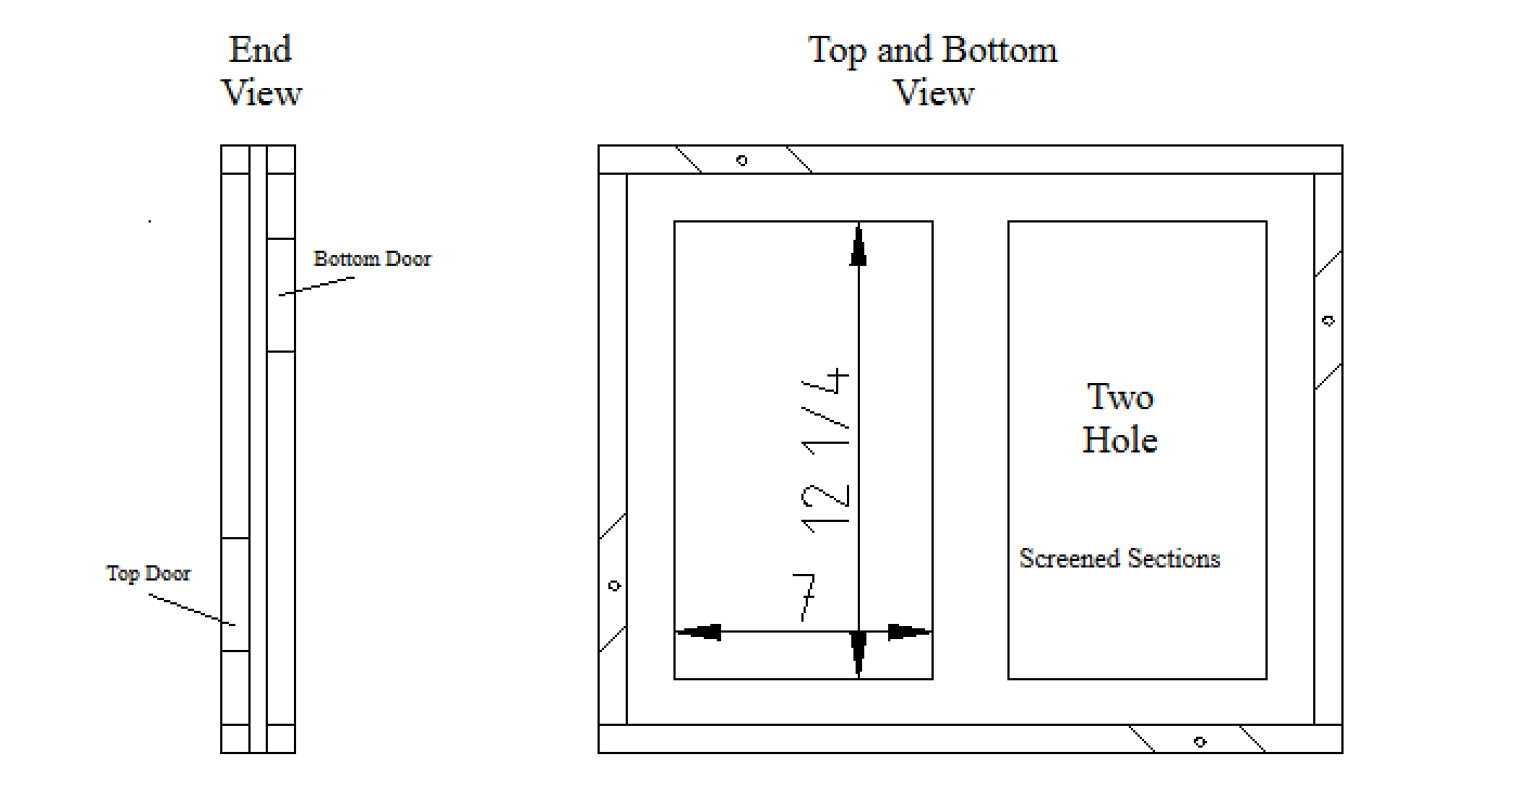
- Two-hole version: This version has a larger screened area. The top and bottom screens need to cover the entire base out to and under the edges. This allows for the doors to swing without catching the edges of the screen. The entrances are offset from the middle of the sides in this design to allow for easier construction of the entrances.
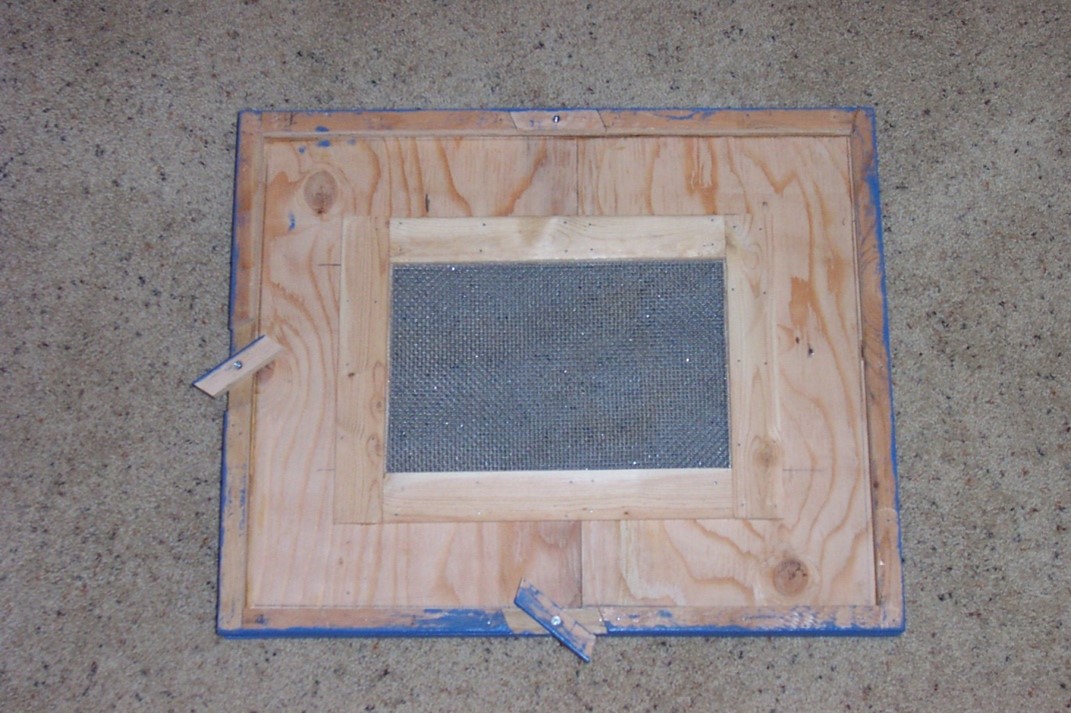
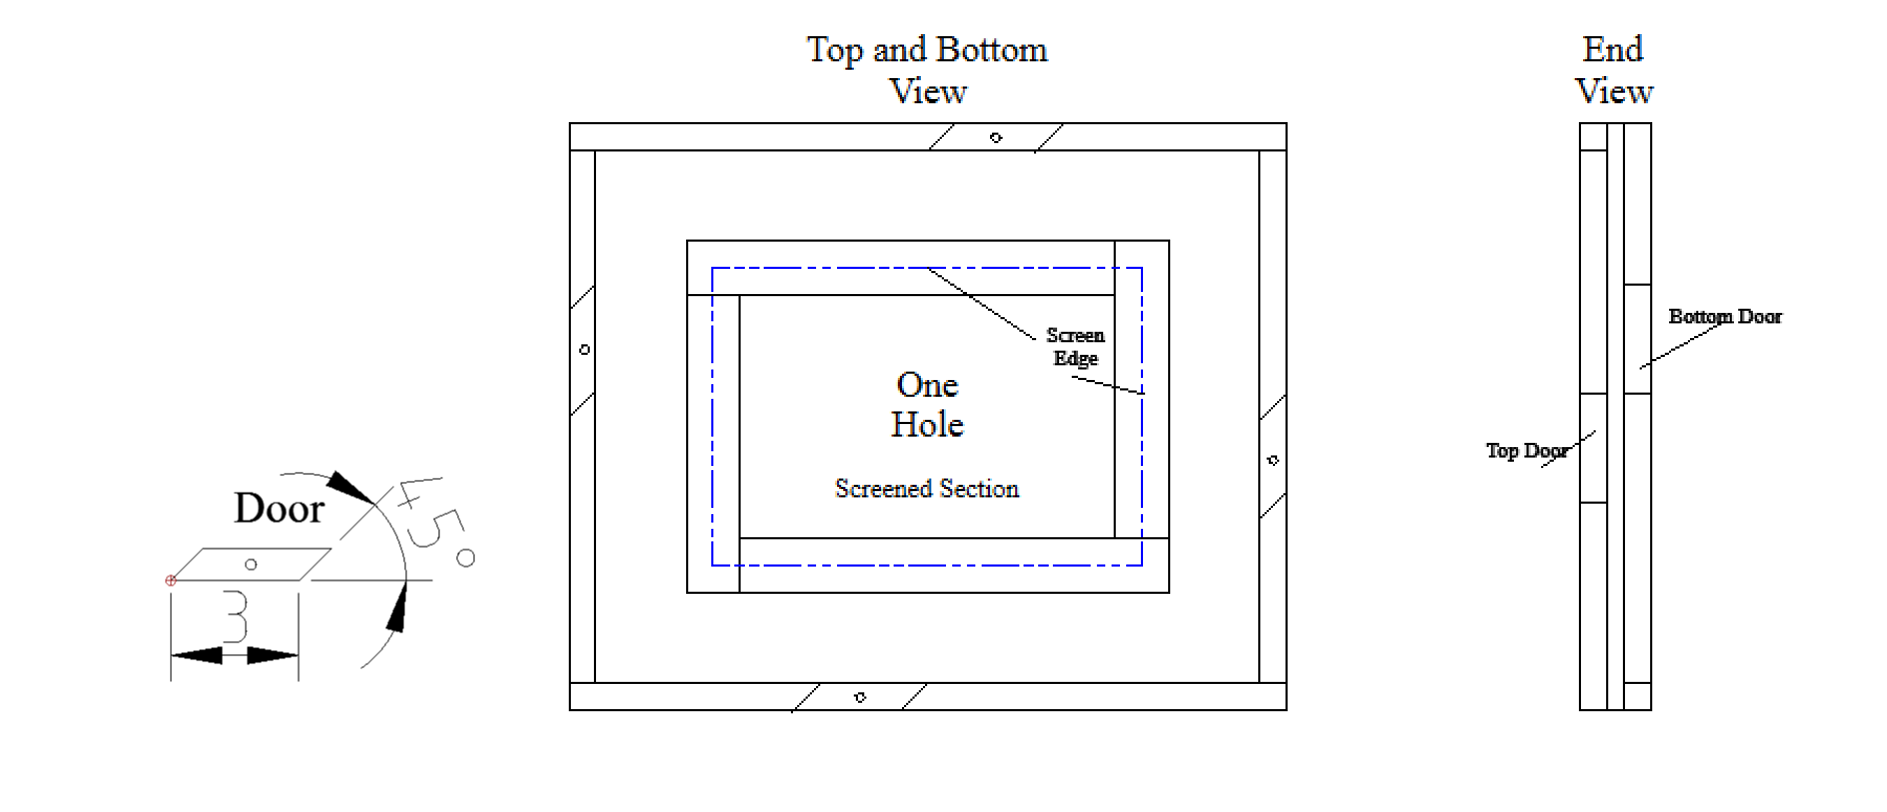
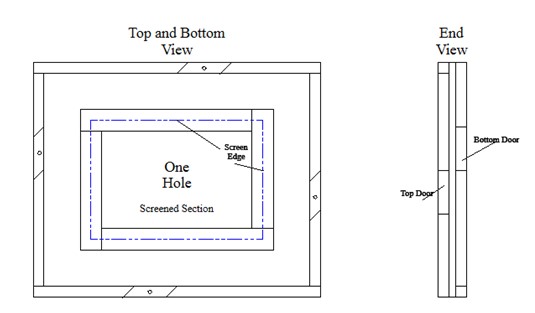
- One-hole version: With this version, the screen edges are covered with a thin lath so the screen edges will not loosen and allow the bees to get caught between the screens. The doors are positioned close to the center of the sides. This version is easier to make.
Parts
⅜” x 16¼” x 19⅞” – Plywood base
¾” x ½” x 19” – Side edge (4)
¾” x ½” x 16” – End edge (4)
¾” x ½” x 3” – Plywood doors (8)
¼” x ??” – Lath (8) – Used only with the one-hole version.
16” x 19” – Metal window screen or hardware cloth (8 holes per inch) (2)
Note: ¾” x ¾” parts 2, 3 and 4 will work equally well.
Construction
The base of the double screen board will be cut and then both sides are covered with hardware cloth or window screen. Edging is then added with pivoting doors.
Please reference the drawings on the next page for any questions.
Decision Time
Two versions of this device are shown. They both work. Choose one. Drawings for both versions are in the drawing section.
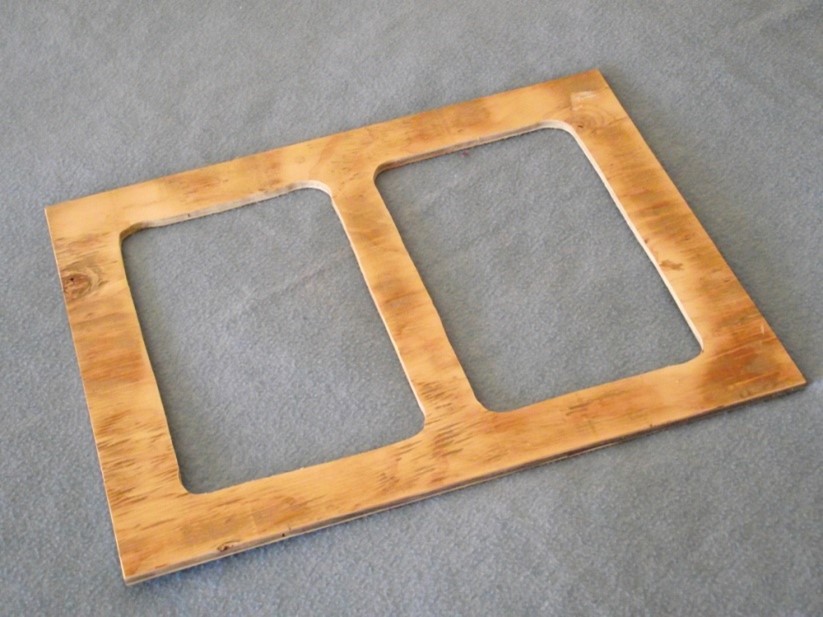
Step 1
Cut the base (part 1) and smooth the edges, top and bottom. Smoothing the wood will allow the doors to swing easier.
Step 2
Staple the window screen or hardware cloth on the top and the bottom of the base.
Step 2a
For the single hole version, the screen just covers the hole with enough extra to staple it to the base.
Then glue and staple or nail the lath (part 5) over the screen edges.
Step 2b
For the double hole version, the screen should cover the entire base.
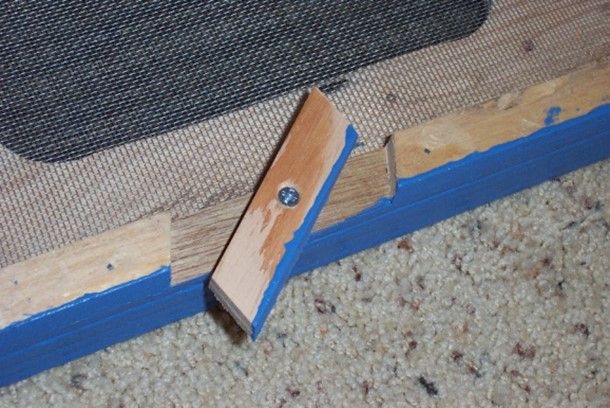
Step 3
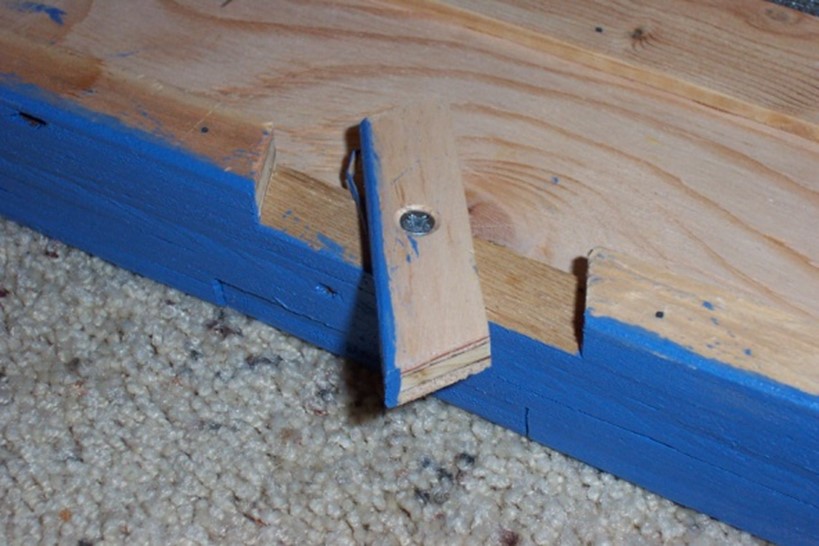
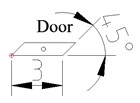
Cut eight doors (part 4) from plywood. Cut the doors with a 45-degree angle on each end. See the drawing for the angle alignment. Drill a small hole in the center of each door. Counter sink the top of each hole so the head of the attaching screw (pivot) will not catch on the hive body.
Note: Plywood is used for the doors because of the tendency of regular wood to split when the screw is inserted.
Step 4
Cut the edge pieces to position the doors.
The location of this cut is dependent on where you want the door to be positioned. Two inches works for an off-center door.
About two inches from the end of each of the edge pieces (parts 2 and 3), cut a 45-degree angle. Save the matching edge pieces as pairs.
You will eventually insert the door between these pieces. Please reference the drawing for any questions about the intended outcome of this step.
Step 5
On the top of the base, start with one corner and add the shortest of the pair of edgings cut in the previous step. Glue and tack this in place. Now, use one of the doors and place it next to the piece you just finished adding. Screw this in place. Finish the side by adding the remaining edging from the pair that you started with.
Work your way around the base while adding a short piece, then a door, then a long piece. When you finish you will have the tails of the long pieces sticking out. Cut these tails off.
Note: The last piece added will have to be individually fitted.
Step 6
Turn the double screen board over and perform Step 5 on the bottom of the board.
Important
When starting the bottom, be sure that the doors are not, and I repeat, are NOT positioned directly below the door on the top. By offsetting the doors, you can use longer screws as door pivots.
Step 7
Paint the double screen boards a unique color. This will allow you to identify them from a distance.
Usage
Depending on its use, the doors can be opened or closed as needed.
In addition to the swarm control usage envisioned by L.E. Snellgrove, the following uses have been found for his board:
- Making splits in which the new hive is piggybacked on top of the parent.
- Wintering a weaker hive over a stronger hive.
- Queen raising – cell builder.
- Help keep a smaller colony warm until it gets started.
- The double screened board can be used as a top when you are transporting a hive in hot weather. All you need to do is close all the doors and be sure it is strapped down tight.
Reference
For a YouTube example, watch this video: https://www.youtube.com/watch?v=MaRIJJ14jD4&t=21s&ab_channel=msbrunell
Recommended Design
Between the two designs, I prefer the one-hole design with the doors shifted a little off center. The doors are shifted enough to allow the top and bottom doors on the same side to function without longer pivoting screws interfering with each other.
Get a copy of Ed Simon’s book Bee Equipment Essentials with detailed drawings, construction hints and how-to-use instructions for dozens of beekeeping tools and equipment from www.wicwas.com. Ed can be contacted through SimonEdwin41@gmail.com.
Drawings
Double Screen Board (Snellgrove)
1Originally published in Bee Equipment Essentials – Wicwas Press 2011