New(ish) Beekeeper Column
Off the Wahl Beekeeping
Raising Queens
By: Richard Wahl
An admirable goal for the new beekeeper is to become self-sustaining. Learning the intricacies of one’s micro-environment and how to get a hive to survive through our variable northern Winters can be a challenging task. Once the hive survives the Winter, there are a new set of conditions to consider. One of those considerations is how to minimize the probability of swarming. In last month’s article, I covered the causes of swarming which led to the conclusion that one of the best ways that has been found to minimize the natural instinct to swarm is to create an artificial swarm by doing a split. Once the split has been completed, as described in a previous month’s article (just prior to the one on swarms), it is time to introduce a queen to the queenless split off starter hive or nucleus hive (nuc). If the beekeeper does not wish to wait for the time it takes the split to make a new queen on their own, where does the beekeeper get an additional new queen? The logical choice would seem to be to purchase another queen from a commercial source. But if that queen is from out of state or from a considerably distant location it is almost like starting over again. The purchased queen from a far off place will be laying eggs that become brood that need to once again acclimate to your own micro-climate. Producing a queen that comes from your own stock is often a much better option. She will be the product of a hive and its workers that have previously acclimated to your own environment and climate conditions. She will have a better chance at producing future workers whose genetics have also adjusted, allowing for a potentially greater degree of success to survive the coming variable Winter.
Hives develop new queens for three basic reasons. One is if there is an emergency where the previous queen was damaged or removed by the beekeeper. A second is when the hive senses the queen is ailing or running low on sperm to fertilize eggs – called a supersedure. A third is the impulse to swarm where the existing queen often leaves with around 50% of the bees in the hive to establish a new colony, leaving the remaining bees to produce a new queen. The beekeeper can use this third instinct to their advantage by creating an artificial swarm with a split and adding a queen from one’s own stock. I have found that raising a few queens from my own bees is not that hard of a task if a few basic techniques are followed. There are two methods of raising queens as explained as follows.
Preparing a Starter Nuc
Several years ago I decided that if at all possible, I would not be buying any more packages of bees. Although I have bought several packages over my first ten year span of beekeeping, they were mostly to expand my stock or try a new race of bees, and of course, to replace some overwintered deadouts as I was learning better wintering techniques. The commonly accepted theory in our area for starting a new hive, be it package, nuc or swarm, is to get it off to a good start by the Fourth of July. I have successfully gotten August swarms or nucs through the following Winter, but it is a bit more iffy.
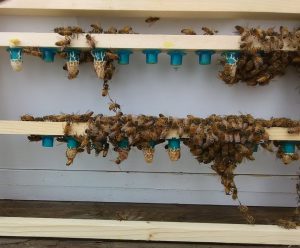
The first step in queen grafting is the preparation of the queen starter nuc. I built a super sided with screen to place under the five frame closed starter nuc for air circulation in the warmer June weather and placed a wet sponge in a shallow water dish at the bottom for a water supply. I suspect this could be done earlier in the year with a closed sided empty nuc super in cooler weather set below the five frame nuc. Either way, the bees in this nuc are closed off and given no exit overnight and discover they have no queen. The next day, when queen cups with larva are inserted they will be ready to make queen cells. How to get queen cups containing larva will be explained later. The queen starter nuc has a frame with honey, at least two frames of capped brood from a donator hive, a frame that is mostly empty or drawn comb that has some pollen (if not on the brood frames) and of course, the empty queen cup frame.
Place the pollen side of a frame next to the brood frame as the nurse bees need the pollen to feed and raise new queen larva. The two frames with capped brood include the bees from the parent hive, as well as two additional frames of bees shook into the starter nuc that were near the donated brood frames. Brood frame bees have not been out of the parent hive yet, so most all of them will stay in the nuc when opened after queen cup insertion. The excess of nurse bees on the brood frames will be eager to make new queen cells in order to get a new queen. If reusing plastic queen cups, it is advised to rinse them thoroughly in hot water (boiling will melt the plastic) to rid the queen cup of previous queen pheromone for better acceptance. If a drop of honey is placed in each queen cup the bees are more likely to better polish the cup overnight in preparation for the larva that is to be inserted the next day.
Grafting Larvae into Queen Cups
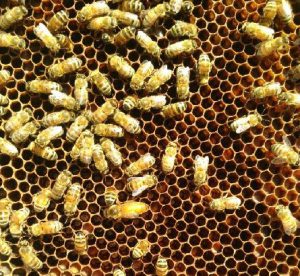
Harvesting the smallest larvae to place into queen cups is not difficult. The smallest larvae are just newly hatched eggs, usually right next to comb cells with unhatched eggs. Eggs standing in a vertical position are about one day old. Those that are lying on their side are two to three days old. Choose the smallest larvae in cells next to the eggs lying prone. The smallest larvae will be smaller than an egg in the cell next to it and using a magnifier with a head lamp may make it easier to see. I fumbled my first few larvae collection tries years ago, but still managed to get ten queens out of a twenty cup attempt on my first try without magnifier use.
I use what is called a Chinese grafting tool, placing the smallest larvae possible into base mounted queen cell cups. Older larvae may not make the best queen as at three days when the egg hatches (ecloses), the bees have decided whether it is to be a worker cell or queen cell. The correct technical term for hatching is “eclosing” meaning in reality the egg casing simply dissolves away and no egg shells are found in the larvae cell. Older larvae may have had a day or so being fed bee bread, which is a mixture of pollen and honey secreted by nurse bees. Queen cells will receive or be returned to being only fed royal jelly.
It took all of fifteen minutes to move twenty larvae to queen cups after the initial starter nuc set up. Carefully slip the tip of the tool which flexes under a larva, and gently lift it out. It is important not to roll the larvae as their breathing orifice is only on one side at this stage and if rolled in the royal jelly, they could suffocate. Place the tip of the grafting tool with the larva in the bottom middle of the queen cup and push the plunger which deposits the larva with a bit of royal jelly into the queen cup. I work with a warm damp towel to cover the queen cup holder while placing the remaining larva into queen cups. It is important not to let the queen cups dry out, if working in hot weather and not to let them get too cold, if working in cooler weather. If there is no separate warmed room nearby, working in the warmed cab of a pickup truck works equally as well.
It takes sixteen days for a queen to emerge from a laid egg, so it is important to keep a close eye on the calendar. Using this method, the age of the harvested larva should be around the four days old stage (after the egg was laid) but it is best to err on the low side of the progression from egg to larva to pupa (capped cell). I take a quick look at the queen cup frame on day four or five after grafting to see how many queen cups are started with the assumption that the bees chose viable larva to raise new queens. It is important not to disturb the queen cells between days seven through ten after cup insertion (eleven to thirteen days after the egg is laid) as these are critical days in queen development. Since larva next to eggs could be anywhere from three to six days old, I check for mature capped queen cells on day thirteen. At this time, any nucs or receiving hives need to be ready to receive a queen cell removed from the starter nuc. Queen cups with cells can be carefully taken from the frame and inserted into new nucs or queenless hives. I like to cage the queen cells if going into a queenless hive to see that when she emerges she will be accepted. I have also caged several queens in a single hive and they will be taken care of by nurse bees, provided they do not come in contact with each other. If multiple queens are freed in the nuc or hive, the first out will normally kill the others. Common practice is to put two queen cells in a hive/nuc and the first out wins.
It can take up to two weeks (weather dependent) for the virgin queen to go out on mating flights before one finds any eggs from the new queen. Once the queen is laying eggs the nuc or hive can be expanded with additional frames and/or deeps and the new hive should continue to increase in size. An early Summer start may even yield some extra honey for the beekeeper in the Fall. Later Summer starts may need to overwinter before honey can be taken the following Summer. If nucs were begun during the past Summer and overwintered, they are great assets the beekeeper can sell or use to increase the hive count the following year.
It is up to the beekeeper to decide from which hive to select larva for production of queens. Some selection criteria to consider may include the ability of the parent hive to overwinter and how disease free that parent hive has been. Temperament of the hive or amount of honey production may be points for consideration. To some degree, mite counts and extra sugar feeding consumption may play into the best hive to choose larva for queen development. The beekeeper should choose the hive from which they take brood and larva for queen development that best suits the beekeeper’s desired traits for the new nuc/hive. This assumes the donating hive is strong enough to support being split. The best success with grafting the best queens is when there is a nectar flow occurring. An artificial flow can be made by feeding the starter nuc one to one sugar syrup and adding a pollen patty to help produce the best queens possible.

Nucs come in wood or cardboard containers and the bearding was due to a need for better top ventilation which was solved by moving the bees to a ten frame deep with an inner cover.
Queens for Walk Away Splits
If time and/or quantity of queens is not a factor then getting a few more queens by doing a walk-away split may be a better and even easier method in queen production. After equally splitting the brood, nectar/honey and pollen frames from the single or double supers, let the separated new hives develop. It does not matter which hive is queenless, as long as eggs are present in both hives, since the queenless hive should produce a new queen. The beekeeper can assist the process by scratching the bottom quarter of several smallest larvae cells away along with the three or four cells below it to give the bees room to make a new queen cell. If by chance the bees make queen cells on more than one frame, the second queen cell frame can be moved to a second starter nuc and brood, honey and pollen frames added to it from another strong hive. This can result in a three way split from one strong hive.
A split can consist of as little as three frames; one brood frame along with a frame with pollen and another with nectar/honey for a food source. A year ago, I successfully got six of seven hives through the Winter months and felt they were all strong enough to be split. For three of them, I found the overwintered queen, marked her and moved the queen along with brood frames to a five frame nuc. These three nucs were ready for sale at the beginning of May. The parent hives each developed a new queen and even produced a honey super or two for my taking later in early Fall. The other three hives that were split provided brood and eggs for the nuc with the queens left in the parent hive. I waited until the nucs produced new queens, mated and began laying eggs before considering them ready to sell. I did have to add a new frame or two of brood from the parent hive as brood frames in the queen developing nucs had mostly emerged. I could have waited until the nuc with the new queen was fully laying and workers capping brood, but that would have delayed their potential sale for several more weeks. A purchaser of a five frame nuc would normally expect to get three frames mostly covered in capped brood with the laying queen along with a frame largely covered with pollen and the fifth frame with nectar and/or honey stores as a food source. The best queen production will occur during a nectar flow which the beekeeper can create artificially by feeding. The year in which I split all six hives in one fashion or another is the first year in which I did not capture a swarm near my beeyard. It has now been five years since I purchased a package or nuc of bees having relied on my own queen rearing and reproduction techniques. I am happy with my own stock and my hive’s honey production has surpassed that of the packages or nucs that I have purchased in the past. If you have not tried raising queens from your own stock, give it a try as it presents a whole new aspect of the beekeeping experience. Your results may vary based on your environmental conditions, experience or the state of your hives.

